I recently purchased a Miami Valley Products O Gauge Kit 36 W-D double track. Seller didn't tell me he didn't have the instructions. Would anyone have a set they could share? Thank you!
I found the instructions. They are full model size (1:48) on a sheet about 40 inches by 24 inches - rather large to reproduce. The drawings were made in 1991. It is essential to have a flat work surface to build the trusses and connect them.
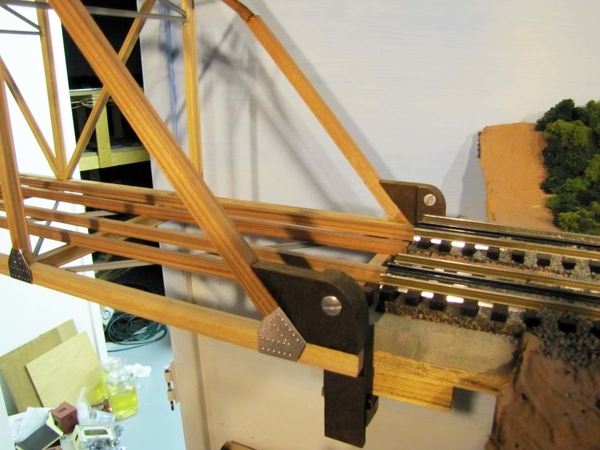
I assembled the two side trusses first - by building on top of the full size plans taped down to the table. I then cut the main cross-beams into identical 9-inch lengths with track spacing 4-1/8 inches between the two track center lines. (Note: The plans show the trusses 7 inches apart - total bridge width 7-3/4 inches. I made them 9 inches apart - total bridge width 9-3/4 inches.) Next, I set up the two completed trusses parallel each other (9 inches apart) and perpendicular to the flat surface on which I was working - as they would be installed on the bridge. I then inserted four cross-beams between the upper and lower ends of the trusses and glued them between the trusses - everything was quickly checked for alignment and squareness before the yellow carpenter's glue dried (about 2 hours). I also used masking tape to help hold the assembly together and in alignment while the glue dried. At that point, the two trusses formed a rigid (but fragile) structure and I inserted/glued the remaining cross-beams into position. I then installed all the diagonal braces in the floor and "ceiling" between the trusses. After all the beams were in place, I installed the aluminum "truss plates" at the beam intersections using epoxy. They increase the structural stiffness significantly. Lots of cutting at angles required. The angles are determined from the full size drawings. No numerical values of the angles are shown on the drawings. The angles are set by building the trusses right over the plans.
I think it will be difficult to assemble the structure without the full size plans. But it can be done. The plans also show the cross-section dimensions of the various beams - which you need to know to determine which piece of wood to use for each beam. I suggest that you send me an email (in my profile) with your name and phone number so that I can call you to discuss.
MELGAR


