Hi @AlanRail,

This is really impressive work you are doing. I just recently got hooked on the Big Boy Tour Trains and when looking closely at the cars in a typical train there are 5 "baggage" modified cars, usually one if not two with some form of POWER for electricity to the passenger cars or to the engine itself in backup. Youi would think Lionel would have attempted cars like that for tjhosd of us wanting models closer to prototypical form Big Boy consists.

Great work - looking forward to seeing your progress.

Does it take a huge learning curve to do this printing? Wow though what you can do with that skill.

- Ken Gillig

Ken

With Chinese and other 3D resin printers being realatively cheap, these printers are more affordable now than ever.  There are FREE 3D modeling software programs available, so that's not an expense, too.

There are on-line tutorials to use these programs and printers most of which are free.

Most of my designs use 2D models made off of photos then extruded into the 3rd dimension to form a 3D model.

For example, Gunrunner John, OGR's resident electronics expert told me, not too long ago, that designing and making 3D models was "way-out-of-his wheelhouse. He bought a 3D printer, got into some 3D modeling software and look at the 3D jeeps and other things he is now making!!

He is not the only one here.

Join us!

My wait is almost over! The 3D printed Hump from Alan  is in the mail as I type this. I'm hoping it'll be here by the weekend.  I'm so excited.
I'm still waiting on my Railsounds card to return from Lionel. Seems the card was never "flashed" with the sound file.
I returned from York with a whole bunch of Fastrack for the layout, and also the 2327270 UP Excursion Pack 4 from Brady's Trains.
This Excursion Pack gives me the last 2 cars I need for the Bush Funeral Train. The "City of San Fransisco" Dome car and a car to build the Sleeper car "Portola".
More to follow in the future.

Until next time....

UPP #2066 HUMP Update

I received a very beautiful laser cut and labeled box from Alan containing the pieces/parts of the Hump.
When I first saw this, I was totally surprised, floored even.

DSCN0049

Inside the box was a laser cut insert containing the cutouts for the side vents and fans.
The fans are with the main parts of the hump which is underneath.

DSCN0050

Remove the insert and this is what you see. Well, what you would have seen is the side vents in the body, and the 3 main parts of the body inserted in the insert.

DSCN0051

As I said, I was very impressed with the box! There was NO WAY the USPS would have destroyed the parts without destroying the box.

So moving on. After close examination of all the parts, I couldn't wait to start trimming and cleaning up the hump. I glued the 3 sections together and allowed them to dry before doing any manhandling. I then placed the hump on top of the car to get some sort of perspective of what I had.  I'm totally liking what Alan has pulled off. This is going to be sooooo cool when it's finished.

DSCN0054
DSCN0053

This afternoon I sanded the ends to get a better fit to the roof. I still have some forming and fitting to do. But with any first time project, there's a huge learning curve that goes into this. I will be detailing the build of the HUMP so others will have the opportunity to see how I put this car together, if Alan is so inclined to put this out for others.

DSCN0055DSCN0057


I'd like to say...Alan and I have sent LOTS of emails back and forth and it's still a work in progress. Alan has been very accommodating to my OCD. This is going to be a one off, at least for me and I'd like it to be as Prototypical as possible.
Alan does awesome 3D work as many of you folks know. I am completely and totally impressed with this "Hump". It was well worth the wait!

I just can't say this enough, Thank You Alan!

Until next time...Stay tuned, More to follow throughout the winter.

Attachments

Images (7)
  • DSCN0049
  • DSCN0050
  • DSCN0051
  • DSCN0053
  • DSCN0054
  • DSCN0055
  • DSCN0057

Please do not ask to purchase here in this thread. It is against OGRR Rules.

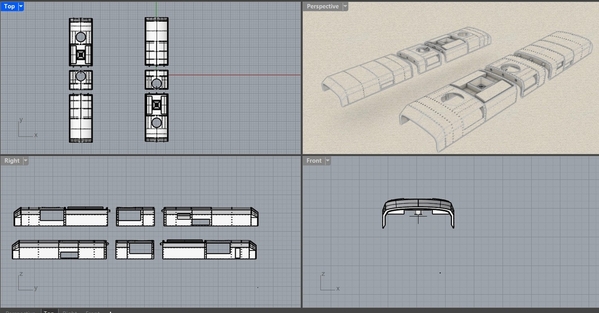
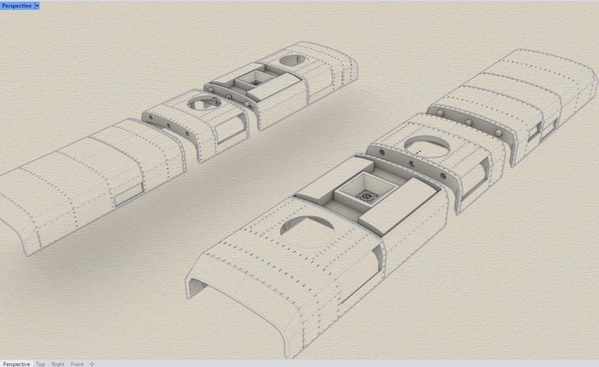
So after several revisions and many more rivet details per Chris, the model was printed and will be shipped to Chris (Jayhawk500). The model as Chris has said will have two rotating fans and a smoke unit.

The hump has 3 main sections, 4 large in-take vents, 4 more smaller vents and two sets of grill and fan blades. And plenty of scaled and positioned rivets!!  Thanks to Chris.

The fan blades have a D-shaped notched shafts to fit the small electric motor shafts.

hump v9

After about 9 hours of printing; here are the three main section printed pieces in the 2nd post-processing wash.

post

Attachments

Images (2)
  • hump v9
  • post

Am I aloud to say, "Hot D*** Skippy!" Where's Snoopy doing his happy dance!
Alan has done an awesome job on this 3D print. I can't wait for it to show up! Just so everyone knows, this isn't going to be a rush job to get it finished. I'll be taking my time assembling this car. If you noticed, The areas under a couple of the vents is a bit warped. This is a VERY thin area and VERY delicate. It's hard to maneuver the hump around with out breaking those strips. I broke the prototype ones without even knowing it.

I will be posting  the build on this thread, so Stay Tuned "O" Gaugers.

Last edited by Jayhawk500

Add Reply

Post

OGR Publishing, Inc., 1310 Eastside Centre Ct, Ste 6, Mountain Home, AR 72653
800-980-OGRR (6477)
CONTACT US
www.ogaugerr.com

×
×
×
×
Link copied to your clipboard.
×
×