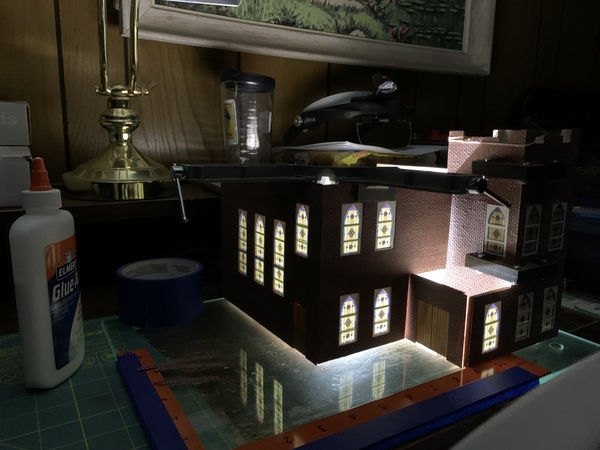
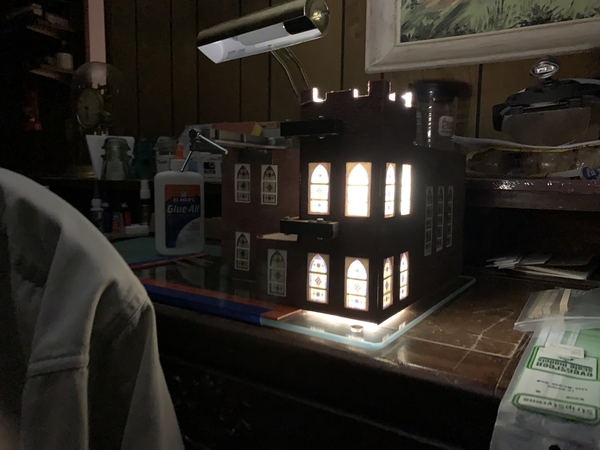
@Mark Boyce posted:

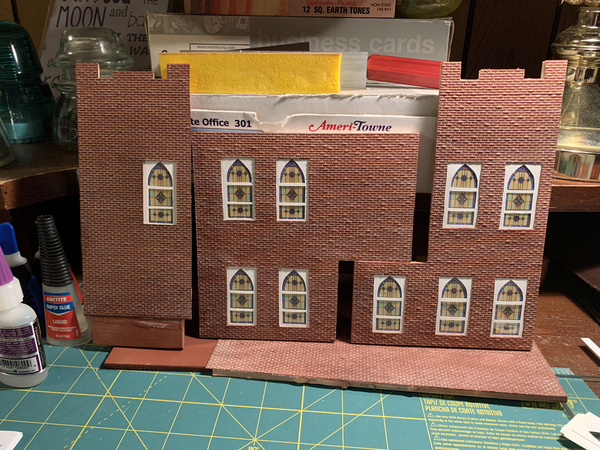
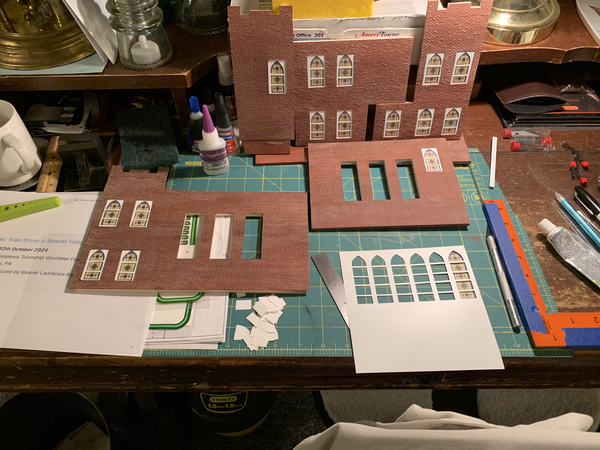
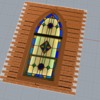
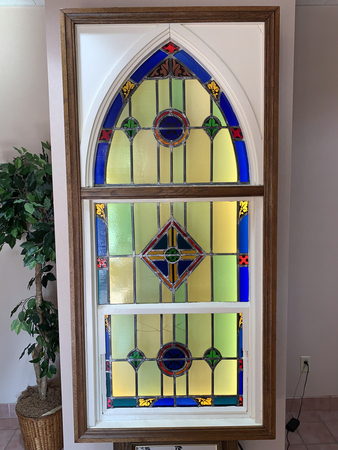
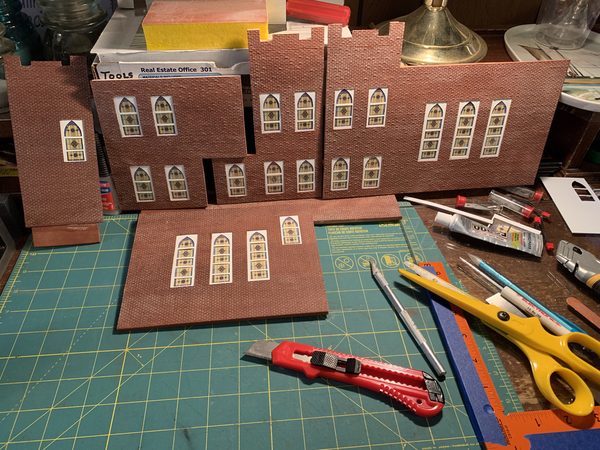
I finished more church windows.  They are going faster now.  I have enough of the white sections cut for the other 5 small windows.  There are 6 large windows and 2 doors to do.  You can really see the texture of the Plastruct brick material @chris a suggested.  I like it.

20241007_031141460_iOS

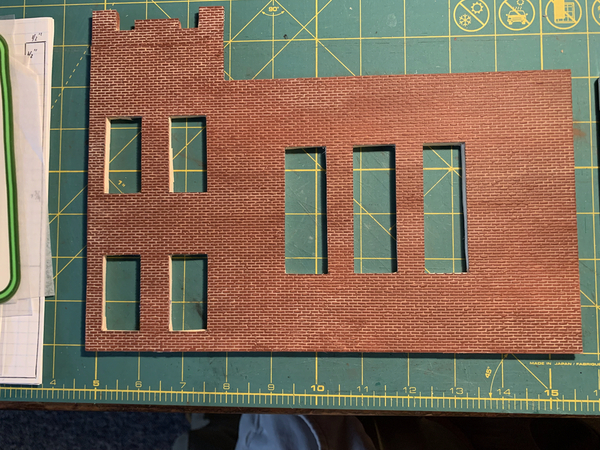
The texture is there, but doesn't show up for the camera laying flat on the workbench.

20241007_145236280_iOS

Most excellent!

Peter

@Mark Boyce posted:

I finished more church windows.  They are going faster now.  I have enough of the white sections cut for the other 5 small windows.  There are 6 large windows and 2 doors to do.  You can really see the texture of the Plastruct brick material @chris a suggested.  I like it.

20241007_031141460_iOS

The texture is there, but doesn't show up for the camera laying flat on the workbench.

Impressive project Mark!!   Looking GREAT!  

Cheers, Dave

Thank you, Tom, Peter, Dave!

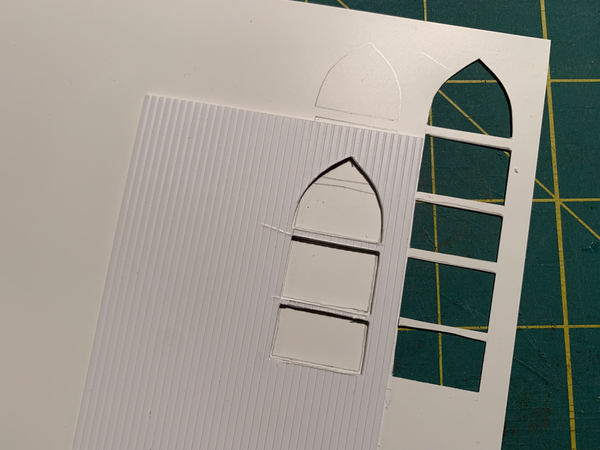
I cut the 6 tall window frames just now.  I cut the top off a window and taped it to the bottom of another to form a tall window.  Then I checked that against my window openings, and it fit!  Then I used my original template to mark some more  .005" styrene.  I just slid the templated down to match how I did the taped window sections and marked that. 

20241008_232244582_iOS

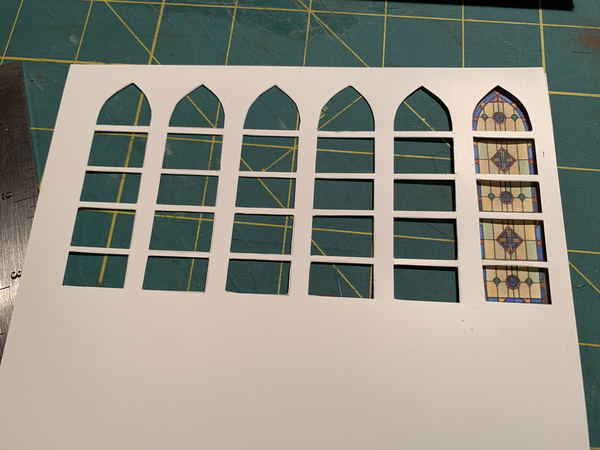
Once I cut out the first one, I tested it against the 'stained glass' window.  Since that checked out, I marked the rest, and cut them in line with the first one. 

20241008_233633881_iOS


20241008_234901365_iOS

I'm ready to put them together on the wall sections.

20241008_235327672_iOS

Attachments

Images (4)
  • 20241008_232244582_iOS
  • 20241008_233633881_iOS
  • 20241008_234901365_iOS
  • 20241008_235327672_iOS

This project is really a plan as I go trek.  I have just been deciding how I am going to do the next phase as I come to it, or close to it.  So far, I have gotten away with it. 

I finished all 21 windows.  I kept the same sandwich of 1. paper 'stained glass', 2. clear plastic, 3. white frame all between the lauan and Plastruct brick, but have switched methods of attaching as I went.  At first, I laid each layer down and glued it to the next until done.  For the last 3 tall windows, I taped the paper, clear, white together; then glued that between the lauan and brick.  I did variations in between.  All methods left a very slight bump out on the brick because the rest of the wall away from the windows was glued directly to the lauan.  I know it's there, but I don't know that anyone else would notice, so I'm satisfied.  The windows do get gray sills.  I am thinking I will leave them off until the walls are all glued together, so they don't get in the way of clamping and get broken off.
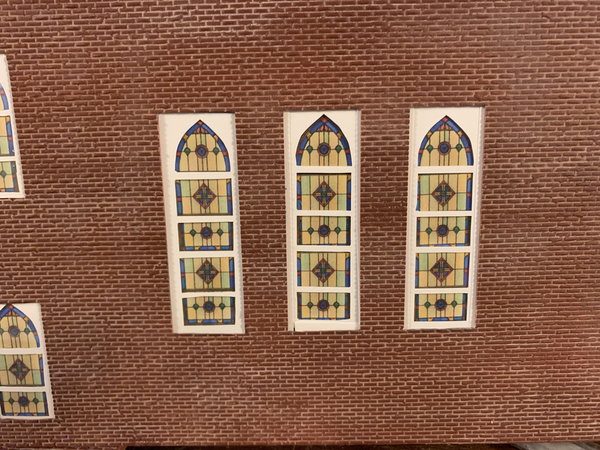
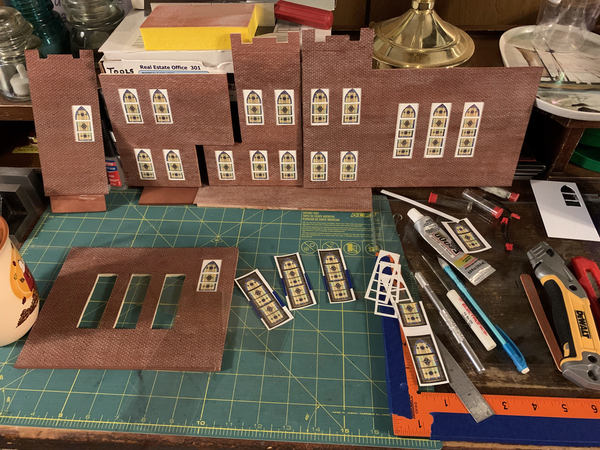
20241013_125618460_iOS

20241013_125546409_iOS

20241013_194423935_iOS

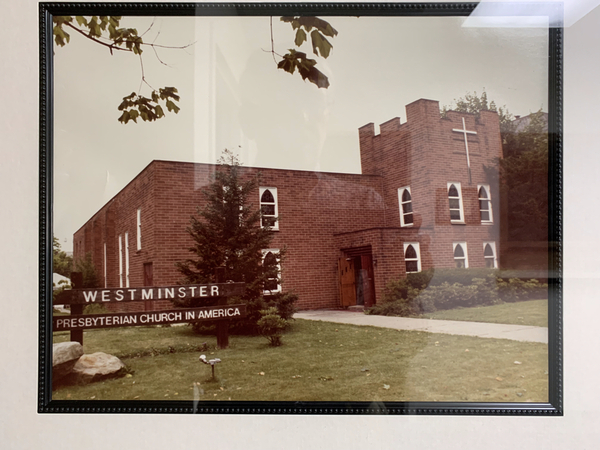
On to the doors.  The photograph of the prototype shows the doors to be dark stained wood.  I sliced the brick siding away from where doors would go, then I pried the top layer of lauan away to give enough recess for the doors to be glued directly to the remaining lauan.  That should be sturdy.

20241013_213136567_iOS

The doors appeared to be dark vertical boards.  The front double doors had 3 narrow windows on each.  I'm not even going to attempt that, so all the doors will be the same.  This siding measures to be 6" wide 'boards'. Here they are with some maple stain.  The prototype looked darker, but the only stain I had on hand that was darker was mahogany.  A test showed to be darker than what I want.  I can darken these a bit later, but this photograph shows how that worked out.

20241013_232754887_iOS

I cut out a base from lauan when I was cutting the walls, so next up is to start standing up adjacent walls and reinforcing corners.  Then it should start to look like something.

Thank you for looking.

Attachments

Images (5)
  • 20241013_125618460_iOS
  • 20241013_125546409_iOS
  • 20241013_194423935_iOS
  • 20241013_213136567_iOS
  • 20241013_232754887_iOS
Last edited by Mark Boyce
@Mark Boyce posted:

This project is really a plan as I go trek.  I have just been deciding how I am going to do the next phase as I come to it, or close to it.  So far, I have gotten away with it. 

I finished all 21 windows.  I kept the same sandwich of 1. paper 'stained glass', 2. clear plastic, 3. white frame all between the lauan and Plastruct brick, but have switched methods of attaching as I went.  At first, I laid each layer down and glued it to the next until done.  For the last 3 tall windows, I taped the paper, clear, white together; then glued that between the lauan and brick.  I did variations in between.  All methods left a very slight bump out on the brick because the rest of the wall away from the windows was glued directly to the lauan.  I know it's there, but I don't know that anyone else would notice, so I'm satisfied.  The windows do get gray sills.  I am thinking I will leave them off until the walls are all glued together, so they don't get in the way of clamping and get broken off.



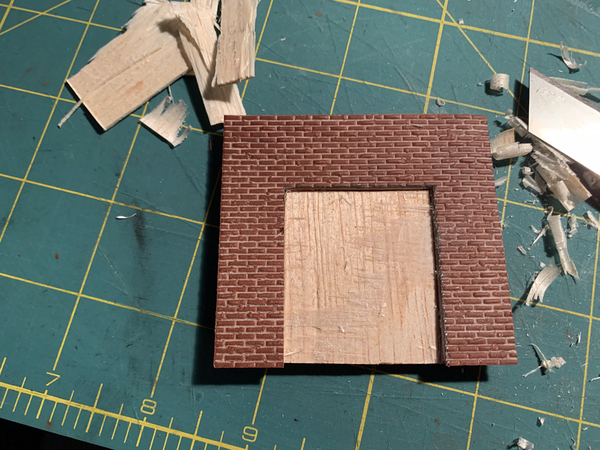
On to the doors.  The photograph of the prototype shows the doors to be dark stained wood.  I sliced the brick siding away from where doors would go, then I pried the top layer of lauan away to give enough recess for the doors to be glued directly to the remaining lauan.  That should be sturdy.

The doors appeared to be dark vertical boards.  The front double doors had 3 narrow windows on each.  I'm not even going to attempt that, so all the doors will be the same.  This siding measures to be 6" wide 'boards'. Here they are with some maple stain.  The prototype looked darker, but my only stain I had on hand that was darker was mahogany, which a test showed to be darker for what I want.  I can darken these a bit later, but this photograph shows how that worked out.

20241013_232754887_iOS

I cut out a base from lauan when I was cutting the walls, so next up is to start standing up adjacent walls and reinforcing corners.  Then it should start to look like something.

Thank you for looking.

Mark, your work looks phenomenal. It really looks like the stained glass is real & the way you sandwiched it gives a great 3-dimensional look. I look forward to seeing it finished but I know your a perfectionist so no hurry.  I'm sure when the church is completed it will be truly awesome.

Last edited by Dave Ripp.
@Mark Boyce posted:

This project is really a plan as I go trek.  I have just been deciding how I am going to do the next phase as I come to it, or close to it.  So far, I have gotten away with it. 

I finished all 21 windows.  I kept the same sandwich of 1. paper 'stained glass', 2. clear plastic, 3. white frame all between the lauan and Plastruct brick, but have switched methods of attaching as I went.  At first, I laid each layer down and glued it to the next until done.  For the last 3 tall windows, I taped the paper, clear, white together; then glued that between the lauan and brick.  I did variations in between.  All methods left a very slight bump out on the brick because the rest of the wall away from the windows was glued directly to the lauan.  I know it's there, but I don't know that anyone else would notice, so I'm satisfied.  The windows do get gray sills.  I am thinking I will leave them off until the walls are all glued together, so they don't get in the way of clamping and get broken off.

On to the doors.  The photograph of the prototype shows the doors to be dark stained wood.  I sliced the brick siding away from where doors would go, then I pried the top layer of lauan away to give enough recess for the doors to be glued directly to the remaining lauan.  That should be sturdy.

The doors appeared to be dark vertical boards.  The front double doors had 3 narrow windows on each.  I'm not even going to attempt that, so all the doors will be the same.  This siding measures to be 6" wide 'boards'. Here they are with some maple stain.  The prototype looked darker, but the only stain I had on hand that was darker was mahogany.  A test showed to be darker than what I want.  I can darken these a bit later, but this photograph shows how that worked out.
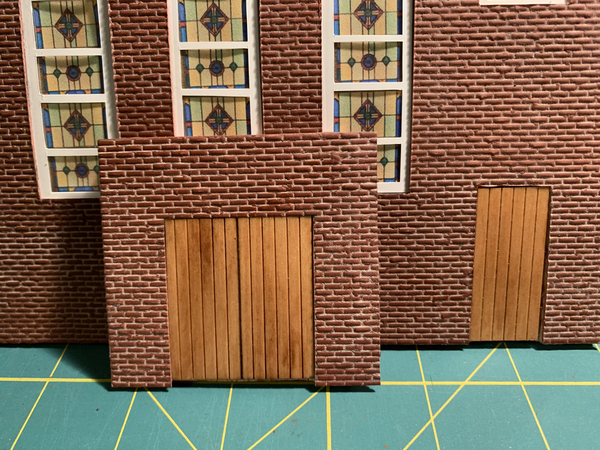
I cut out a base from lauan when I was cutting the walls, so next up is to start standing up adjacent walls and reinforcing corners.  Then it should start to look like something.

Thank you for looking.

Mark, your planning, finesse, and patience is paying off. Keep up the great work!

Gene

Thank you, Dave, Gene, Alan, Mike!!

I am a perfectionist to a point.  Then I say, good enough, because I have years' worth of projects waiting to be started!  The rest of the layout has stagnated on the Sanky Wanky Coffee Co and Westminster Church projects.    Actually, that is a nice place to be. 

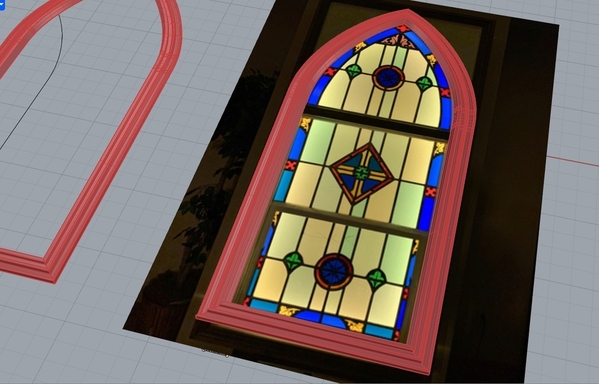
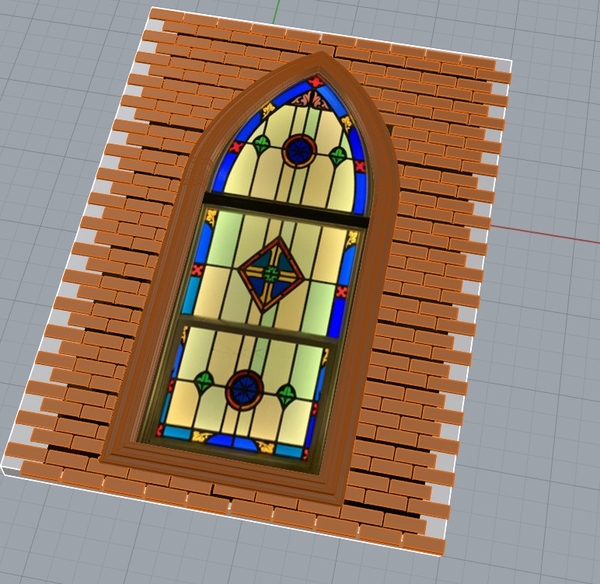
Alan, your drawings look great!  Thank you!  The windows are all actually in rectangular openings in the walls, so no need for bricks to fit in an arch.  That said, I don't know that I want to redo them.  I'm leaning towards leaving everything scratchbuilt and say I did it all myself.  Thank you!!!

20240707_131823862_iOS

20240616_141035513_iOS

Attachments

Images (3)
  • 20240707_131823862_iOS
  • 20240827_235143788_iOS
  • 20240616_141035513_iOS

Alan, thank you!  I totally agree about the less expensive brickwork.  I think it is pretty evident that the building was built as a low-cost protestant brick church.  Others in the area of the same vintage are bricked around arches, have at least one larger stained glass window, and have a standard steeple with bell.  Also, when the need arose to expand, it wasn't conducive to expand this building.  Therefore, a two story fellowship hall/classroom building was built on the left side, then this building was razed.  A larger sanctuary was built in it's place.

Last edited by Mark Boyce

I thought I would take a couple photographs as the church walls are being glued together.  The glue is dry on some, some are being clamped until dry, and some I just leaned into place.  I only had one light handy, so one photo has the light in the main building and one in the “steeple”.  Of course it shows up way too bright, but not bad for a quick check.


IMG_6506

IMG_6508

Attachments

Images (2)
  • IMG_6506
  • IMG_6508
Last edited by Mark Boyce

Thank you, Rubin, Mike!

Rubin, like others who have posted their work on the forum, and those of us who have completed our time in the workforce (me for one) or are veterans in their fields, I try to learn from my mistakes and how to cover up some mistakes.  Certainly trial and error.  Maybe that is the definition of talented.  hmmm...

Mike, yes it does have extra meaning when our models remind us of good times from our past.  This December 7th will be Kim and my 40th anniversary of that snowy day where we were married in this long gone building.  She has seen the project sitting there, but hasn't commented on it being the original Westminster Church.  In fact, when she first saw the mockup, she only commented that it is an interesting building.  If she realizes what it is, she hasn't let on.  I hope to have it finished for our anniversary.  With a month and a half left, I should be able to do it.  Barring another trip to the hospital and recouperation, that is! 

I’ve got one whole area off the beaten path that I have thought about giving a fine dusting of snow to. I model the fall so it wouldn’t look to out of place. With 8” you certainly wouldn’t see much as far a ground cover if any. Other than a bush or hedge. I remember viewing an HO layout that modeled early winter. It was quite convincing with a dreary look about it. No snow. Fallen brown leaves and what looked like just frozen ground.  The trees were armatures with Super Tree material added to the branches. No foliage. A bit of work to make a convincing tree especially as you increase the size to O. I really liked the look and to pull off a fully sceniced layout. It may have been a little more cost effective.

Add Reply

Post
The Track Planning and Layout Design Forum is sponsored by

AN OGR FORUM CHARTER SPONSOR

OGR Publishing, Inc., 1310 Eastside Centre Ct, Ste 6, Mountain Home, AR 72653
800-980-OGRR (6477)
www.ogaugerr.com

×
×
×
×
Link copied to your clipboard.
×
×