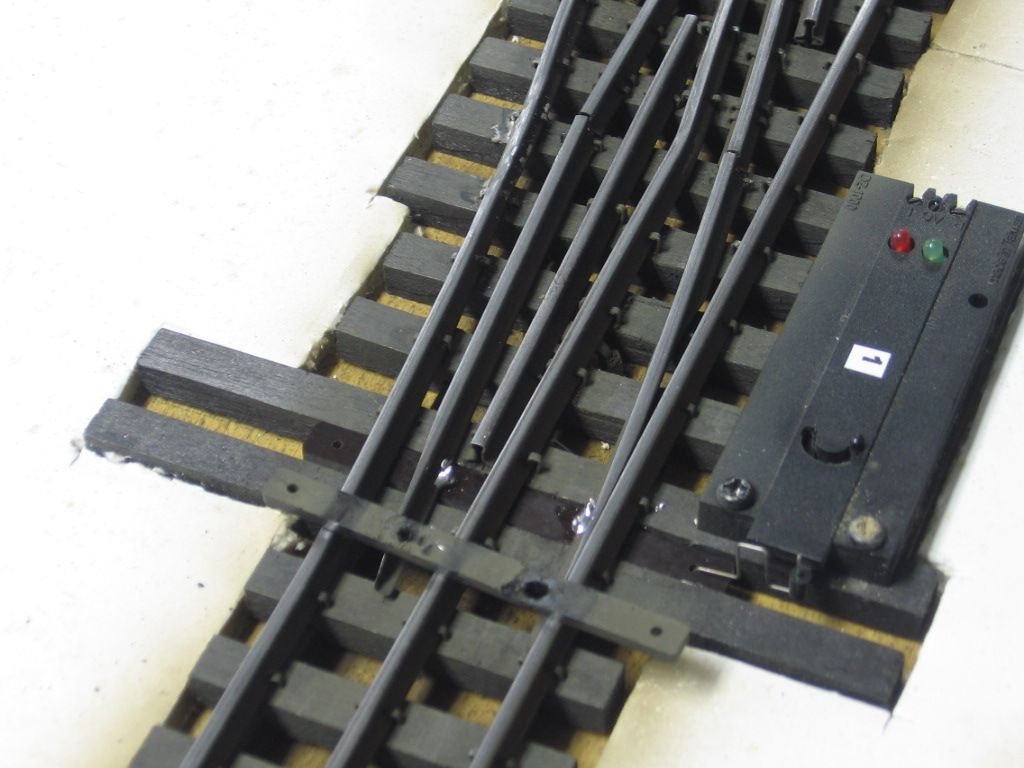
Hi all, I have a ross turnout that one of the rails (the one nearest the switch machine) has disconnected from the plastic drawbar, so that the drawbar hangs low and drags a bit on my tabletop. Thus it doesn't always open fully and train will jump or go straight thru. Any ideas how to fix this? I haven't pulled it from layout yet and am not quite sure how its held on in the first place. Not sure if super gluing would hold up very long. Thanks.
Replies sorted oldest to newest
Super glue doesn't hold plastic to metal. Your best bet is to pull it and return to Ross. HE stands behind his products.
Call Steve at Ross. He’s really good about taking care of his products. More than likely he’ll just send you the parts to fix it.
Don’t glue the rail to the throw bar as it needs to be able to slide. More than likely the pin has come loose in the throw bar. You may be able to glue the pin into the throw bar and get it to hold for a little while, but ultimately fixing it with new parts is the way to go
Yes, call Steve Ross. I had a similar, if not identical, problem and he took care of it promptly. One of the best companies I've ever dealt with.
Hal
I have to agree with everyone above, Call Steve at Ross, they will repair it or replace it at no cost to you.
Ross is an excellent company and will help you out whenever they can. Last York I brought a switch that suffered the same problem you described, Steve took the switch back to his shop repaired it, and sent it back at no charge.
When taking out the turnout isn't that easy. They can be repaired while still on the layout as long as they are in easy reach. If the throw bar is intact. The pin that resides in the hole may have fallen out due to a broken solder joint. Steve should be able to send you some. I've substituted some copper nails that were the correct thickness. They just had to be cut to the proper length.
To begin. Cut the wooden stringer between the ties below the throw bar. This will give you some room to allow you to slip the pin up through in the hole using tweezers or needle nose pliers. Next while holding it in place. You need some basswood strips in various thicknesses. Hold up on the pin and throw bar with a piece of basswood strip under it. Keep stacking strips under it till it will stay at the correct height in line with the rail. You then need to solder the pin to the rail. You should see some existing solder on the closure rail. Again use either strip wood or better yet. Tension the rail with a small spring so it stays snug against the pin. Now you just need to solder the rail to the pin. Remove everything. If it swivels freely back and forth your good to go.
Dave is right. I have repaired several on Will Allens Duckunder layout. The first time takes about 30 min and the rest about 10-15 min. If the throw bar is broken get a replacement and rivets from Ross and use the same method times two. Not hard, just a tad fussy.
George Lasley

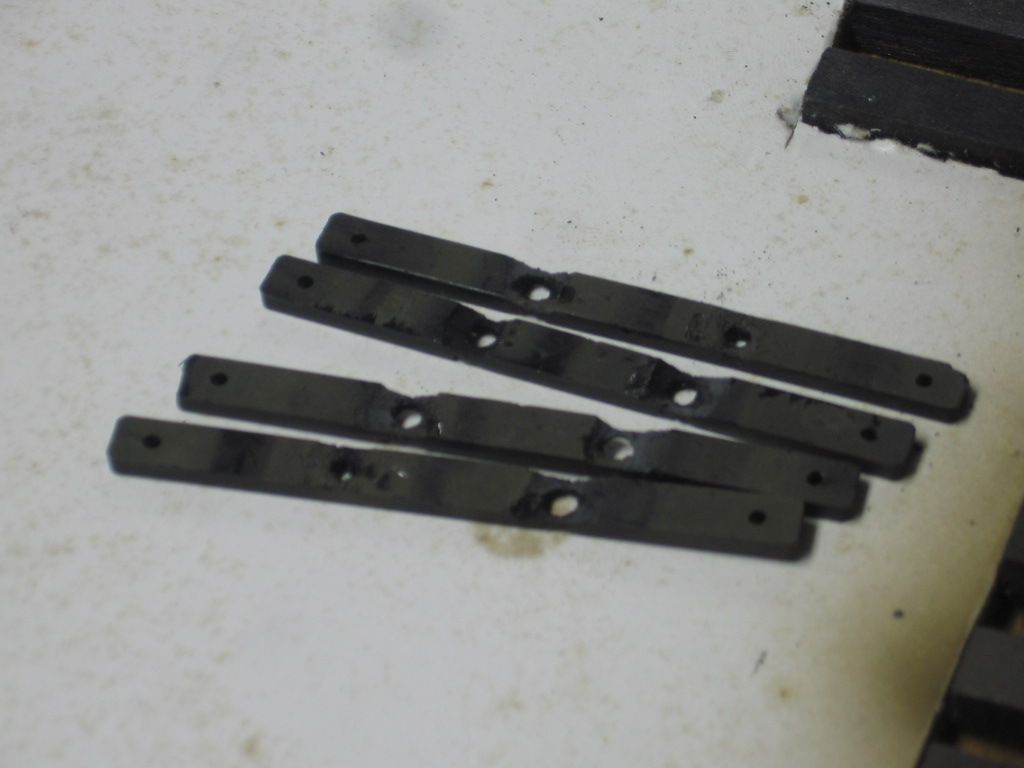
A new throw bar fabricated from a plastic blank electrical plated. Note the solder, where the small pins are connected to the move-able point. Sometimes the solder has to be softened/heated to adjust the points to the side rail.
Worn throw bars. New bars should also have new rivet/pins for installation. Worse case is you would loose a pin, they are small.

Send it back to Steve. Repairs and return shipping are free. Best warranty for the best switches in the industry!
Mike CT posted:
A new throw bar fabricated from a plastic blank electrical plated. Note the solder, where the small pins are connected to the move-able point. Sometimes the solder has to be softened/heated to adjust the points to the side rail.
Worn throw bars. New bars should also have new rivet/pins for installation. Worse case is you would loose a pin, they are small.

Those throw bars are not worn. Per Steve Brenneisen, there was a period of time when Ross used a soldering flux (for soldering the pins to the point rails) that attacked the plastic in the throw bar. In the bars above, the plastic has been dissolved by the flux residue. The throw bar will eventually break at one of the pin locations due to the material being eaten away.
Steve supplies free throw bars and pins if you want to repair the switches yourself. I remove all of the old solder using either a solder sucker tool or a desoldering wick before installing new pins using new solder and new flux.
I've probably done 15 or 20 repairs on several local layouts using the shimming technique described above.


