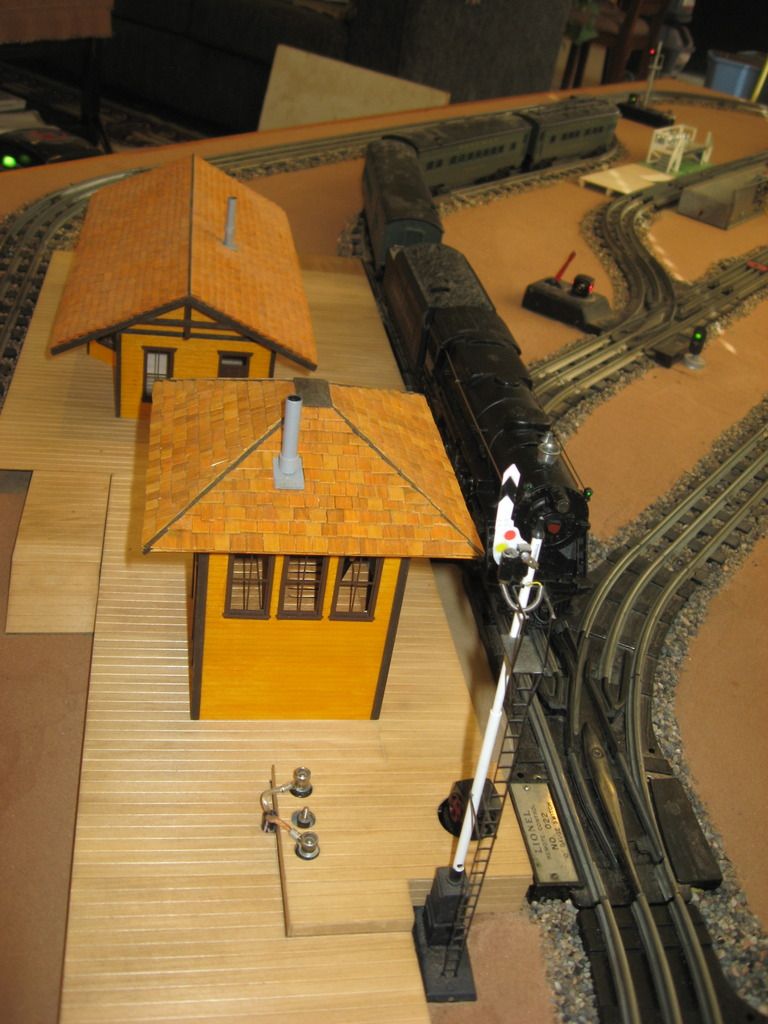
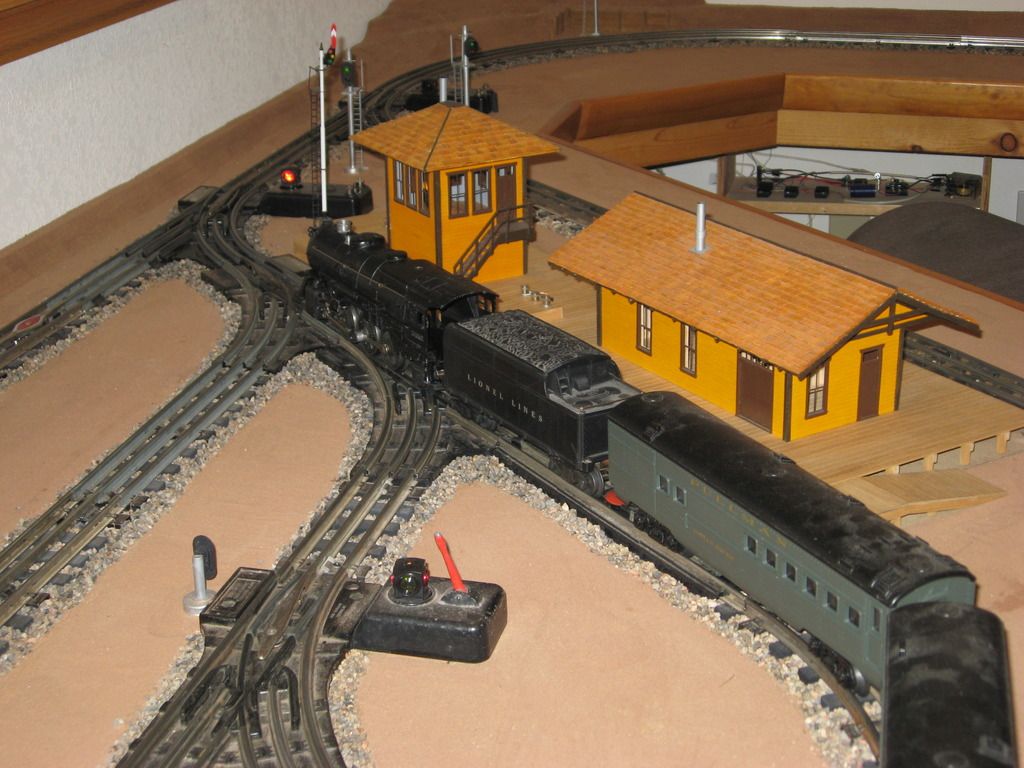
I built a Station and a Switch Tower.   I used Basswood Clapboard Siding and Basswood framing by Midwest Products that I purchased at my local Ben Franklin Craft Store / Hobby Shop.   The windows and doors are from Grandt Line.  The platform is 1/4" grooved Flooring and stained using Minwax wood stain.

Here is the platform,  Station framing,  and the roof
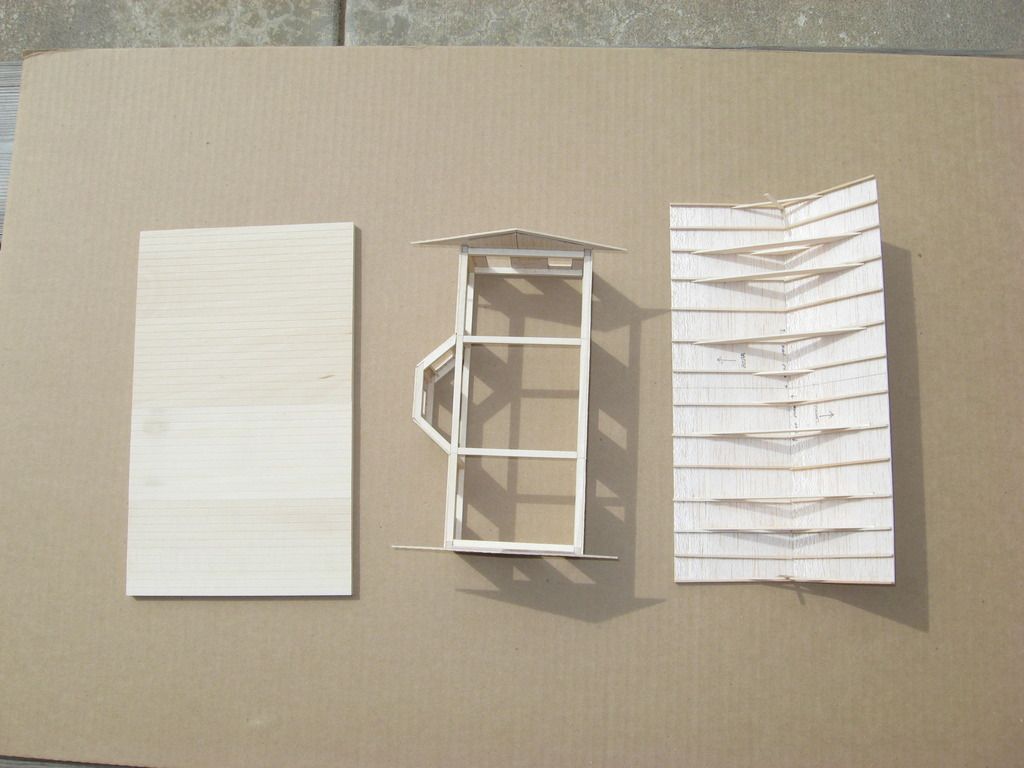
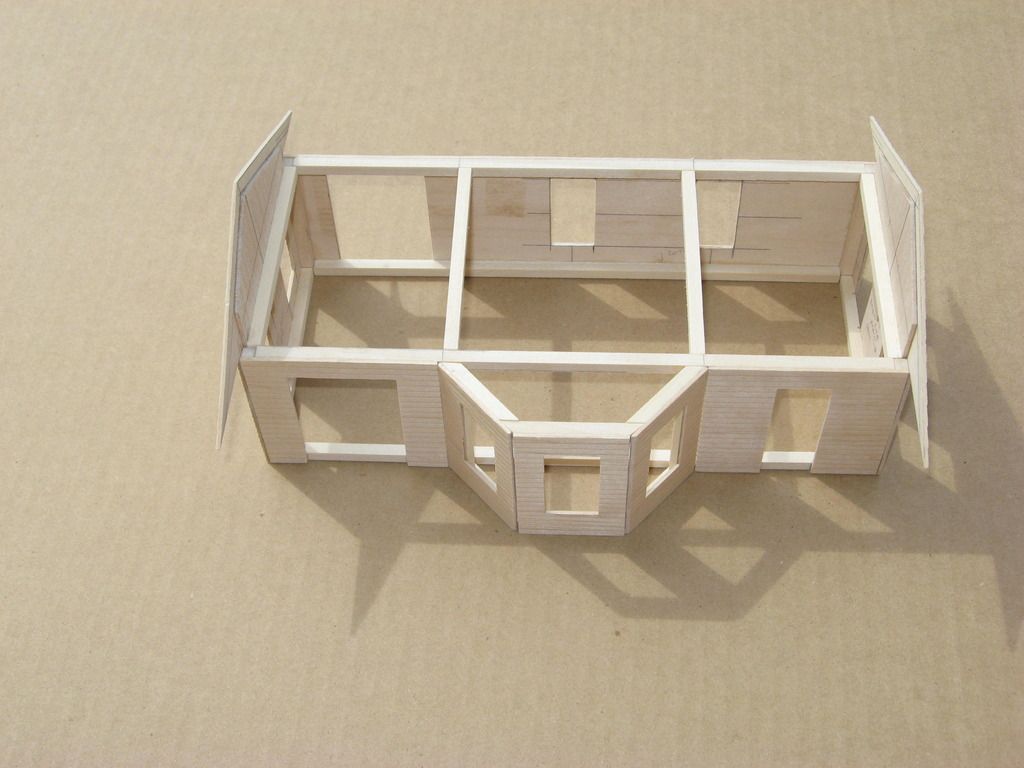
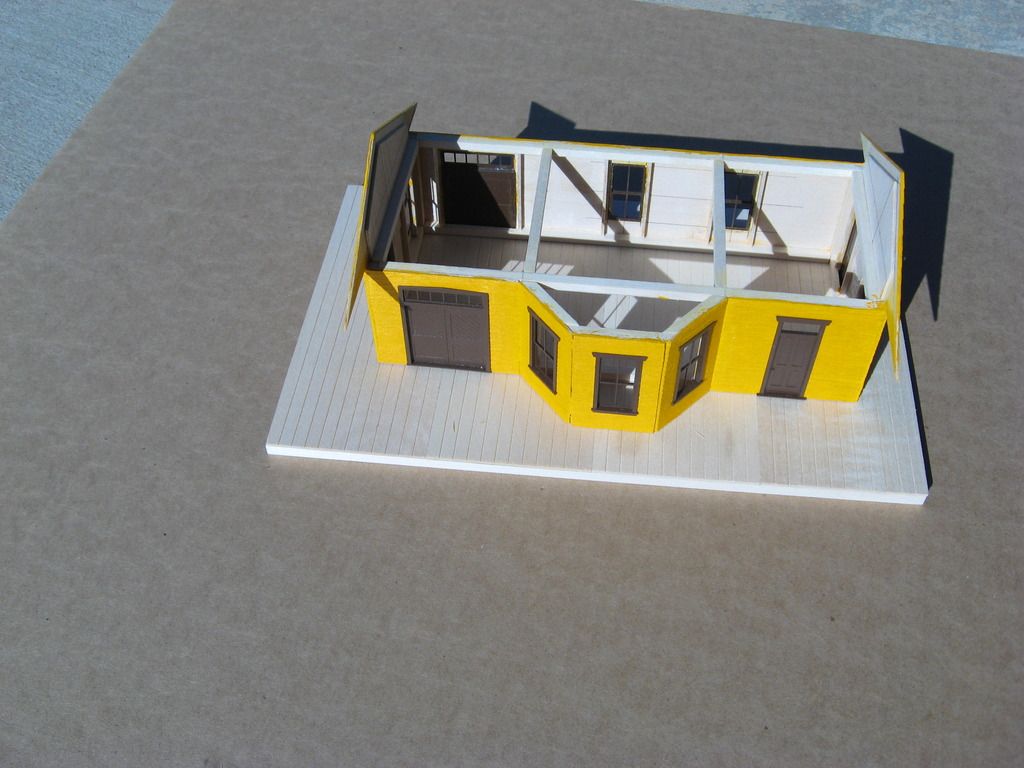
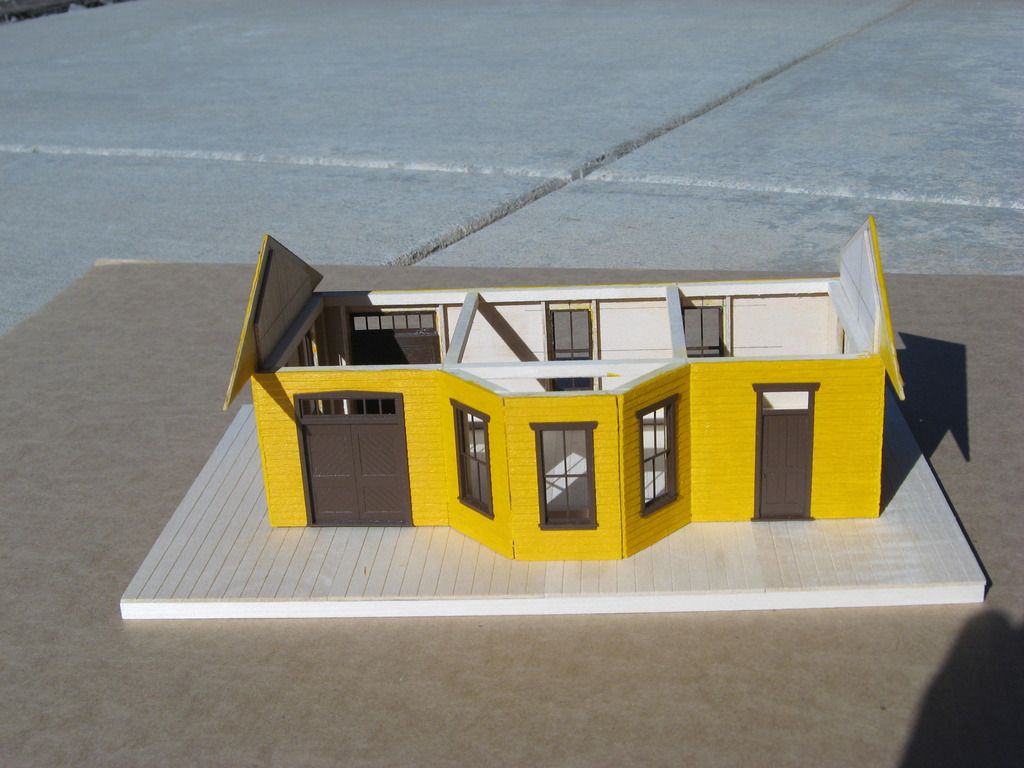
Here is the raw Station showing how I did the framing
 

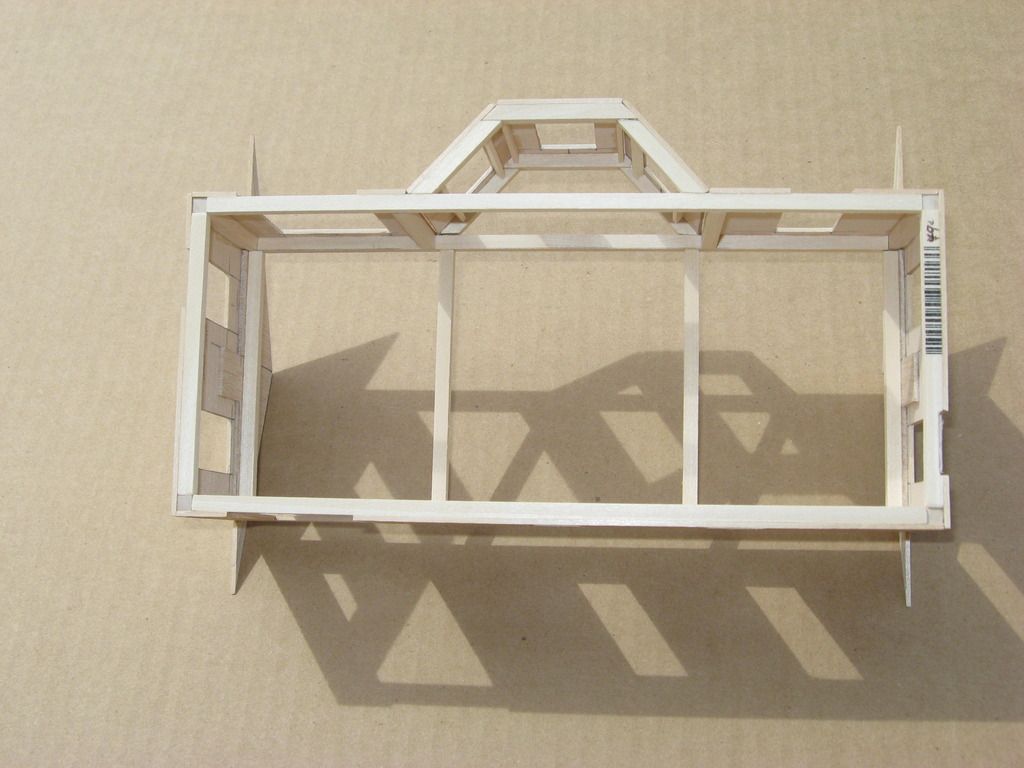
Painted the siding with Acrylic Paints.  Cadmium Yellow Deep Hue mixed with a little Raw Sienna.  Add the Doors, Windows.  The paint looks much brighter outside in the sun.

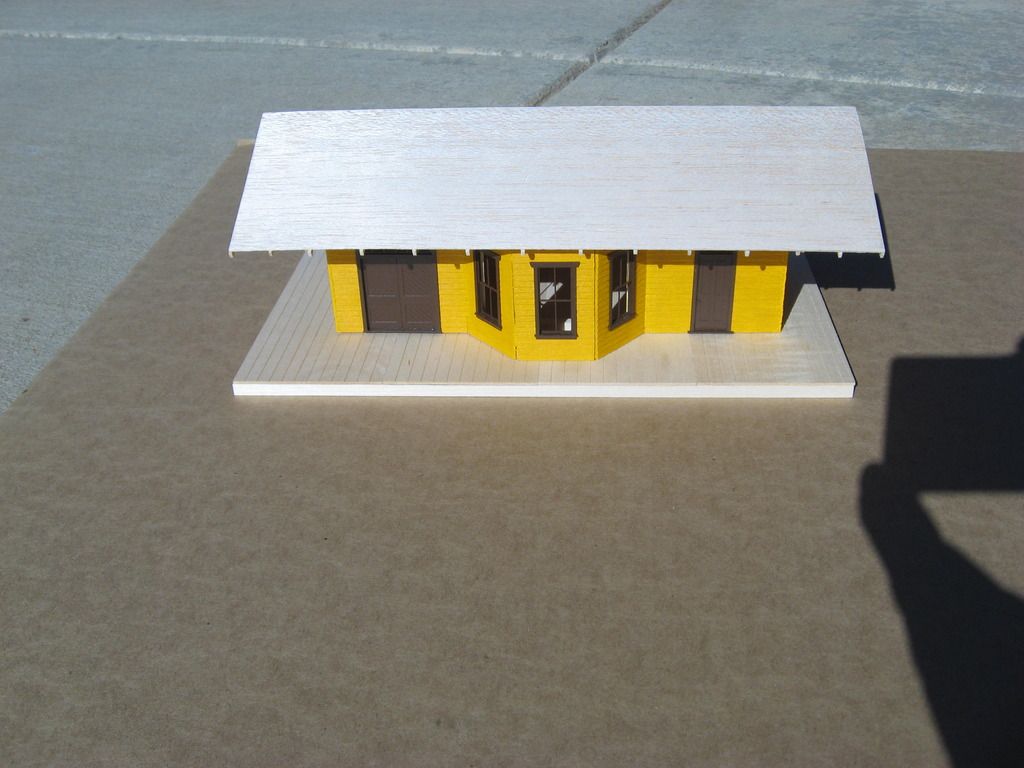
With the roof placed on top.   Still have to add the shingles.

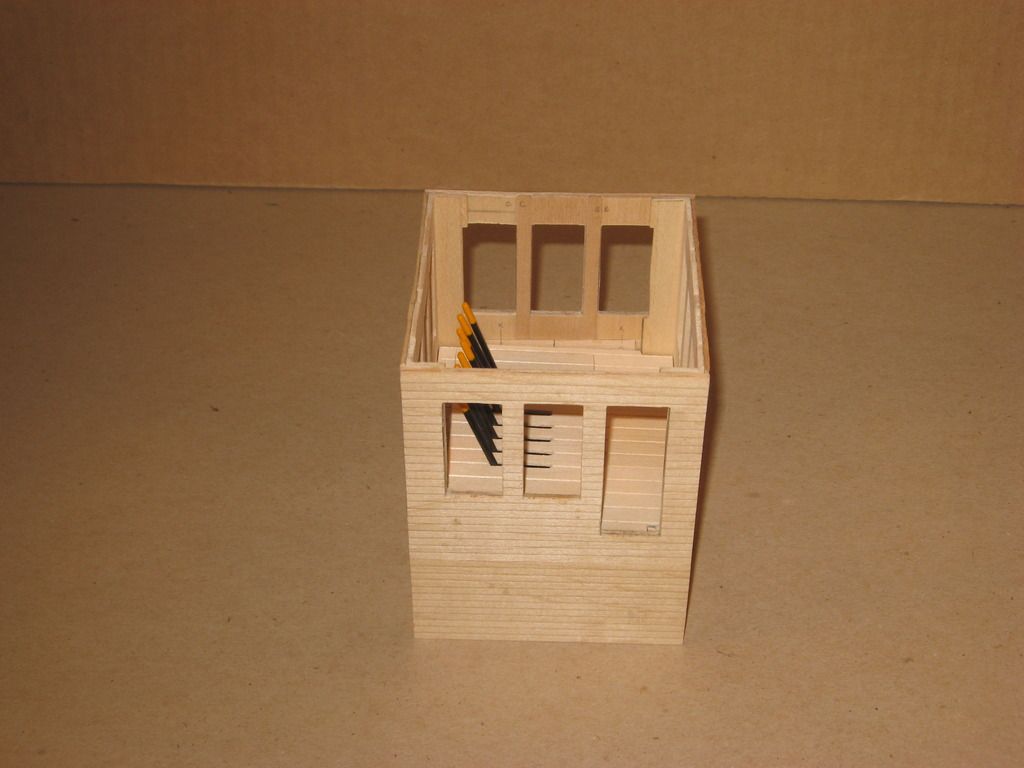
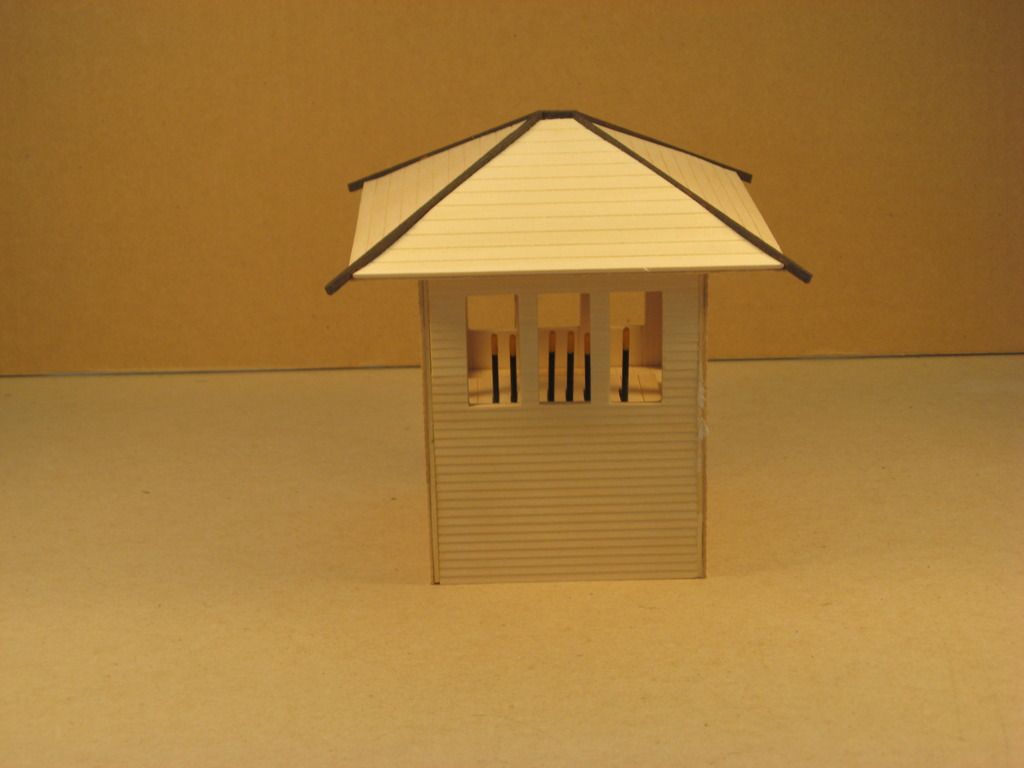
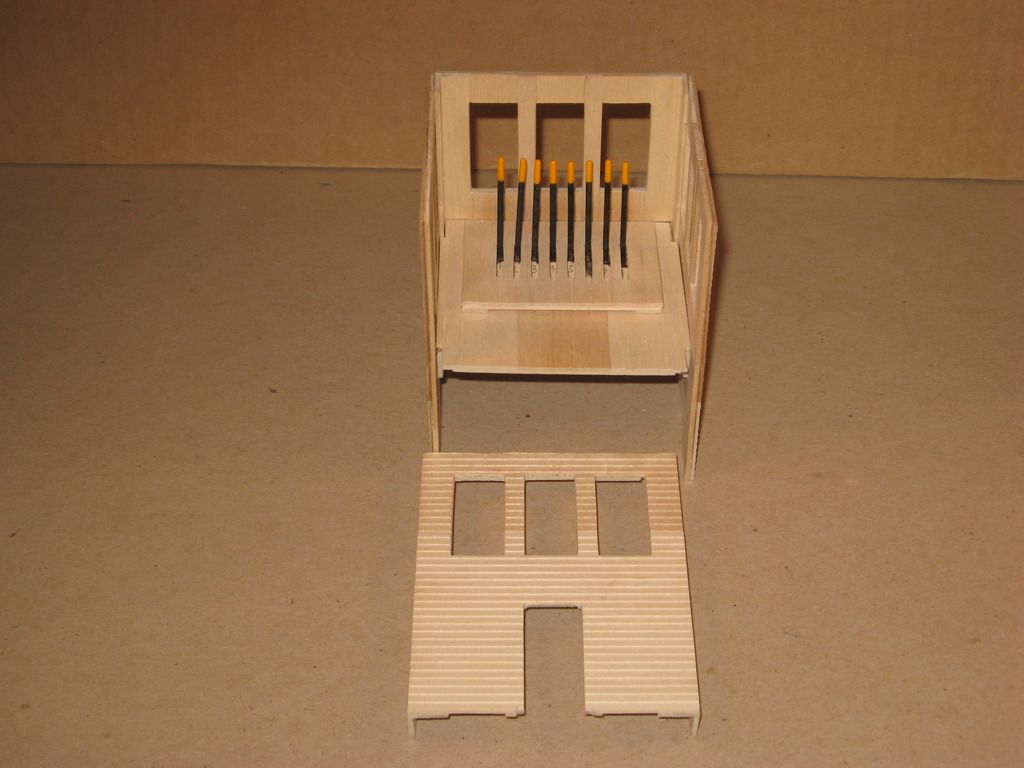
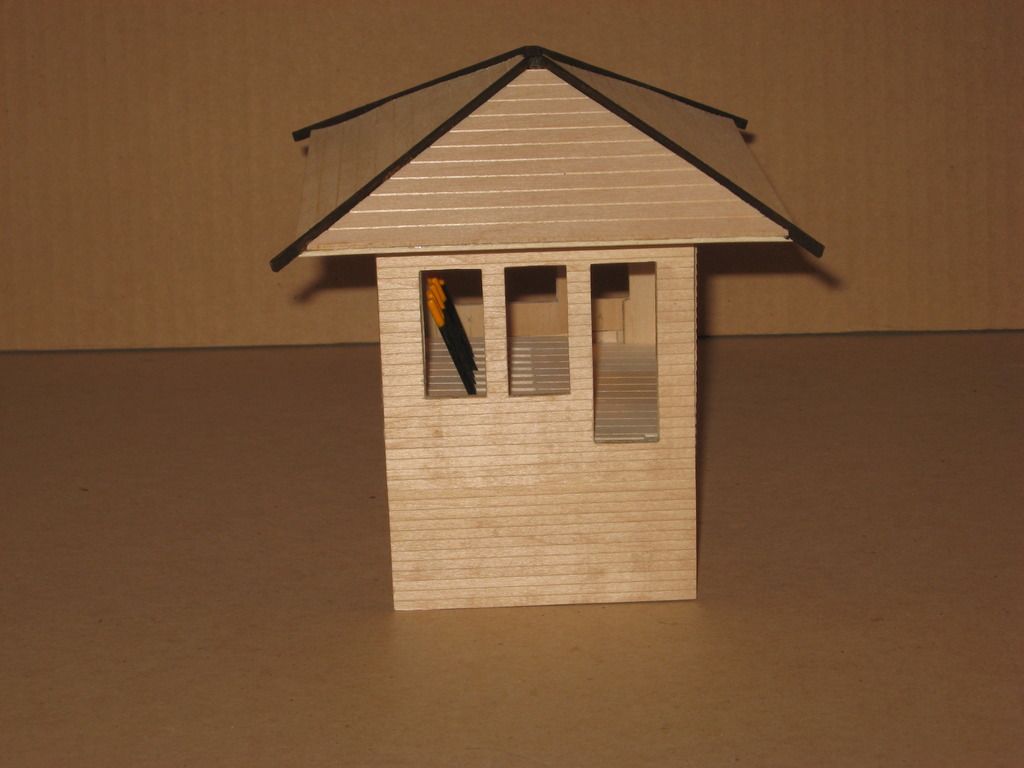
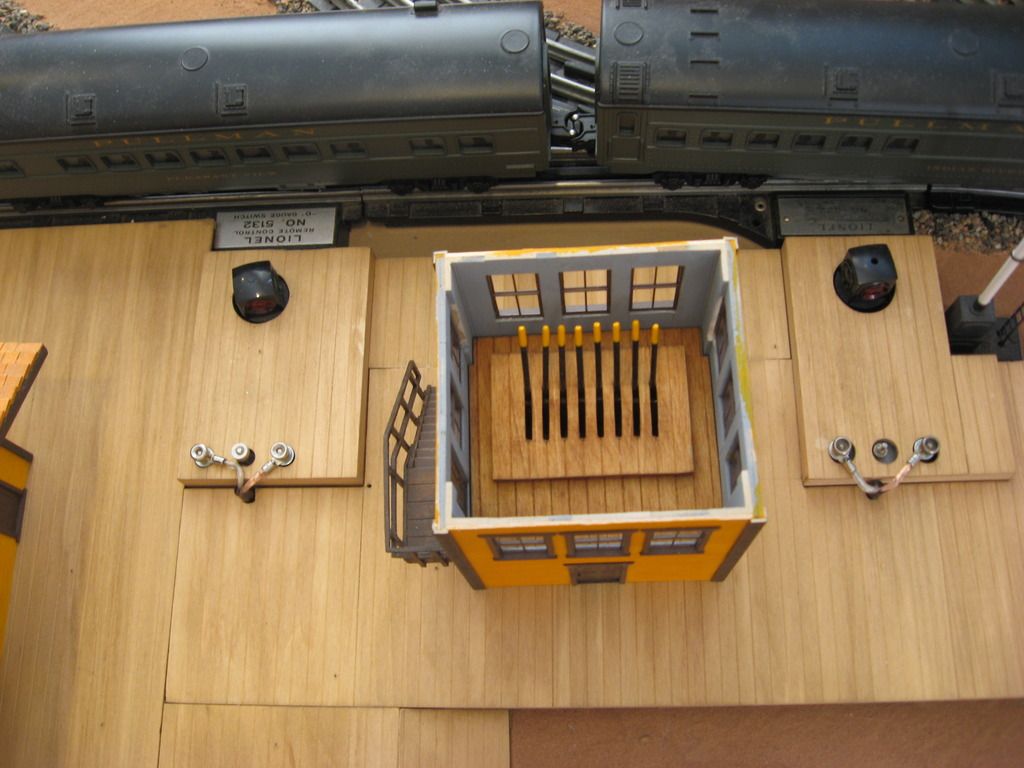
Switch Tower     The Interlocking Levers are toothpicks, and yes they move.

Add the Roof

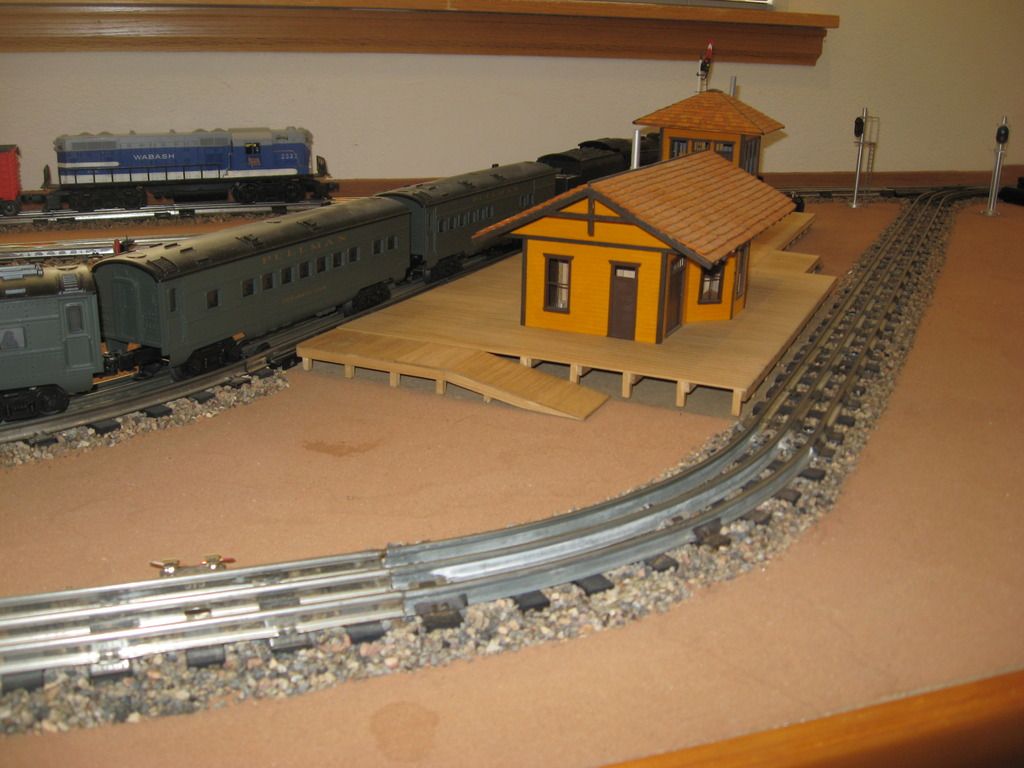
And as installed on my layout.  Note the added trim.  The roof shingles are hand cut out of the thinnest sheet of Basswood I could find.  Painted with a thinned mix of Raw Sienna and Raw Umber. I sanded a bevel on each shingle to get them to lay flatter., and glued them on with Elmers Glue. This was a long tedious process. I would do a couple rows at a time.  But I think it turned out well.

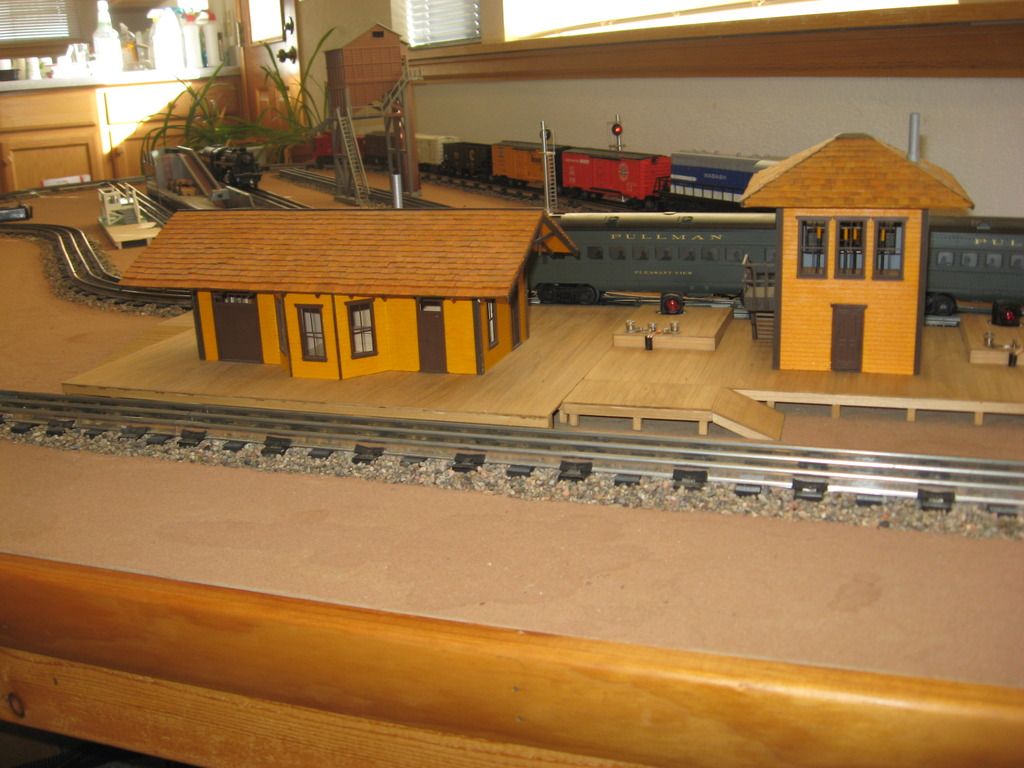
The stairs on the Switch Tower are from Plastruct.  The hand rail on the stairs was made from thin basswood.  The stovepipe is Evergreen Styrene 1/4 tube painted with a mix of grey primer and aluminum spray paint.  Note the boxes I built around the O22 switch machines.  I ran the wires up through black straws. ( coffee stir straws )  I think I got them at McDonalds.

Looking down at the inside of the switch tower.

The semaphore is a NJ International that I bought many years ago ( 1980s ? ) at Caboose Hobbies in Denver, now sadly closed.    The semaphore blade moves by a Tortoise Switch Machine mounted under the layout and activated by a Atlas Twin slide switch  mounted on my control panel.

The Lionel 2025 Steam Engine is my latest addition to my Roster.  Found her at Rocking Chair Antiques located in downtown Helper, Utah.    $110 bucks !   She runs great.   If you get a chance to follow the UP ( D&RG ) over Soldier Summit Helper is a must stop.  They have a great Railroad and Mining Museum there.  They have a outdoor display of mining and railroad equipment and the Museum is inside the old Hotel.   Well worth the time.

Steve

Original Post

Replies sorted oldest to newest

Pennsylvania & Ohio rr conway yard posted:

how did you build your signal and what did you yous for ballast?

My track ballast is from Ant Hills.   The ants here build these ant hills that can be 2 feet in diameter, around 6-8 inches in height.  The ants do a superb job of sorting the coarse sand, ( small pebbles ) to size.  I scoop up the sand into buckets, then back home run it through a cheap kitchen strainer.  When laying the ballast I use a pair of tweezers to pluck out pieces that are too large or don't look right and other junk.   Then ballast the track with white glue and water.

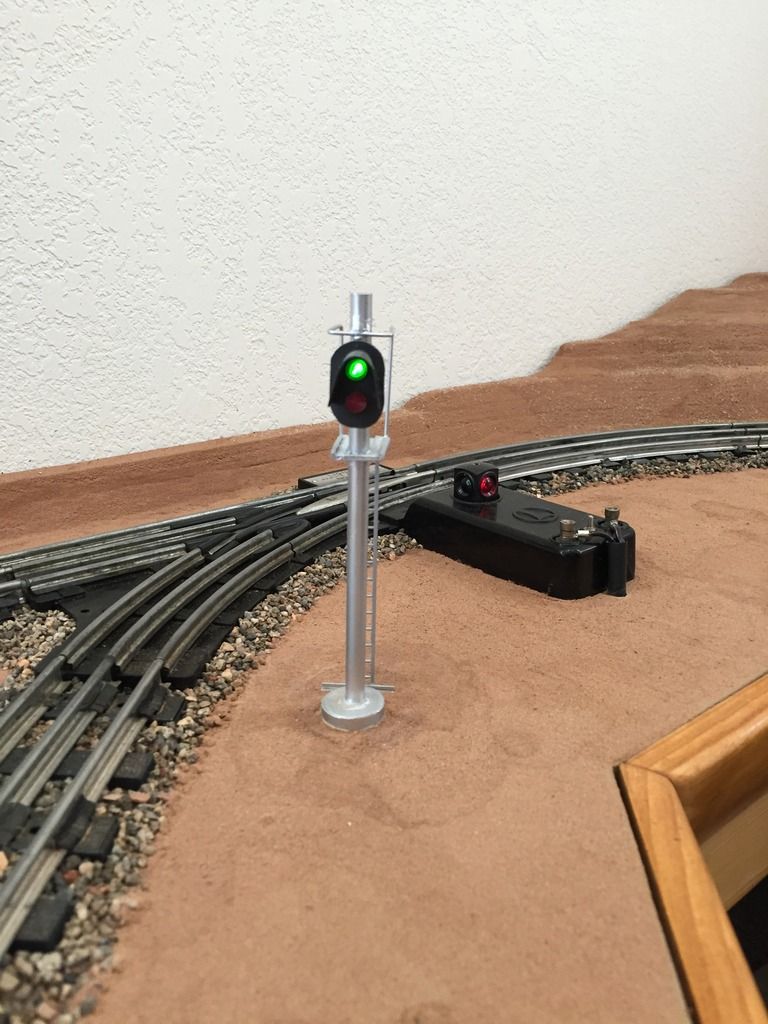
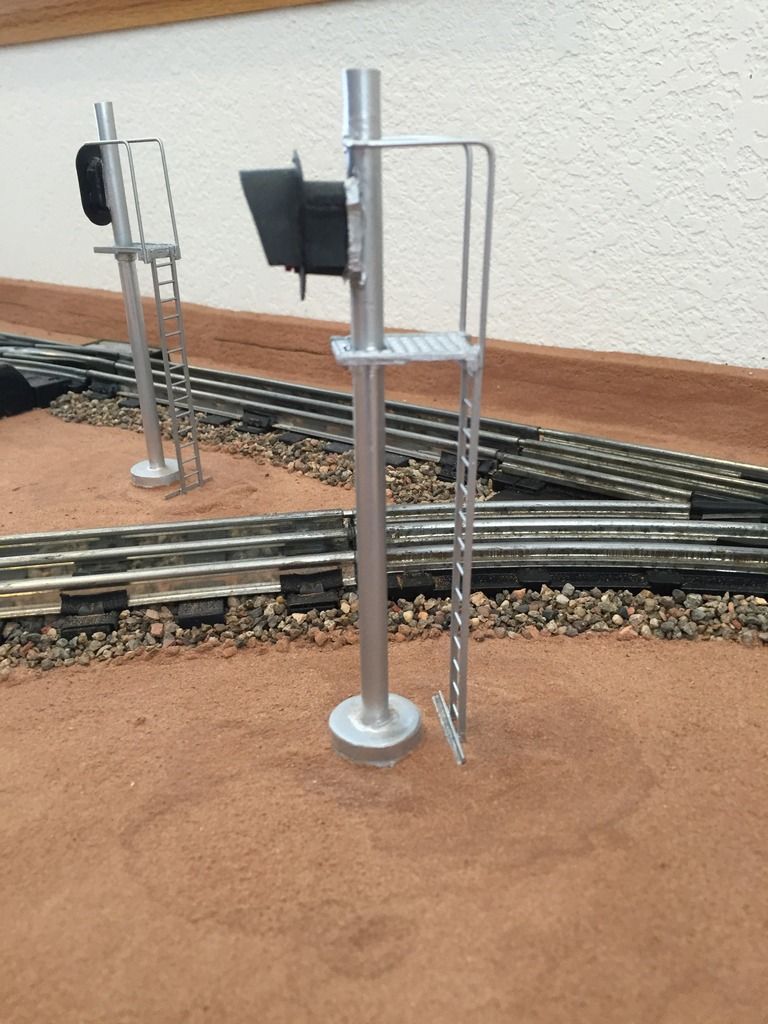
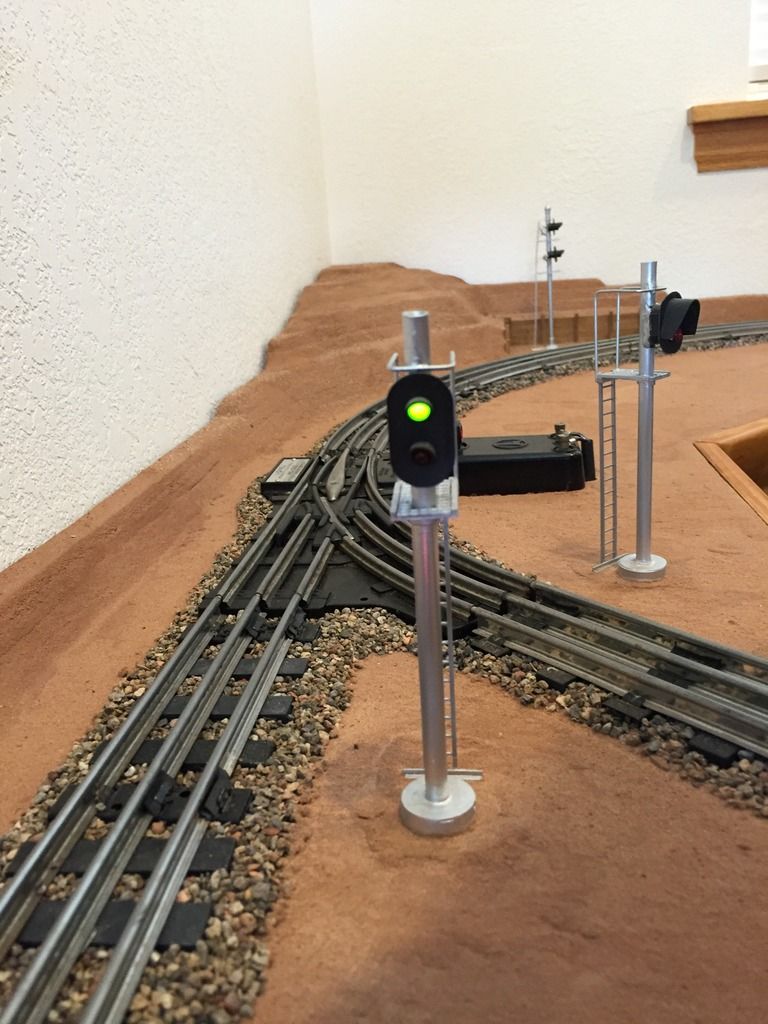
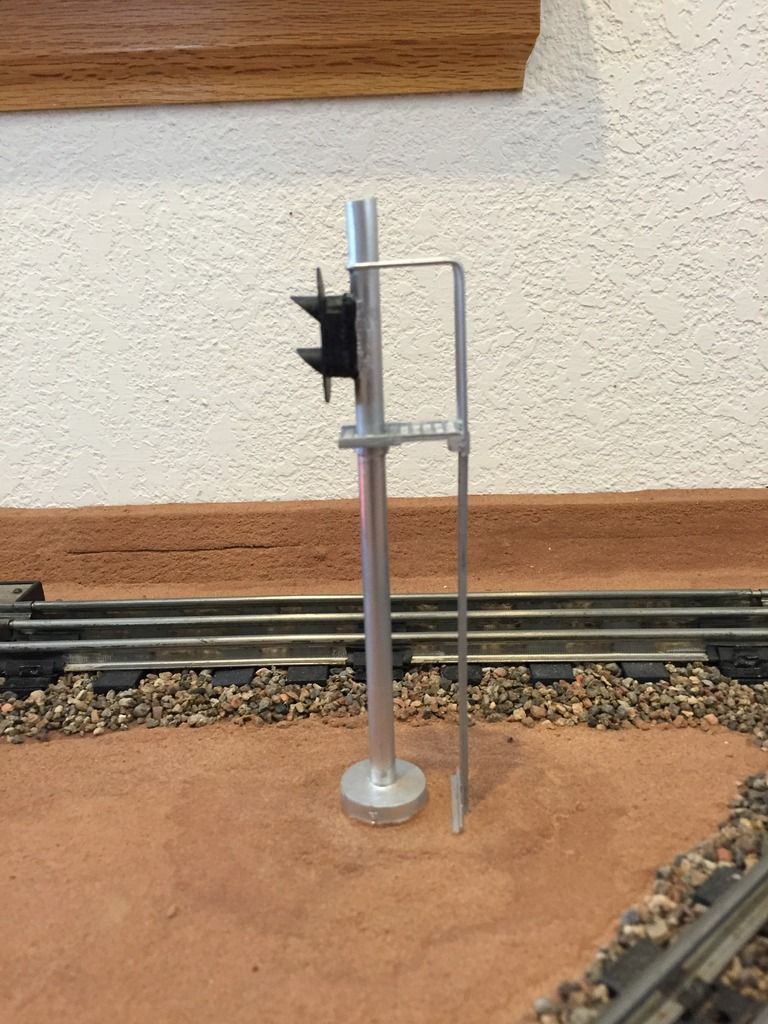
The Signals are scratchbuilt.  Evergreen Styrene tube for the mast. The base is a 3/4 inch PVC pipe fitting.  With a flat piece of Styrene to make a top for the base.  The base is countersunk sunk into the 1/2 Celotex.   The signal head are Radio Shack LEDs in Styrene tubes.  Styrene scraps make up the signal target face and the head along with some model putty.  I made one to look like a UP Darth Vader hood, the other to look like small hoods over each lamp.  The platform is needle point mesh and wood.  The ladder is Plaststruct and wire for the hand rail.   Flat black paint for the signal head, and the ladder and mast painted with a mix of grey primer and aluminum spray paint. 

Signals are activated by relays and insulated rail.  You can see my Relay set-up, over the roof of the station, under the benchwork in the last picture with the train at the station.  Look at the track and you can see the insulated rail.


In the picture below the signal in the background is a MTH RailKing.

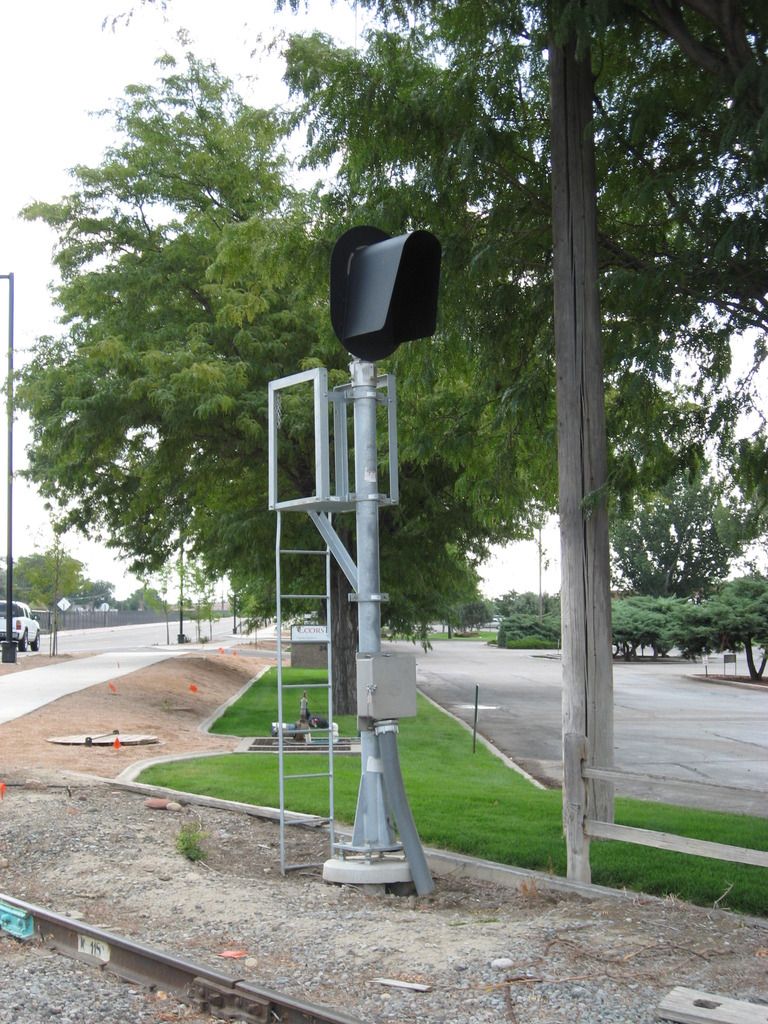
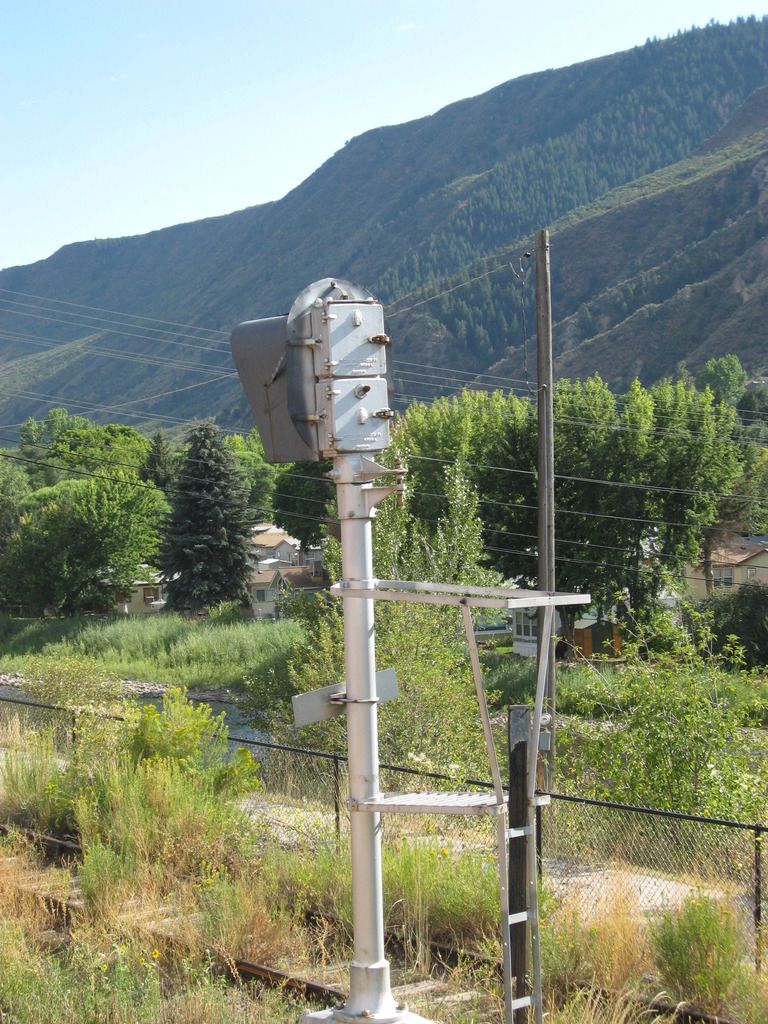
Here are pictures of prototype signals that I tried to copy.   The first signal pictured below controls an industrial spur where the spur meets the Main Line.  This is in Grand Junction, Colo

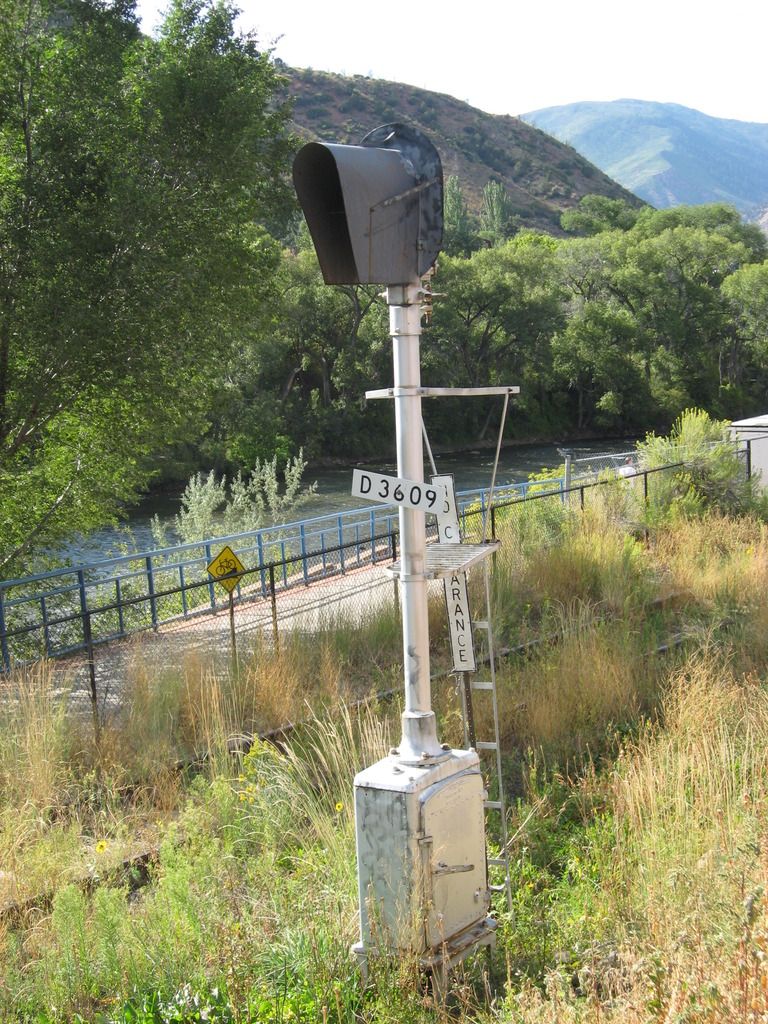
This signal below is located in Glenwood Springs, Colo where the Branch line from Carbondale approaches the Main Line.  The track to Carbondale is gone and replaced by a bike path, but  this signal and about 1000 feet of track remain.    The main line switch has been removed.   Not sure how much longer this lonely signal will remain.  But she still stands watch, waiting for the next train that will never arrive.

Steve

Pennsylvania & Ohio rr conway yard posted:

Have you ever scratch build prr signal and can we see layout tour of your layout? 


Nice work on signals,building and ballast. 

No I have not built any PRR Signals. Wiring the head for a PRR signal would be quite a task.  One would have to use the smaller yellow LEDs and with a minimum of 7 lamps, soldering and threading all those wires would scare me away.

And as far as a Layout tour,  my layout is not very big.  It is a Loop to Loop, and the pictures here show most of the large portion of my layout.

I am trying to post more pictures,  But having a problem with Photobucket.    I will try later to add more.

Steve

OK  Think I solved the picture problem.    Don't have to use photobucket anymore.   Wish I knew this before.

Here are more Signal Pictures

Below is a small Dwarf Signal I built and wired to the O42 manual switch.   Again the signal is constructed using Styrene scraps and tube with Radio Shack LEDs

IMG_0210

Green straight,  Yellow Curve

IMG_0211

Here is the inside of the switch.  I soldered a stiff piece of #16 wire to the moving arm assembly. I flattened out a HO scale rail joiner and soldered it to the end of the piece of wire making a ugly looking "T"   The white is styrene scraps to act as an insulator.  I made a bead of solder at the end of the red and green wires and glued them to the styrene.  When the switch is thrown the T slides back and forth making the circuit from the yellow wire changes the signal from Green to Yellow  ( the red wire is to the yellow lamp )   The base of the signal is a 3/4 in PVC pipe fitting.  I cut it in half so it wasn't too tall.  Glue a scrap piece of styrene to make a top.  I have one of the single hole paper punch tools.  Just the right size to make a hole for the Mast.   The under side of the base is a mass of Hot Glue to hold the mast in place.  A larger piece of sheet styrene with a hole cut to fit the PVC fitting is glued to make a large flange.  I drill a 3/4 inch hole into the Celotex down to the plywood and a   1/4  inch hole through the plywood for an extension of the mast to go through the plywood so the base is countersunk.  The large sheet styrene flange sits on top of the Celotex, thumb tacks to hold in place.  My other signals, the base is made the same as this dwarf signal.   The wire I use is from 4 wire telephone cable.

IMG_1647

Here is a searchlight signal.  Same at the other signals.  The mast is 1/4 Styrene tube.  The target is a 1/4 steel washer.  The Lamp hood is 5/16 tube with a Radio Shack Bi-Color LED.  Target and Hood are painted with flat black spray paint.  Mast and ladder painted with a mix of grey primer and aluminum spray paint.   Lots of ACC glue, some model putty,  sanding to make smooth, and a lot of time masking off the black and silver from each other to paint.   Cut a hole just the right size in the side of the mast to run the wires.  

IMG_0212

Another pair of Searchlight Signals.

IMG_0213

Game 2 of the World Series about to Start.   Go Cubs !!

Steve


Attachments

Images (5)
  • IMG_0210
  • IMG_0211
  • IMG_1647
  • IMG_0212
  • IMG_0213
Steve24944 posted:

I built a Station and a Switch Tower.   I used Basswood Clapboard Siding and Basswood framing by Midwest Products that I purchased at my local Ben Franklin Craft Store / Hobby Shop.   The windows and doors are from Grandt Line.  The platform is 1/4" grooved Flooring and stained using Minwax wood stain.

Here is the platform,  Station framing,  and the roof

Here is the raw Station showing how I did the framing
 

Painted the siding with Acrylic Paints.  Cadmium Yellow Deep Hue mixed with a little Raw Sienna.  Add the Doors, Windows.  The paint looks much brighter outside in the sun.
With the roof placed on top.   Still have to add the shingles.

Switch Tower     The Interlocking Levers are toothpicks, and yes they move.

Add the Roof

And as installed on my layout.  Note the added trim.  The roof shingles are hand cut out of the thinnest sheet of Basswood I could find.  Painted with a thinned mix of Raw Sienna and Raw Umber. I sanded a bevel on each shingle to get them to lay flatter., and glued them on with Elmers Glue. This was a long tedious process. I would do a couple rows at a time.  But I think it turned out well.

The stairs on the Switch Tower are from Plastruct.  The hand rail on the stairs was made from thin basswood.  The stovepipe is Evergreen Styrene 1/4 tube painted with a mix of grey primer and aluminum spray paint.  Note the boxes I built around the O22 switch machines.  I ran the wires up through black straws. ( coffee stir straws )  I think I got them at McDonalds.

Looking down at the inside of the switch tower.

The semaphore is a NJ International that I bought many years ago ( 1980s ? ) at Caboose Hobbies in Denver, now sadly closed.    The semaphore blade moves by a Tortoise Switch Machine mounted under the layout and activated by a Atlas Twin slide switch  mounted on my control panel.

The Lionel 2025 Steam Engine is my latest addition to my Roster.  Found her at Rocking Chair Antiques located in downtown Helper, Utah.    $110 bucks !   She runs great.   If you get a chance to follow the UP ( D&RG ) over Soldier Summit Helper is a must stop.  They have a great Railroad and Mining Museum there.  They have a outdoor display of mining and railroad equipment and the Museum is inside the old Hotel.   Well worth the time.

Steve


Steve24944 posted:

I built a Station and a Switch Tower.   I used Basswood Clapboard Siding and Basswood framing by Midwest Products that I purchased at my local Ben Franklin Craft Store / Hobby Shop.   The windows and doors are from Grandt Line.  The platform is 1/4" grooved Flooring and stained using Minwax wood stain.

Here is the platform,  Station framing,  and the roof

Here is the raw Station showing how I did the framing


Painted the siding with Acrylic Paints.  Cadmium Yellow Deep Hue mixed with a little Raw Sienna.  Add the Doors, Windows.  The paint looks much brighter outside in the sun.
With the roof placed on top.   Still have to add the shingles.
Switch Tower     The Interlocking Levers are toothpicks, and yes they move.
Add the Roof
And as installed on my layout.  Note the added trim.  The roof shingles are hand cut out of the thinnest sheet of Basswood I could find.  Painted with a thinned mix of Raw Sienna and Raw Umber. I sanded a bevel on each shingle to get them to lay flatter., and glued them on with Elmers Glue. This was a long tedious process. I would do a couple rows at a time.  But I think it turned out well.
The stairs on the Switch Tower are from Plastruct.  The hand rail on the stairs was made from thin basswood.  The stovepipe is Evergreen Styrene 1/4 tube painted with a mix of grey primer and aluminum spray paint.  Note the boxes I built around the O22 switch machines.  I ran the wires up through black straws. ( coffee stir straws )  I think I got them at McDonalds.
Looking down at the inside of the switch tower.
The semaphore is a NJ International that I bought many years ago ( 1980s ? ) at Caboose Hobbies in Denver, now sadly closed.    The semaphore blade moves by a Tortoise Switch Machine mounted under the layout and activated by a Atlas Twin slide switch  mounted on my control panel.
The Lionel 2025 Steam Engine is my latest addition to my Roster.  Found her at Rocking Chair Antiques located in downtown Helper, Utah.    $110 bucks !   She runs great.   If you get a chance to follow the UP ( D&RG ) over Soldier Summit Helper is a must stop.  They have a great Railroad and Mining Museum there.  They have a outdoor display of mining and railroad equipment and the Museum is inside the old Hotel.   Well worth the time.
Steve


Lowes2win posted:

I really like the color choices and the shingle work. Very time consuming but I'm sure very satisfying with the results.  What color yellow is that? It really looks great on the layout 

Is this a serious question?  I ask because the OP states the color's composition in the third paragraph of text in the original post, and you've quoted the entire, original post, including color information, not once, but twice.

If this is a serious question, well, you know where to find the answer.

Pingman posted:
Lowes2win posted:

I really like the color choices and the shingle work. Very time consuming but I'm sure very satisfying with the results.  What color yellow is that? It really looks great on the layout 

Is this a serious question?  I ask because the OP states the color's composition in the third paragraph of text in the original post, and you've quoted the entire, original post, including color information, not once, but twice.

If this is a serious question, well, you know where to find the answer.

Yes it was but if i was paying attention I would have read it in your post. I will go back and read it again.  Thank you nice work 

Rich   -   The Semaphore is NJ International.  I bought it back in the 80s.

Yes,  some detail on the platform would be nice.  I am always finding something to work on and disassemble the whole assembly, then put it back it back together again.   Adding people seems  like the very last thing to do and I feel like I am nowhere near saying that something is finished and nothing else to add or do.

Steve

Add Reply

Post
×
×
×
×
Link copied to your clipboard.
×
×