Atlas Pratt Double track bridge. 40" length and a track spacing 4.5" center to center.
|


|
Atlas Pratt Double track bridge. 40" length and a track spacing 4.5" center to center.
Nice work Scratchbuilder!
Dan
Hey Matt,
It is the Owen Sturm Memorial Bridge at the NJ Highrailers , can be seen at Trainstock 7
Dual track lift bridge is also there .
Bernie
I'm sure this topic has been covered before, but I just got back into the hobby again, so please bear with me. I'm looking to build a double track Pratt truss bridge. I know Atlas sells a kit for this, but it's hard to find, and costly when you find it. I'm willing to build one with a little less detail, so I can use my available funds for switches, track, signals, etc. Do Plastruct still sell structural O-scale beams? Thanks for the input.
Geno
Geno
We make bridges of various sizes and lengths., Look at our web page and you can see the double wide bridge. it can be made as a triple wide too. we ATTACH A PHOTO OF THE 36" DOUBLER WIDE BRIDGE
WE ARE MAKING A 25% DISCOUNT FOR THE NEXT WEEK.
In the Plastruct online catalog, they have a Rivet making device that I guess for lacking of words imbeds rivets into styrene plastic quick and easily
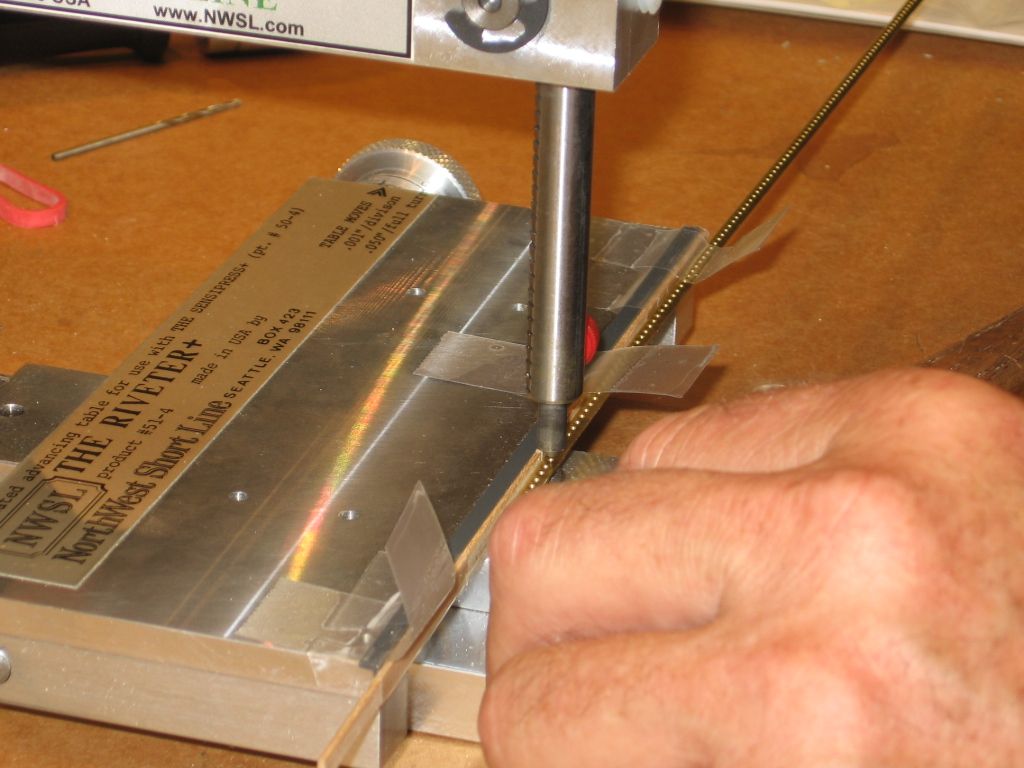
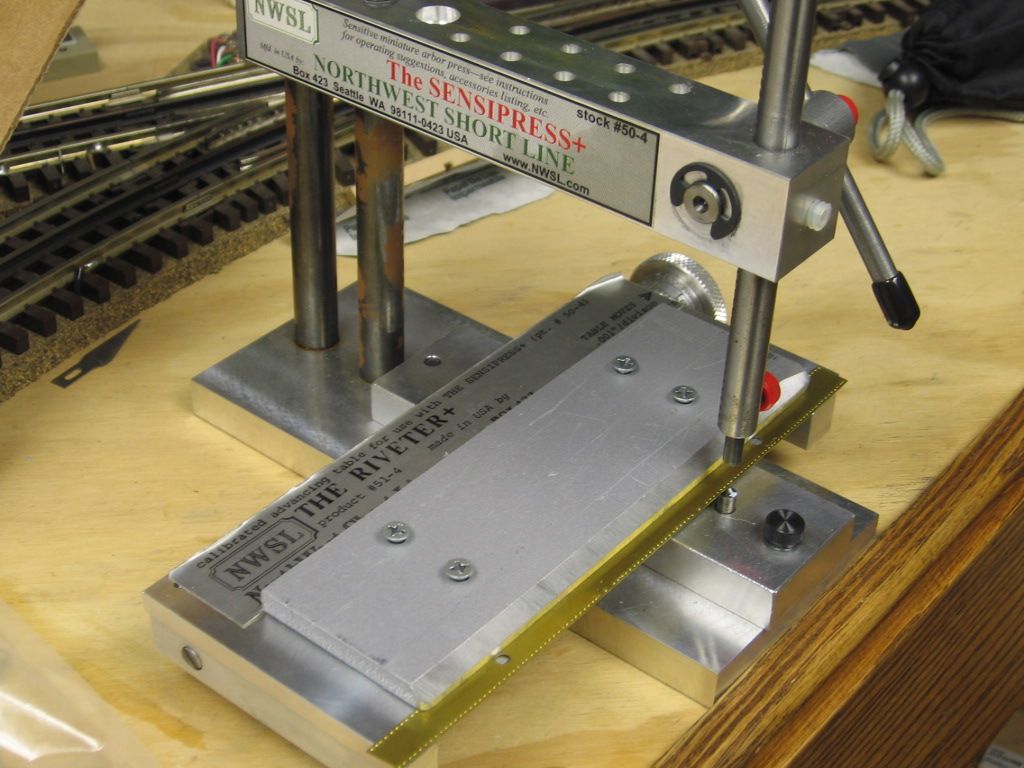
The NWSL North West Short Line. Scan down this tool page to the Sensi-Press and Riveter Table. The Sensi-press is a device for embossing rivets either metal or plastic.

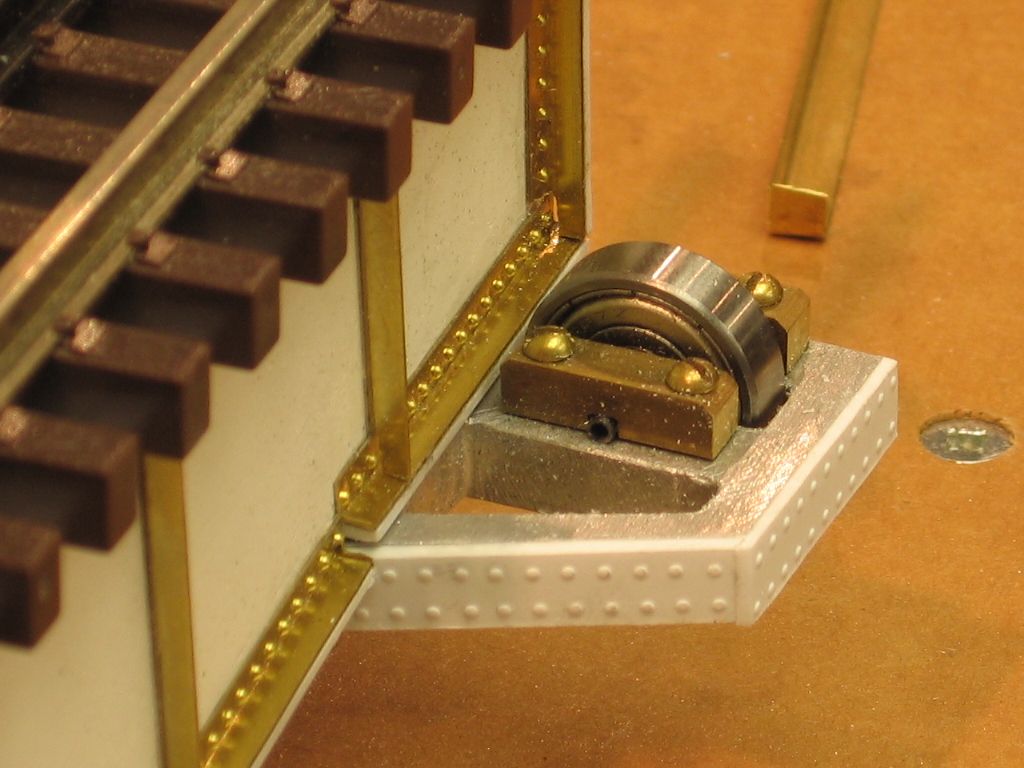
I worked from the back side of the material. The press, with punch and die, dimples the material. The Riveter Table allows for the systematic, accurate progression of the piece of material through the punch and die. I fabricated the aluminum clamp in the first picture.
Note the plastic styrene and brass installed on this turntable bridge. The rivet detail is done before the pieces are assembled.
Link to Plastruct rivet tool.
You may wanted to look at the Silk City Bridges custom made to order by the NJ Hirailers. Fantastic bridges at great prices.
Very nice. Where are you at York? I'll have to stop by. I helped my son build a short section of the Rockville bridge for a school project when he was in 7th grade. It's incorporated into the storage yard in the workshop.
Don
Don't forget Bridgeboss.com either. See a few of our products below. Several new models coming in April York.
Ok. Ok. I'm cheating. This is my friends layout. He built these over the last four years. The caboose you see is "HO Scale!" Hellsgate is huge in HO, but would still be big in O. It's 1/2 the size it should be in HO.
I very proud of his work and that's why I posted this HO bridge.
He's still working on the towers but has it operational for the holidays.
I was stuck for a 2 track bridge that would span 8 feet yet be shallow enough in height to fit up close to the ceiling. Based on a loose interpretation of the Hellgate bridge, the main supporting arches are out of "I" beam curtain rod and are tied together with extruded aluminum shapes and Erector girders. During construction I screwed the end piers ( plywood ) to our kitchen floor while I assembled the structure with machine screws. The big day came when I cautiously removed those screws from the piers, praying the entire assembly wouldn't shatter into 100 pieces as the arches straightened. I must have done something right...the whole thing didn't budge, even a fraction. I was tempted to stand on it to test its strength but never did. I've often eyeballed the structure when running my heaviest equipment over it and there's absolutely not deflection.

Beautiful work guys! Clearly I asked the right question! The 40" Atlas bridge kit seems to be the most direct route for me, since that's close to the length I need to span. I'm looking for a 2-rail double track model if anyone has a lead on one.
Thanks,
Geno
For inspiration and some neat information about the real thing, see http://www.historicbridges.org/index.htm
I was stuck for a 2 track bridge that would span 8 feet yet be shallow enough in height to fit up close to the ceiling. Based on a loose interpretation of the Hellgate bridge, the main supporting arches are out of "I" beam curtain rod and are tied together with extruded aluminum shapes and Erector girders. During construction I screwed the end piers ( plywood ) to our kitchen floor while I assembled the structure with machine screws. The big day came when I cautiously removed those screws from the piers, praying the entire assembly wouldn't shatter into 100 pieces as the arches straightened. I must have done something right...the whole thing didn't budge, even a fraction. I was tempted to stand on it to test its strength but never did. I've often eyeballed the structure when running my heaviest equipment over it and there's absolutely not deflection.

I wouldn't mind hearing more about the build of this bridge. It's great looking.
Pete, thanks for the photos of some neat wood bridges. I'm planning a layout in a new train room and I hope to go "bridge heavy;" i.e., lots of bridges of various designs.
Thanks to all who shared photos of their bridges.
I wouldn't mind hearing more about the build of this bridge. It's great looking.
Thanks for inquiring
The piers were first built to size out of plywood and notched to accept the "I" beams. In a stroke of luck our kitchen was in mid renovation and this allowed me to screw the piers to the sub floor to keep them positioned exactly 8' apart. Next, I strung 2 "I" beams upright from pier to pier and "L" shaped cross beams every 6" formed the roadbed. With the piers solidly fastened down it was possible to bend the aches to fit in place, 2 "I" beams per side, laying on their sides. Height of the arches and piers needed to be adjusted down during mid project as they would have interfered with the ceiling when installed. After that was finalized then it was simply a matter of stringing everything together with "L" shapes and 1/2" flat bar of extruded aluminum. At the time the anodized extruded aluminum could be found at Home Depot but I've noticed lately the selection there has dwindled. The "I" beams are the old fashioned curtain rod still available at HD too...roughly about $10 for a ten foot length. To finish off construction i cut Erector girders to fit as roadbed hangers. All the metal to metal assembly is with machine screws with the bridge fastened to the piers with epoxy. After spraying the structure with red lacquer, which believe me takes some time to cover entirely, it was masked off and the piers sprayed with granite tone decorator paint to simulate stone. The whole assembly probably weighs less than 10 lbs and that's good cuz it could easily have been a very awkward piece to maneuver into place. It's still tempting to try hanging from it just to test its strength but I fear I'd tear down the supports for the piers before breaking the bridge. Had I known that running on this structure was as quiet as it is I'd have redesigned my entire Platerail Central using this method.
Bruce
Access to this requires an OGR Forum Supporting Membership
