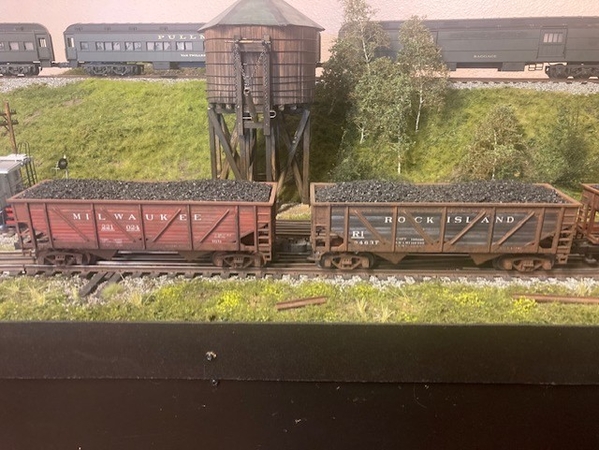
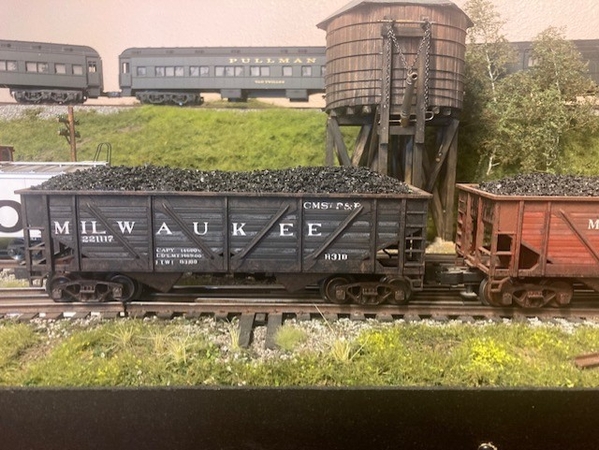
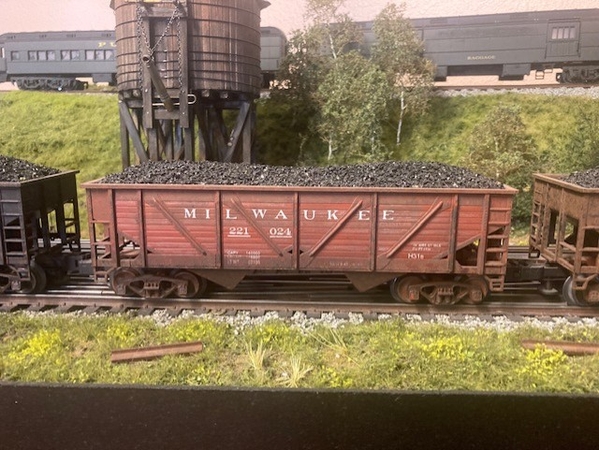
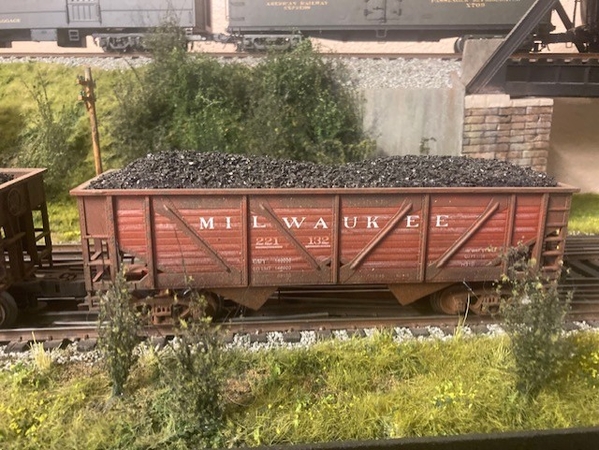
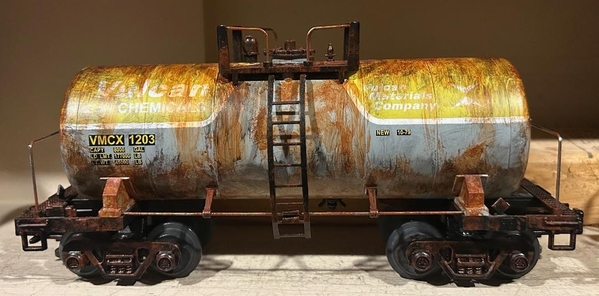
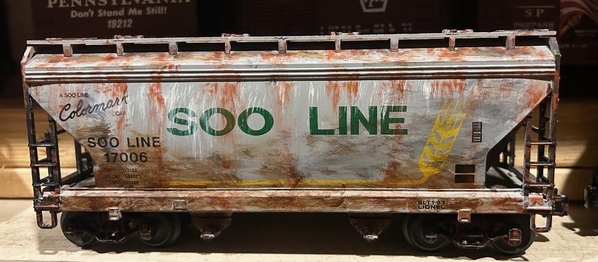
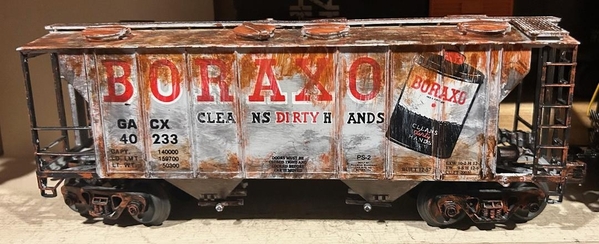
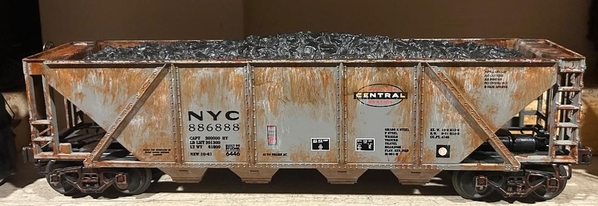
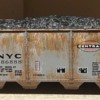
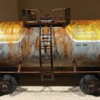
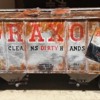
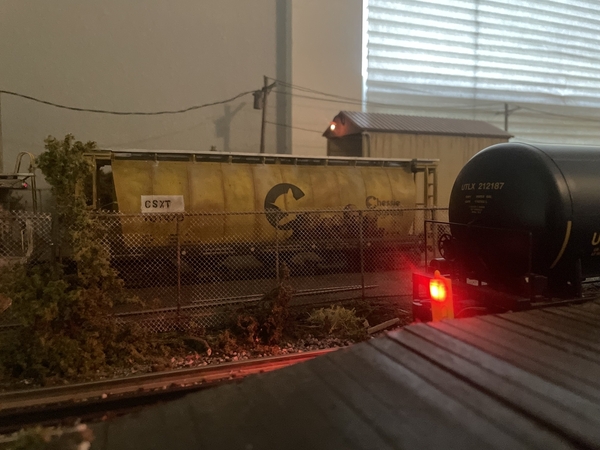
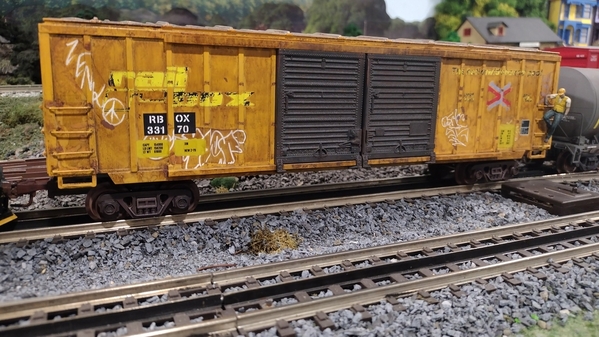
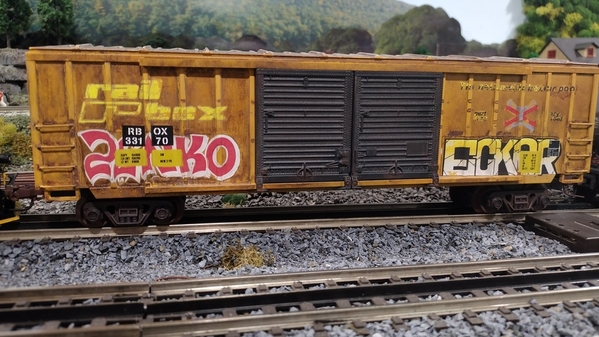
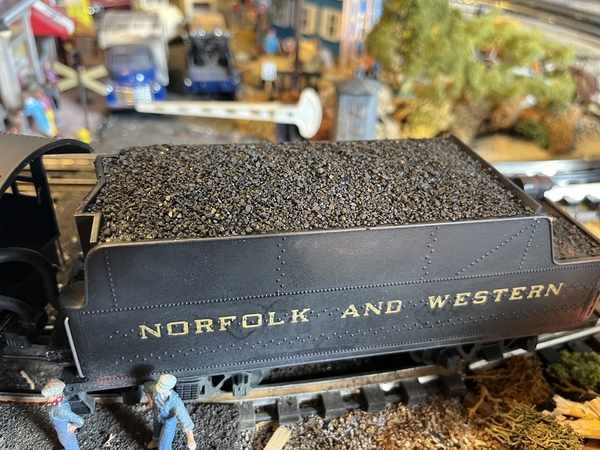
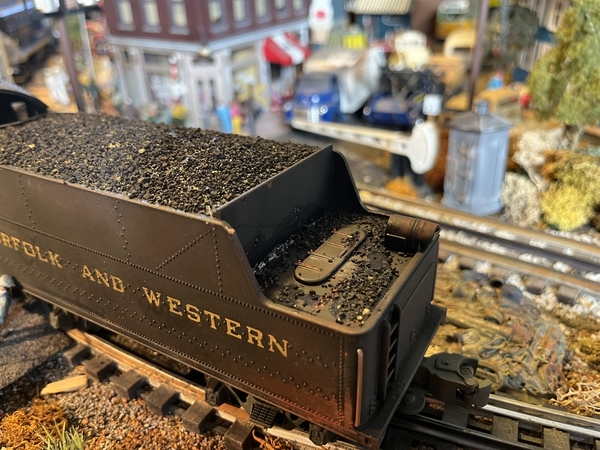
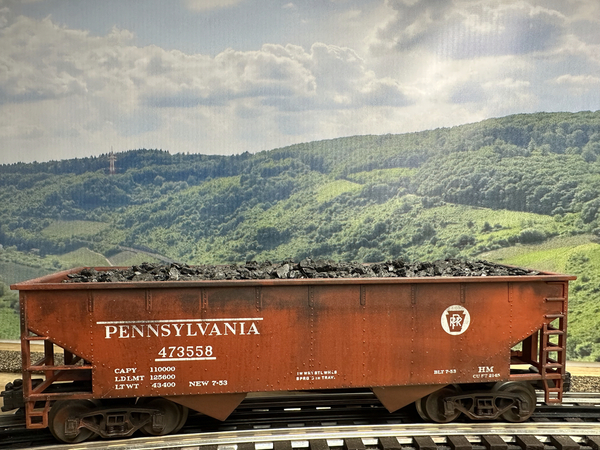
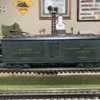
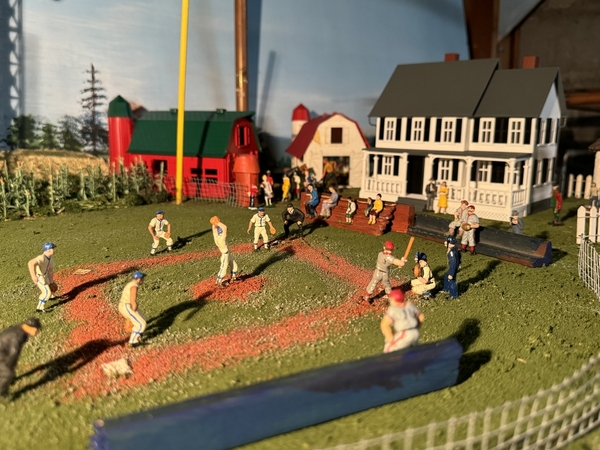
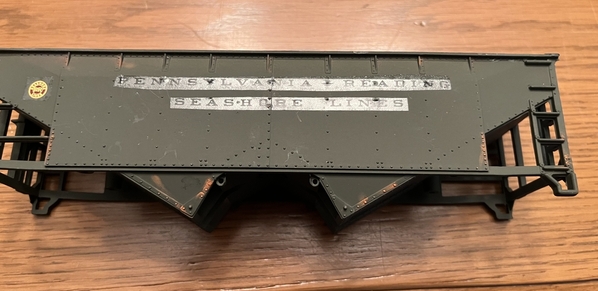
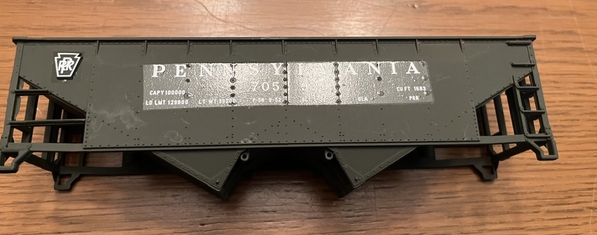
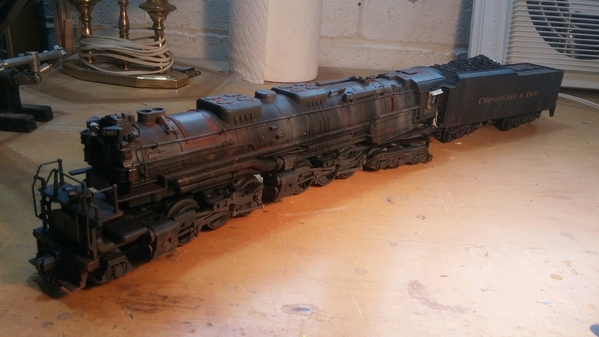
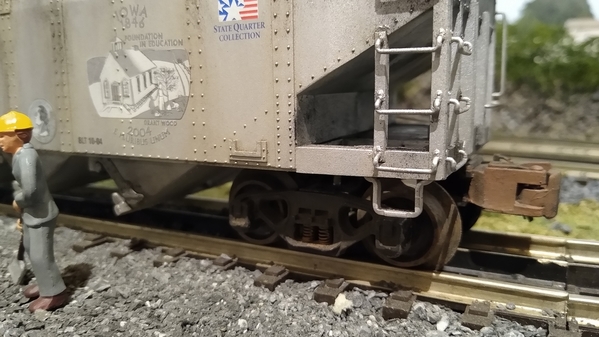
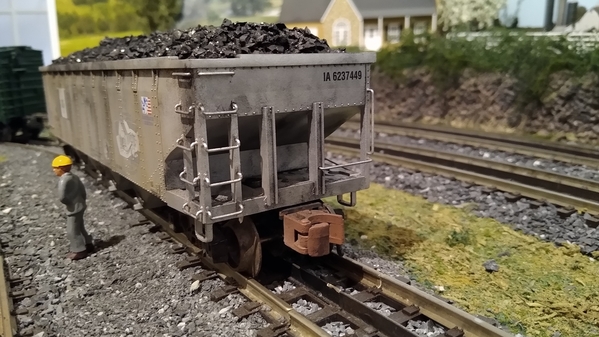
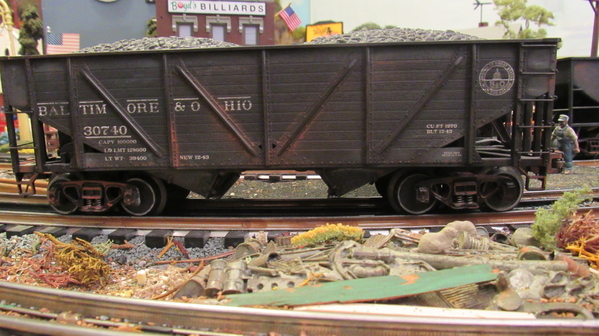
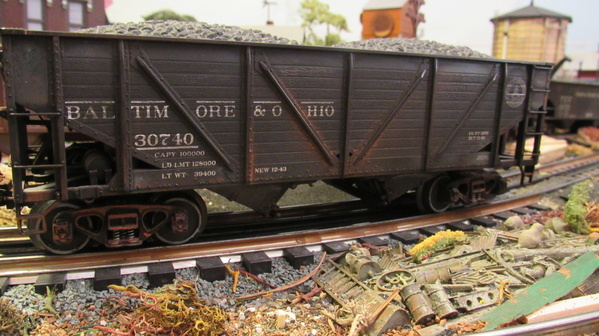
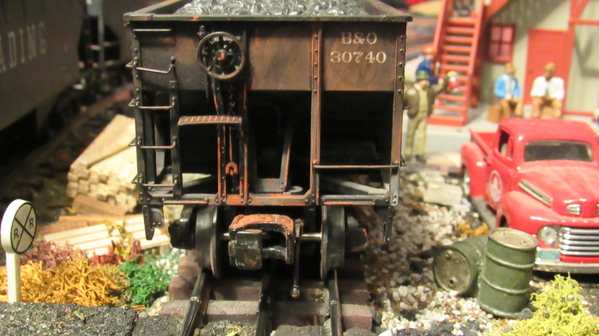
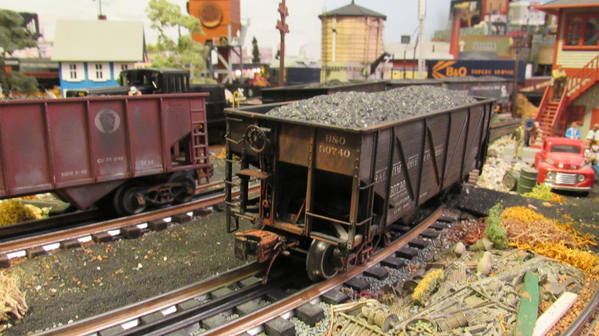
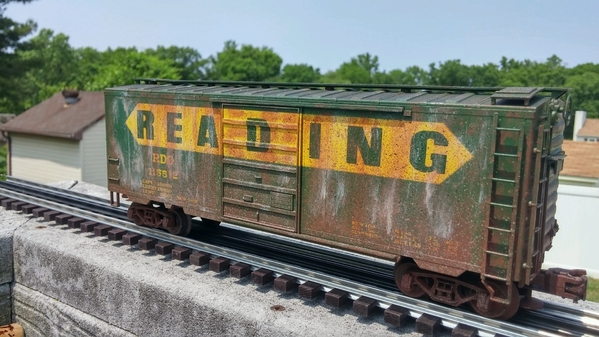
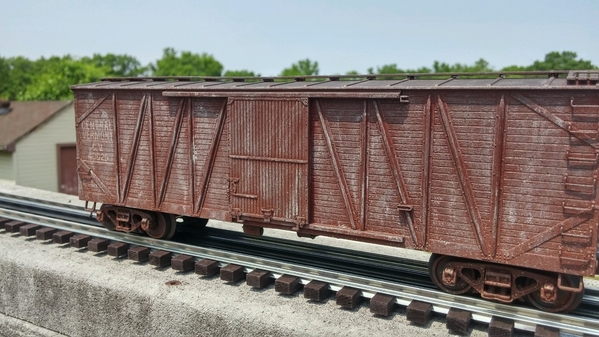
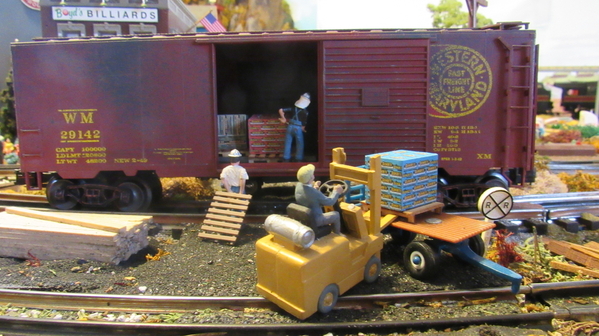
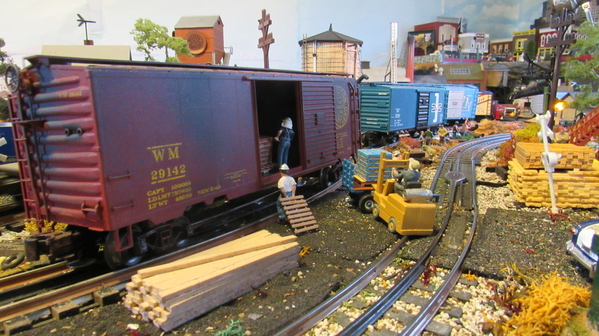
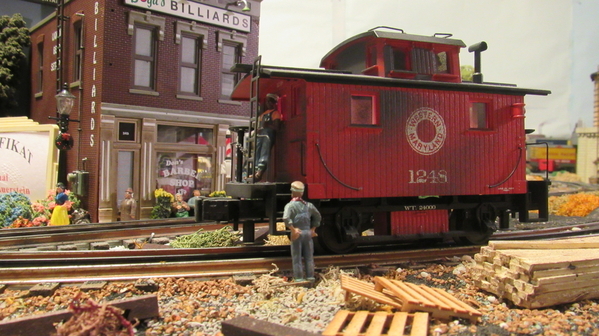
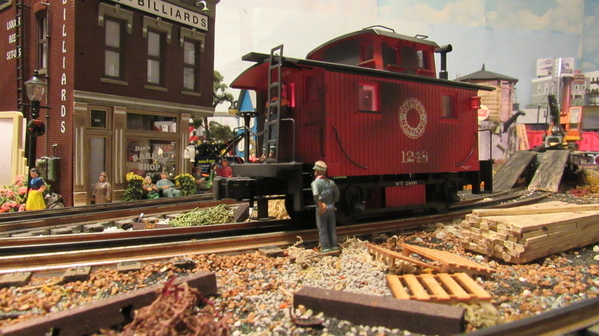
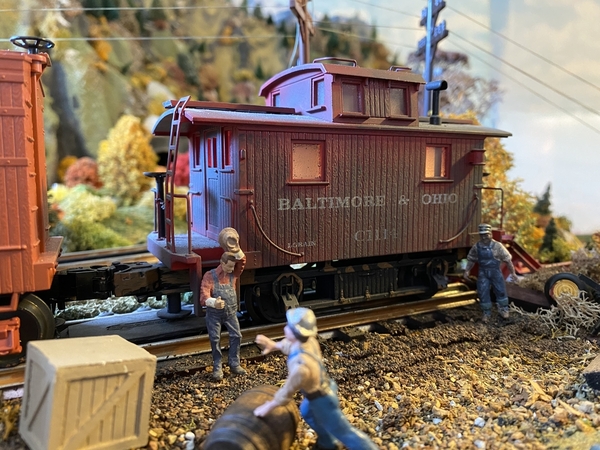
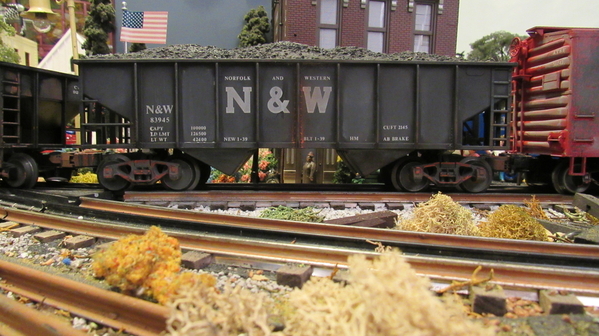
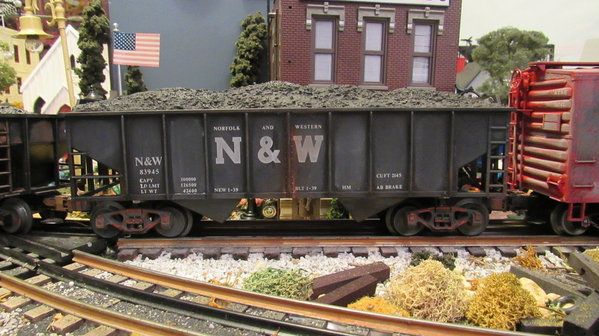
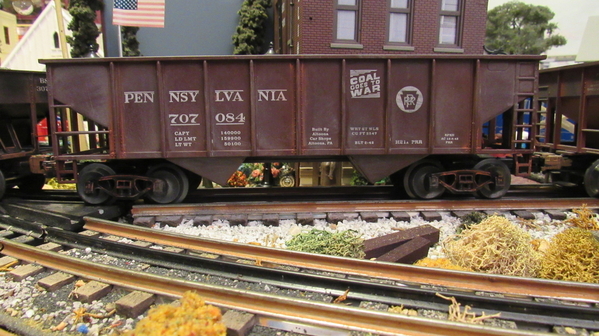
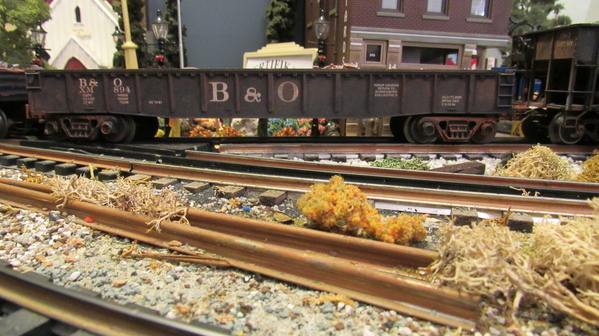
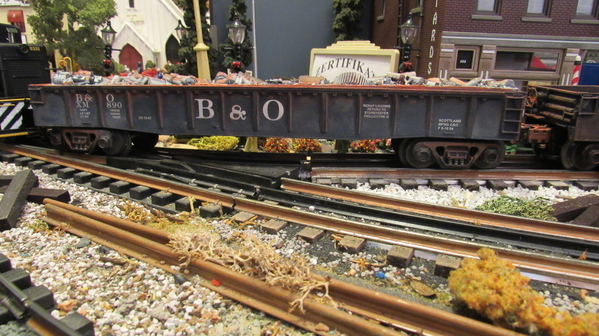
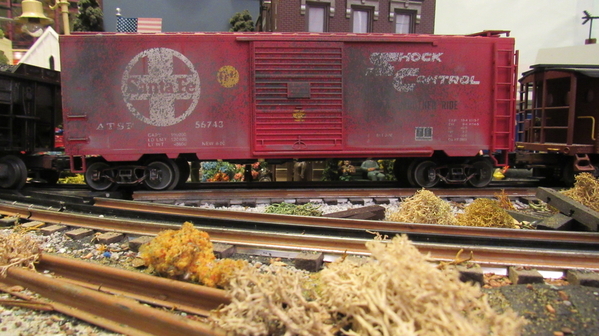
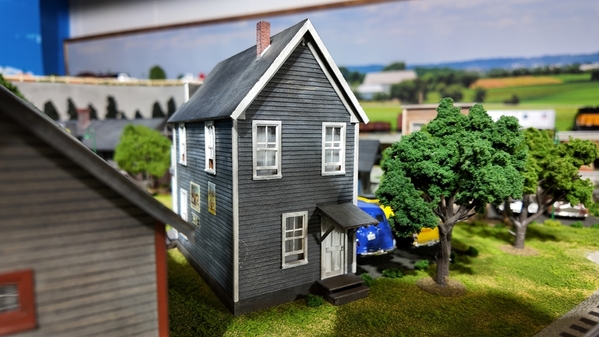
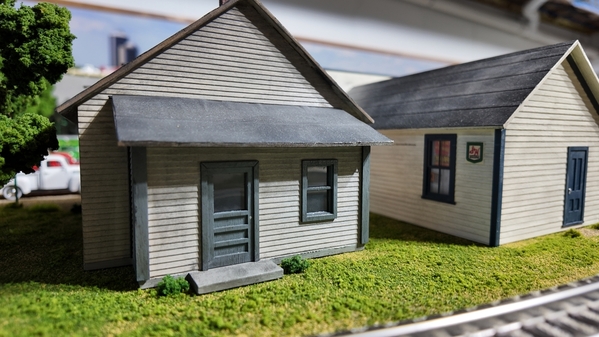
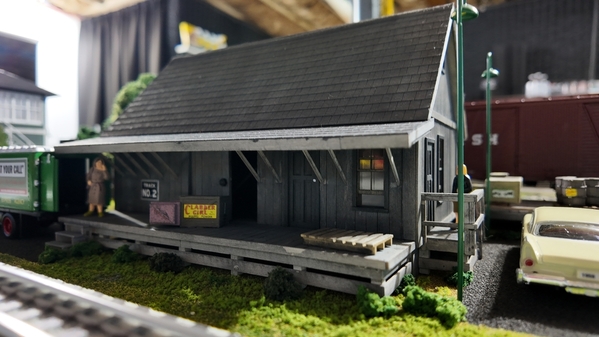
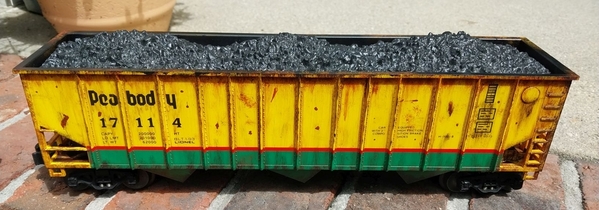
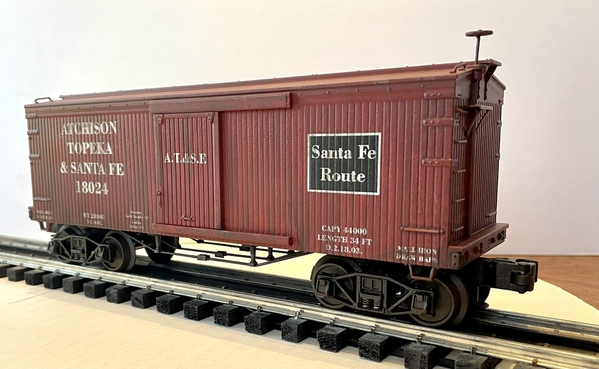
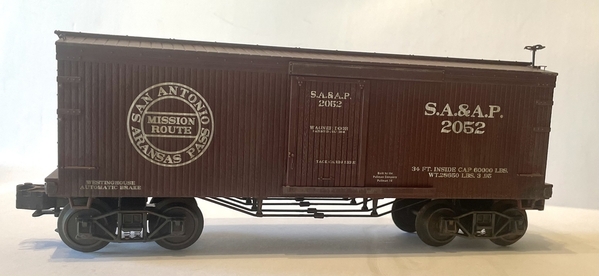
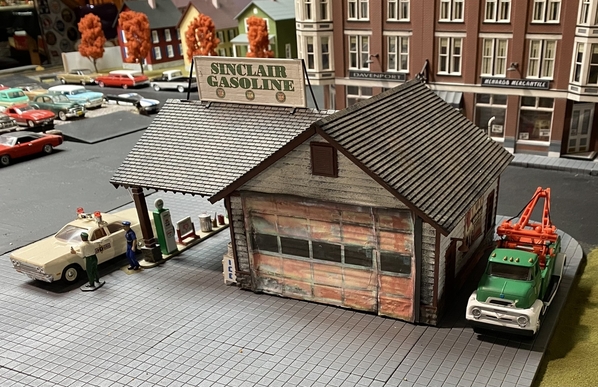
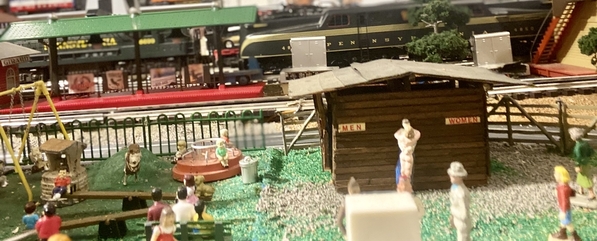
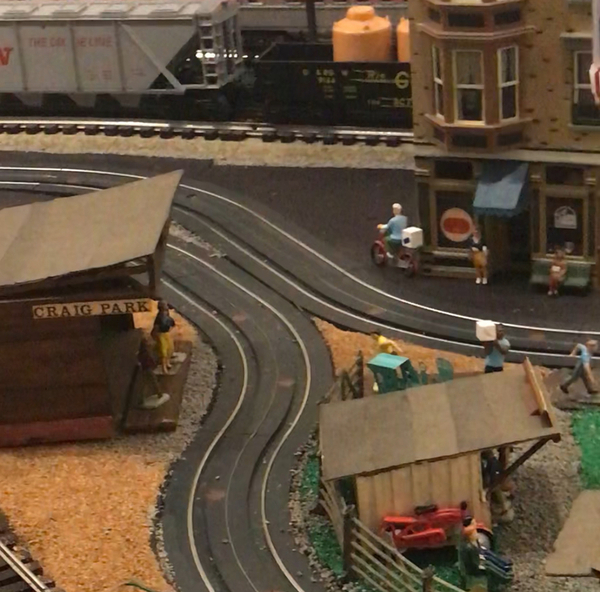
I bought 24 Weaver cars off Ebay years ago for $10 a car. Composit hoppers were a little to far in the past but I couldn't pass up that deal. They were originally PRR hoppers but I had packs of Archer dry transfer letters and just had some fun. Made up a few Milwaukee Road and Rock island hoppers for some coal drags.
Fast Freight, not only do the cars look good. So does the scenery, weathered rails and water tower. Nothing looks out of place. Nicely done.
@Dave_C posted:Fast Freight, not only do the cars look good. So does the scenery, weathered rails and water tower. Nothing looks out of place. Nicely done.
Thank you Dave.
Attachments
@Jesse ferguson posted:
Wow! Excellent work, Jesse!
@Jesse ferguson posted:
Jesse:
That is a SUPERB weathering job!!!! Also, your scenery is excellent! Thank you for sharing this photo. We hope to see more of your work in future editions of Weathering Wednesday.
Had to wet sand someone else's weathering job on these (2) two PRR Ball Herald H21a PRR hoppers on the front track left hand side.
Used 800 grit paper and wet sanded off what was done then applied Pan Pastels. Produced some interesting effects as I couldn't get all the prior weathering done.
While I was there, figured I'd photo the entire kit bashed coal mine tipple scene. Pretty much everything here is weathered, buildings, brick, retaining walls, track, support timbers etc. Built this whole scenery module back in 2018
Attachments
Summer is officially here. I hope that you and your families have some fun activities and trips planned. BUT, with summer also comes sweltering heat!!!!! So, use my cure for heat. Stay indoors where it is cooler and weather your engines, rolling stock, buildings, scenery and post your results here on Weathering Wednesday. I and your fellow forum members are eager to see your see your artistry and learn from your techniques.
But first, here are the forum ground rules:
- Have fun and enjoy!
- Post only photos that you have taken.
- If you post a photo taken by someone else or a copyrighted photo be sure you have express written permission from the photo's owner to post their photo.
- Any individual who posts copyrighted material is subject to legal liability. Furthermore, that individual will be banned from the OGR Forum.
- Please consult the OGR Forum TOS (Terms of Service) for further information regarding copyrights.
I will start today’s Weathering Wednesday with several photos. The first is a Weaver, PRR Mogul ten-wheeler weathered for us by Harry Hieki, of Mt. Ephriam, NJ. I asked Harry for a light weathering job.
The next two photos are of old Stemmers Run station that is currently on the Amtrak (former PRR) mainline in Baltimore County, 5 minutes from my home. It was originally a stop on the Philadelphia and Baltimore Railroad mainline a small railroad that was bought by the Pennsylvania Railroad in the early part of the 20th century to become part of the PRR's trackage to Washimgton D. C. The first photo is as it exists today. The second is a scratch-built model of the station as it would have existed in its period of a working train stop. The photos of this station were few. The model is the best that I could do reproducing the station from several old black and white photos. The model was built for the Lockheed-Martin company's Christmas train display in 2022.
Now it is your turn to show us your weathering artistry as well as how you achieved yours results.
Attachments
@Randy Harrison posted:Summer is officially here. I hope that you and your families have some fun activities and trips planned. BUT, with summer also comes sweltering heat!!!!! So, use my cure for heat. Stay indoors where it is cooler and weather your engines, rolling stock, buildings, scenery and post your results here on Weathering Wednesday. I and your fellow forum members are eager to see your see your artistry and learn from your techniques.
But first, here are the forum ground rules:
- Have fun and enjoy!
- Post only photos that you have taken.
- If you post a photo taken by someone else or a copyrighted photo be sure you have express written permission from the photo's owner to post their photo.
- Any individual who posts copyrighted material is subject to legal liability. Furthermore, that individual will be banned from the OGR Forum.
- Please consult the OGR Forum TOS (Terms of Service) for further information regarding copyrights.
I will start today’s Weathering Wednesday with several photos. The first is a Weaver, PRR Mogul ten-wheeler weathered for us by Harry Hieki, of Mt. Ephriam, NJ. I asked Harry for a light weathering job.
The next two photos are of old Stemmers Run station that is currently on the Amtrak (former PRR) mainline in Baltimore County, 5 minutes from my home. It was originally a stop on the Philadelphia and Baltimore Railroad mainline a small railroad that was bought by the Pennsylvania Railroad in the early part of the 20th century to become part of the PRR's trackage to Washimgton D. C. The first photo is as it exists today. The second is a scratch-built model of the station as it would have existed in its period of a working train stop. The photos of this station were few. The model is the best that I could do reproducing the station from several old black and white photos. The model was built for the Lockheed-Martin company's Christmas train display in 2022.
Now it is your turn to show us your weathering artistry as well as how you achieved yours results.
Great work Randy. I’m almost ready to put my toe in the pool. I have 8 hoppers that I’m preparing to haul sand. They were a blank canvas; I gave them a second coat today to catch all my misses from the first spraying. So I’ll give them a few days to cure then I get the decals out. After that I’ll be ready to age them. Problem is I lost that video that your son Chris provided. I’m not sure what to search for.
One of my MTH PRR I1sa 2-10-0 Decapods…weathered with airbrush early in my O scale career…
Dirty and worn paint…typical Hippo!
Tom
Attachments
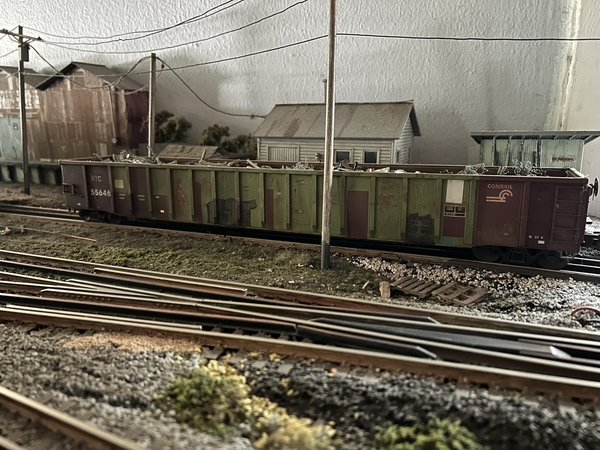
At a local gathering of model railroaders Saturday at my friend Rick's house, I could not pass up photos of these beauties. Its doubtful any of these cars have had a proper inspection. They would be banned on my layout.
Attachments
@pennsyfan posted:Great work Randy. I’m almost ready to put my toe in the pool. I have 8 hoppers that I’m preparing to haul sand. They were a blank canvas; I gave them a second coat today to catch all my misses from the first spraying. So I’ll give them a few days to cure then I get the decals out. After that I’ll be ready to age them. Problem is I lost that video that your son Chris provided. I’m not sure what to search for.
Bob:
Here is the link to Chris' video.
(82) Easy weathering with spray paints. ModelRailroad DIY HowTo - YouTube
I am eager to see your finished products.
I really enjoyed your layout video and the way you have remembered your friends and family members from over the years by dedicating, different scenes to them in the layout. Also, I wish that I had room in my already overcrowded layout for an urban station like your Pennsylvania Station. I vividly remember the real station from my youth. It was an architectural work of art and engineering. Seeing it in the early to mid 1960's being demolished only to be buried in the New Jersy meadowlands was downright heart breaking.
@Rob Leese posted:
Rob:
The appearance of your weathering job is perfect for passenger equipment that most likely ran behind Diesel locomotives. It looks to be the result achieved by your great eye for color and detail coupled with the finesse to resist the temptation of the over-application of weathering materials. BRAVO, sir! You captured the look perfectly.
@Bill Park posted:
Bill:
If heavy weathering is the look one desires, these cars are well done. But other railroads, such as yours, take greater care to maintain their rolling stock.
@Krieglok posted:
Tom:
You have really made a superbly detailed model of the mighty PRR "Hippo" even more wonderful! The look is definitely of a Pennsy freight hauler that has been hard at work on the mainline. BRAVO!!!!!! You have captured "reality" and transferred it to 1:48 scale!
@Krieglok posted:
Tom - your decapod looks absolutely terrific!!! Wonderful weathering job!!!
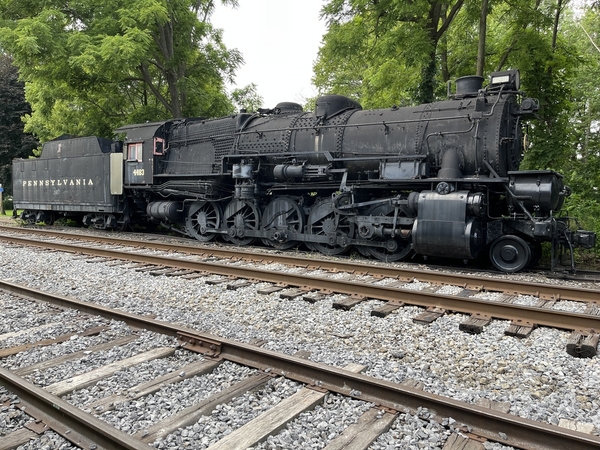
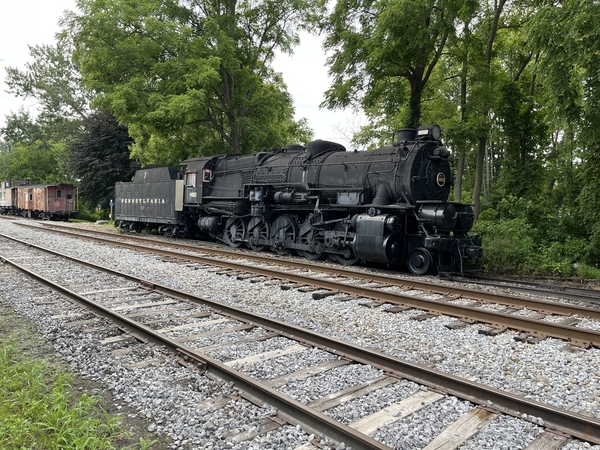
Here are a couple shots of a Pennsy decapod which I took last August when visiting a rail museum/ railroad in Hamburg NY. I think (?) this is the only one still in existence.
Attachments
@Bill Park posted:
Wow Bill!! These cars look like they've been sitting on an abandon siding for decades! At least that's the what my eye interprets them as being. I think they look great!!
@Rob Leese posted:
Excellent work, Rob!!
@Randy Harrison posted:Rob:
The appearance of your weathering job is perfect for passenger equipment that most likely ran behind Diesel locomotives. It looks to be the result achieved by your great eye for color and detail coupled with the finesse to resist the temptation of the over-application of weathering materials. BRAVO, sir! You captured the look perfectly.
IMO, truer words have never been spoken regarding weathering. The best "weathermen" I've learned from will always tell you less is more. So many people just can't resist that temptation to overdo it. I know firsthand as I did the same thing when I got started.
It's really interesting to compare photos of my first attempts from about 10 years ago to my most recent. I don't think those first cars would actually be allowed on the rails in the real world...LOL!!
@trumpettrain posted:
Right you are, Patrick! The very last I1sa, out of 598. I am a member of the group that moved it from Pittsburgh to Hamburg, NY. It has been there for almost 40 years now. It was the face of the WNYRHS in its day.
I spent a couple summer vacations in the early 90’s painting the boiler with primer and black paint! The engine was shuffled over the years from siding to siding by the host railroad. Now it sits on a sinking track.
It’s supposed to end up at the Buffalo Industrial Heritage museum but it seems to be dying a quiet death in Hamburg. At this point, I would like to see it go to the PRR museum in Strasburg.
I have a number of MTH I1s just because of this engine. Obviously, a personal favorite…
Tom
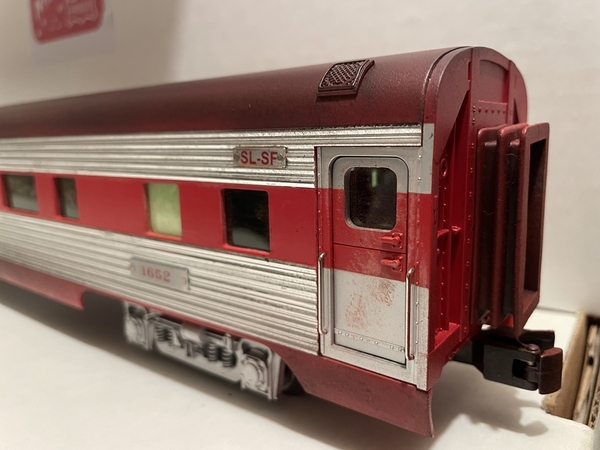
If you look at color photography of Frisco streamlined passenger cars they often look shamefully faded and grimy. This coach lounge, Huntleigh, is still due to receive a rooftop antenna, but most of the weathering has been done in advance. The bright reds weather to become mottled maroon, and the stainless panels become dull and tired looking. This car is part of my METEOR consist conceived long before 3rd Rail’s offering. 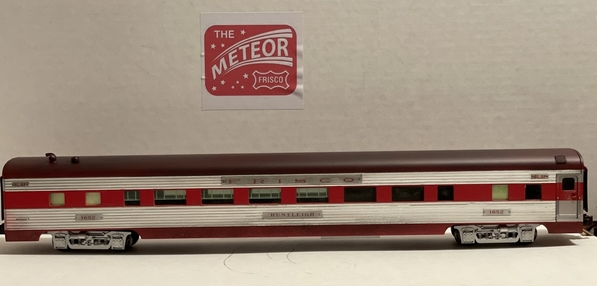

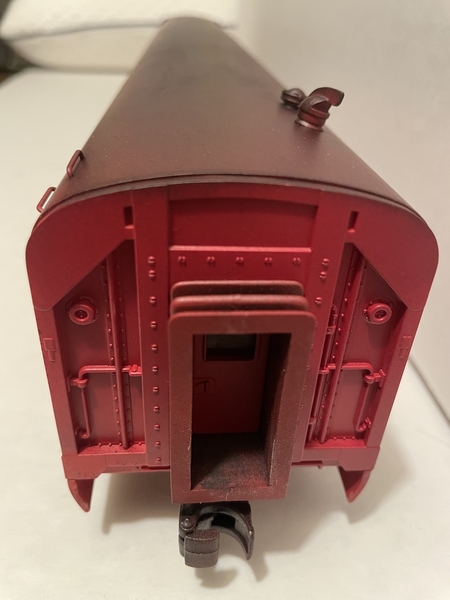
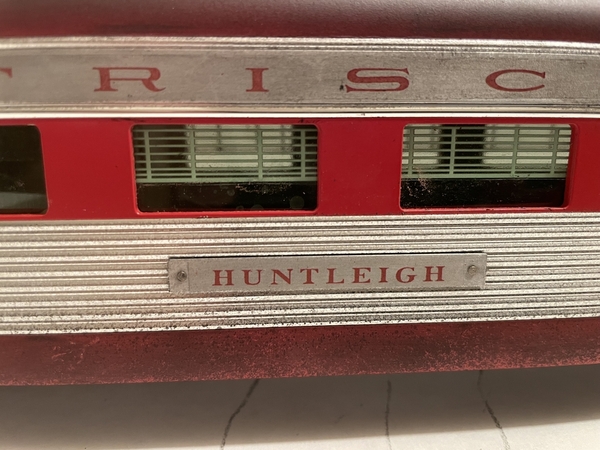
I’m posting this 3 days early as my ranch work will consume me for the next 144 hours.
Attachments
@Krieglok posted:Right you are, Patrick! The very last I1sa, out of 598. I am a member of the group that moved it from Pittsburgh to Hamburg, NY. It has been there for almost 40 years now. It was the face of the WNYRHS in its day.
I spent a couple summer vacations in the early 90’s painting the boiler with primer and black paint! The engine was shuffled over the years from siding to siding by the host railroad. Now it sits on a sinking track.
It’s supposed to end up at the Buffalo Industrial Heritage museum but it seems to be dying a quiet death in Hamburg. At this point, I would like to see it go to the PRR museum in Strasburg.
I have a number of MTH I1s just because of this engine. Obviously, a personal favorite…
Tom
If you send it to the Railroad Museum of Pennsylvania, it will end up like 6755, 3750, and 520!
It is that time of the week again. Time to show off your weathered engines, rolling stock, buildings, and scenery here on Weathering Wednesday, 4th of July Eve, 7/3/2024 Edition. I and your fellow forum members are eager to see your see your artistry and learn from your techniques.
But first, here are the forum ground rules:
- Have fun and enjoy!
- Post only photos that you have taken.
- If you post a photo taken by someone else or a copyrighted photo be sure you have express written permission from the photo's owner to post their photo.
- Any individual who posts copyrighted material is subject to legal liability. Furthermore, that individual will be banned from the OGR Forum.
- Please consult the OGR Forum TOS (Terms of Service) for further information regarding copyrights.
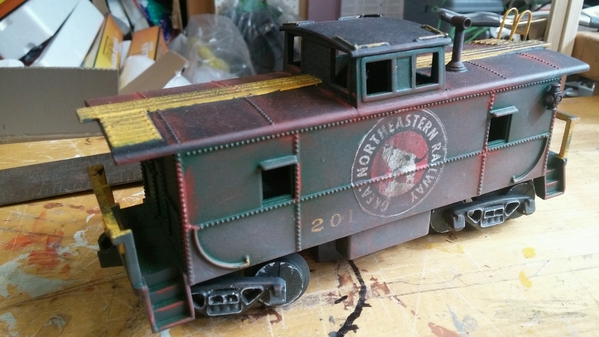
Below are two photos of one of my son Chris’ work on the Great Northeastern Railway’s weathered bobber caboose in Mt. Carroll Yards.
The first photo of is the bobber coupled to the Great Northeastern Railway's (GNR) tank engine weathered by Pat Whitehead. The bobber was also originally weathered by Pat. Chris added the decals and applied additional weathering.
Below is the GNR bobber coupled to a train pulled by the GNR's tank engine, behind a tank car (also Chris' weathering job) and ready to leave the yard.
Now it is your turn to show us your weathering artistry as well as how you achieved yours results.
Attachments
Attachments
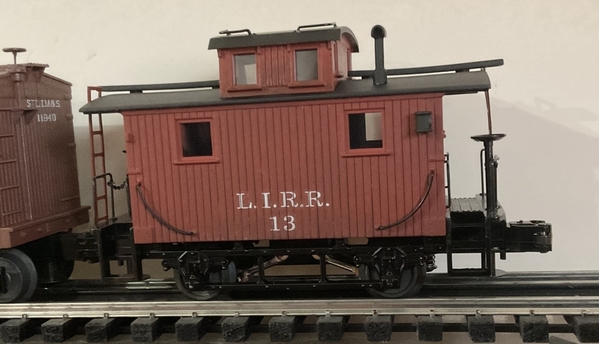
A couple 19th Century cabooses, painted detailed and lightly weathered…
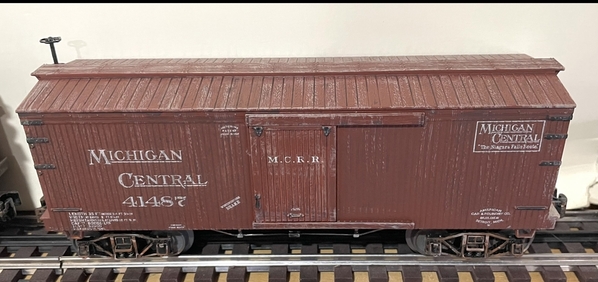
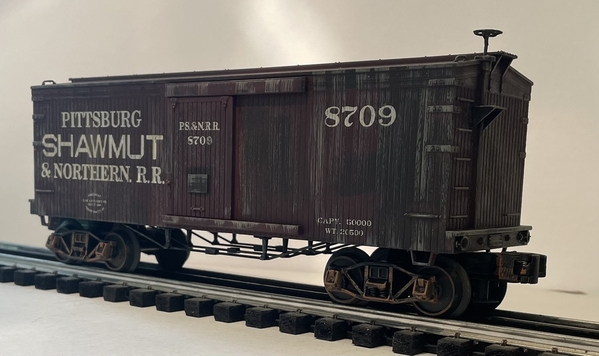
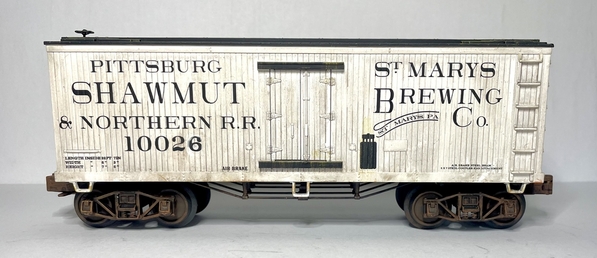
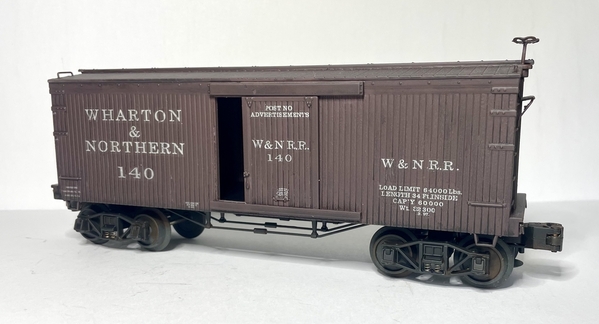
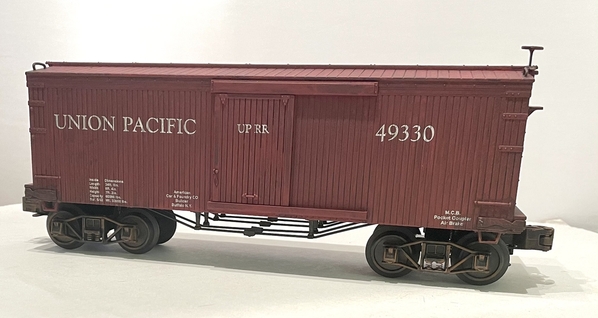
And a MTH 19th Century boxcar, detailed and painted by me…
Tom
Attachments
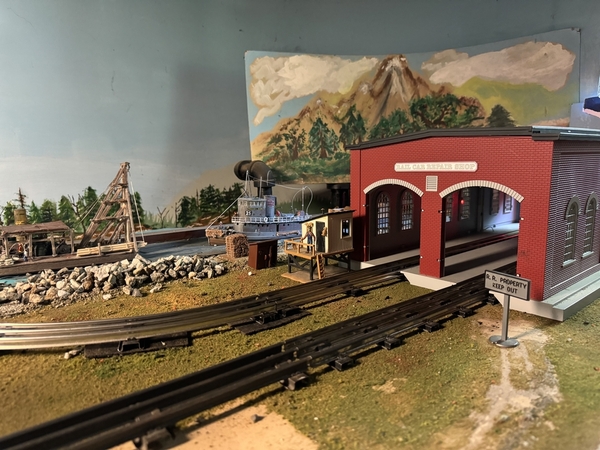
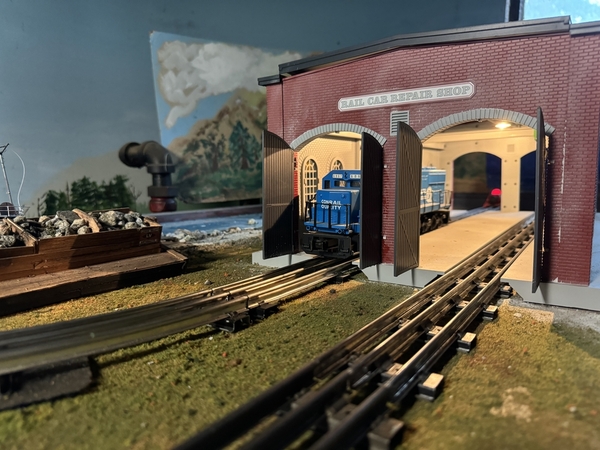
Below is an MTH 2 stall Rail Car Repair shop before it was weathered:
And, here is is after being lightly weathered using talcum powder:
My intent was to weather it using chalk dust, but I couldn’t find any chalk around the house, so I used talcum powder instead. Arnold
Attachments
@Arnold D. Cribari posted:
Arnold:
The weathering is very effective! Bravo!!!!
Talcum powder is a GREAT idea! Your thinking "outside the box" has introduced all of us to a new technique. I can think of many other applications that would lend themselves well to your powder idea.
It is that time of the week again. Time to show off your weathered engines, rolling stock, buildings, scenery and post your results here on Weathering Wednesday, 7/10/2024. I and your fellow forum members are eager to see your see your artistry and learn from your techniques.
But first, here are the forum ground rules:
- Have fun and enjoy!
- Post only photos that you have taken.
- If you post a photo taken by someone else or a copyrighted photo be sure you have express written permission from the photo's owner to post their photo.
- Any individual who posts copyrighted material is subject to legal liability. Furthermore, that individual will be banned from the OGR Forum.
- Please consult the OGR Forum TOS (Terms of Service) for further information regarding copyrights.
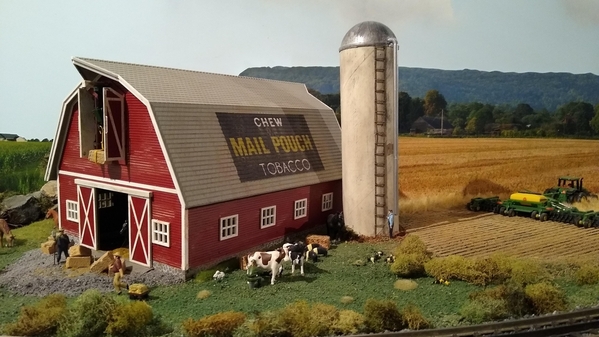
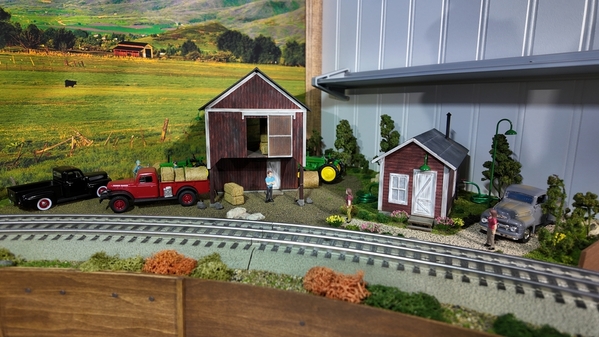
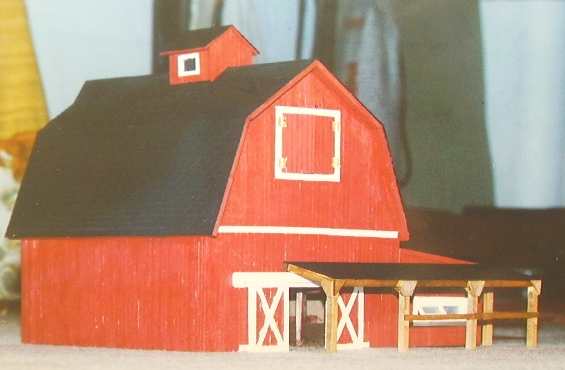
Below are photos of a barn diorama that my son Chris scratch-built and weathered for a friend. The barn was built with square wooden dowels for the frame, popsicle sticks for the wall planks, Wooden coffee stirrers for some of the trim, and 1/4" plywood for the roof underlayment
Now it is your turn to show us your weathering artistry as well as how you achieved yours results.
Attachments
Keeping with the barn theme. My MTH barn that I weathered and customized.
A gold star to anyone who remembers what I made that silo out of.
Attachments
Attachments
After seeing those barns being weathered, I'm going to have to work on my scratch built one too when I get things out in November.
- walt
Attachments
@walt rapp posted:After seeing those barns being weathered, I'm going to have to work on my scratch built one too when I get things out in November.
- walt
Walt, that’s a nice looking barn and a good candidate for a bit of light weathering.
Gene
Thanks so much Randy for creating this wonderful thread and keeping it going!![]() It's amazing how much knowledge is displayed/shared here each week. I, for one, have learned so much! The barn that Chris built looks absolutely terrific!!
It's amazing how much knowledge is displayed/shared here each week. I, for one, have learned so much! The barn that Chris built looks absolutely terrific!!
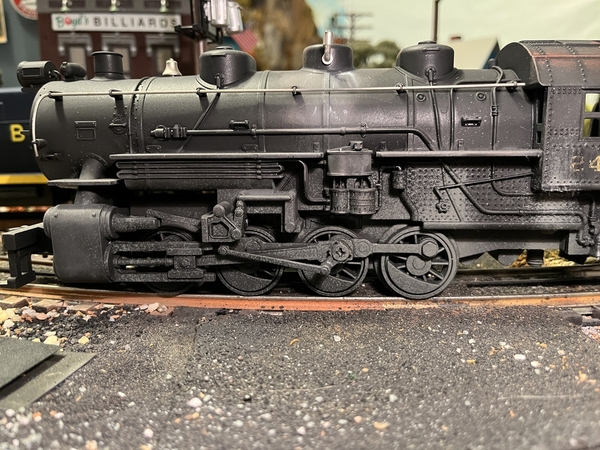
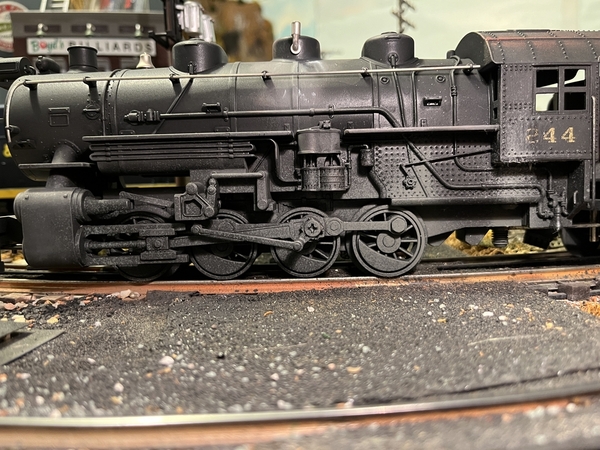
I've been going full tilt boogie with work related projects ( all great and interesting fun ) pretty much since the beginning of January of this year. Unfortunately I've only garnered 12 hours of time working on my layout since the beginning of the year. Yesterday all of that changed when free time actually showed up in my life and low and behold the muse struck! I've been jonesing to weather my MTH RailKing scale N&W 0-8-0 since I bought her new off the Bay earlier this year. Of course my Sunday visit to the Virginia Museum of Transportation, viewing all those wonderful steam locos, boosted my appetite too!
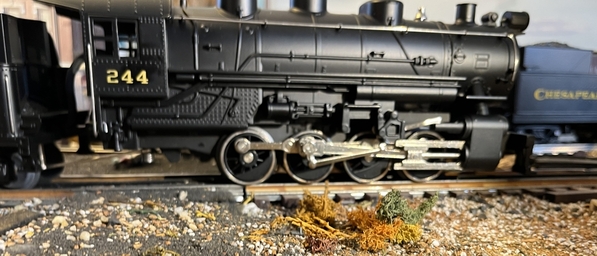
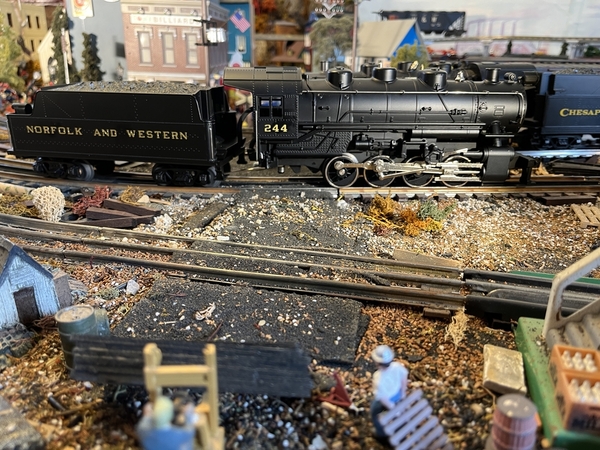
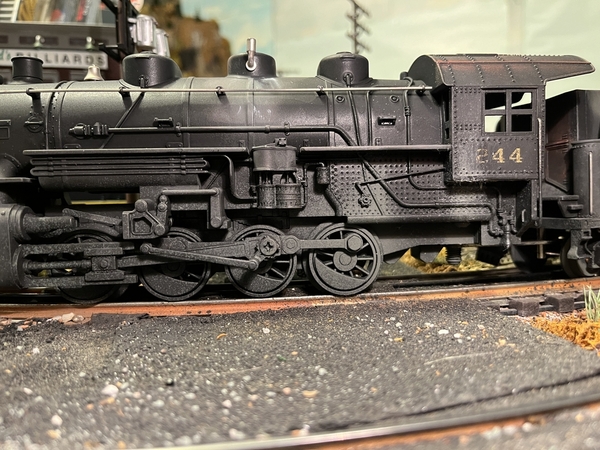
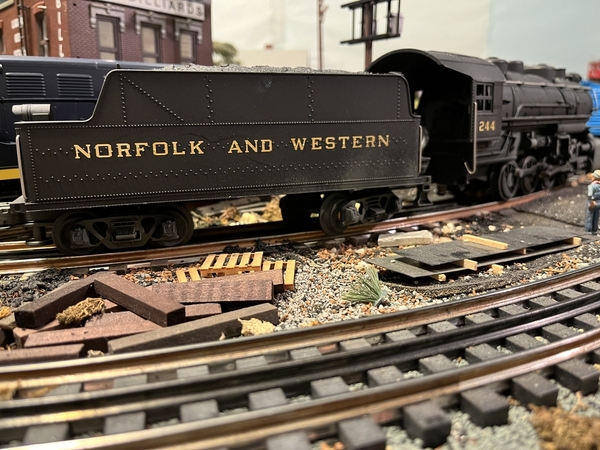
Yesterday, early afternoon I entered my scorching hot train room and snatched the 244 with tender along with a can of Testor's clear lacquer spray paint, and a can of "Flat grime" and took to the outdoors where it was a cool 96 degrees! Good times!! Placing the loco and tender on my shaded outdoor patio table, I began the process of dulling down the factory sheen with several coats of clear lacquer. After I felt satisfied the sheen was no more, I applied just a light touch of flat grime here and there along the tender's trucks and locomotive drive gear/wheels. Later I added some dark grey chalk around the steam dome to give a mineral deposit look. I also applied, by brush, a dark gray pan pastel to the tender starting the brush at the tender's base and brushing upward on an approximate 45 degree angle to imply ballast dust as it might adhere to the tender's sides over the years on the road.
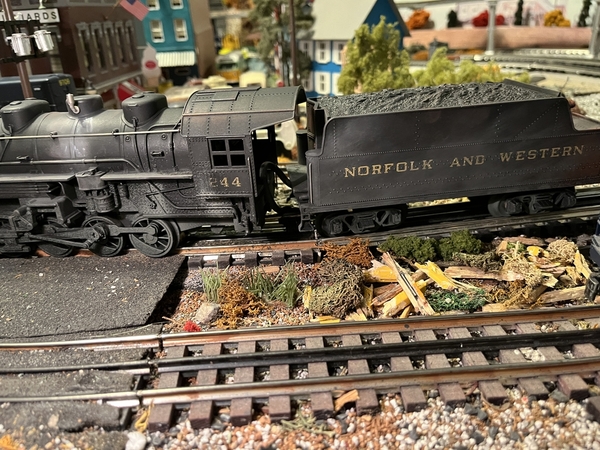
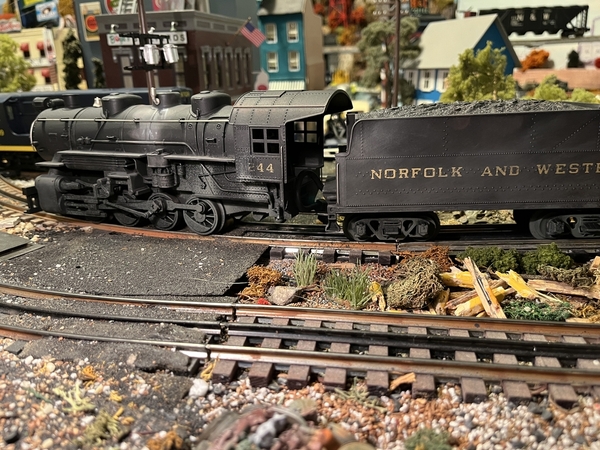
Although my weathering of N&W 244 is not yet complete, here is what I have so far starting with before and after pics. I plan to do some more with pastel chalks and pan pastels and seal that work with another coat of clear lacquer. As this engine was produced by MTH back in the late 1990s, the tender's coal pile is lacking by today's standards so I plan to apply real coal over top of the existing load which I think ( ? ) will work well. I'll also apply coal spillage on the apron and back deck of the tender too. I'm sure O'l Shorty Long was not very accurate with the coal schute ... lol!
So here is where I am in the process. There's still more to do and I'll update my progress. I'm also open to suggestions as to how I can improve this project from any of you who wish to comment. Thanks so much!
This photo shows the engine new out of the box.
Engine and tender new out of the box.
Yesterday after applying several coats of clear lacquer and just a touch of flat grime here and there. Oh BTW that's fireman Shorty Long and engineer Roscoe Updike giving 244 the once over.
Tender after several applications of clear lacquer and just a touch of flat grime. Yep I know the front trucks are off the rails ... sorry bout that but I shot these photos about 1 a.m. this morning.
Attachments
@walt rapp posted:
Walt:
Your barn is SUPERB!!!! It looks as if you and Chris were on the same wave-length when you designed and built it.
Pat:
A big BRAVO to you on your weathering job so far and your GREAT step-by-step explanation of how it was done. Being the owner of some of your weathering projects on my engines and rolling stock, I can say with authority that you are a master at the art! Keep your contributions to Weathering Wednesday coming for all of us to admire.
This is a 50 foot Atlas O sheathed boxcar.
Weathered it about 5 years ago, after watching some YouTube videos on weathering with artist oil paints and Turpenoid. I really liked the way it came out, but haven't had sufficient patience to do any more cars with this method as it takes a couple of days for the oil/turpenoid washes to dry enough to safely handle the car....
At least back then I was smart enough to take a "Before" photo....
Attachments
Chris, love the way those came out. Especially the varied colors in the boards. I’m going to have to pick your brain for a how to.
This is the very first diesel I weathered. Many years ago. All the pics. I’ve seen they were seldom clean. Unless they were being used for a rail fan trip. These engines were built at the start of WW2. They pulled passenger trains in the day and freights at night. Probably not seeing the wash racks very often. I recently dug them out to see if I could put fixed pilots on them. Also got some fresh batteries in them. The pilots were somewhat of a success. The work fine on my 072 curves. But because of there length. They need a 70 ft. car behind them. So they are barred from freight service. At some point I’ll try to match the paint for the stripe and continue it up the pilot.
Attachments
To paraphrase the inscription on the Moynahan Train Hall at Penn Station, New York City, the former central U. S. Post Office building, ‘Neither snow nor rain nor this stinking, excruciating, 101-degree northeast coast heat nor gloom of night stays Weathering Wednesday, 7/17/2024 Edition from making its regular appearance on the OGR Forum.’
So, it is time to show off your weathered engines, rolling stock, buildings, scenery and post your results here on Weathering Wednesday. I and your fellow forum members are eager to see your see your artistry and learn from your techniques.
But first, here are the forum ground rules:
- Have fun and enjoy!
- Post only photos that you have taken.
- If you post a photo taken by someone else or a copyrighted photo be sure you have express written permission from the photo's owner to post their photo.
- Any individual who posts copyrighted material is subject to legal liability. Furthermore, that individual will be banned from the OGR Forum.
- Please consult the OGR Forum TOS (Terms of Service) for further information regarding copyrights.
Not only has my son, Chris has been at it again this week but, my friend and Sunday morning layout assistant, Ms. Zora Maya Keith, has also gotten into the weathering act. Below photos of their work.
The hopper car below was painted, decaled and weathered by Chris.
Great Northeastern Railway (GNR) hopper #487 was immediately dispatched to Mount Carroll Yard and is being added to a train by the GNR's dockside switcher and the switcher's GNR bobber caboose.
The tank car below is the work of Zora Maya. It is her fist serious try at weathering with some coaching by Chris. I am very impressed by her eye for color and restraint when doing a light weathering project. I say a big BRAVA to Zora Maya and look forward to more weathering from her.
Now it is your turn to show us your weathering artistry as well as how you achieved yours results.
Attachments
My small contribution for this week. I need to get busy weathering some trains!
I renumbered this engine and touched up the weathering around the cab…
Tom
Attachments
Randy - That's a great first weathering job by Zora Maya!!![]()
Last week I showed my weathering of a RailKing N&W 0-8-0 number 244 ( The prototype being last reciprocating steam locomotive manufactured in the U.S. ). At that time the coal load was not done. Here are photos ( before & after ) of the coal load ( which I also showed on the most recent edition of Switcher Saturday). Sorry I don't have a better before photo of the coal load. 

The loco after weathering.
After washing off the original factory installed coal load, I brushed on scenic cement to that factory installed load. I then sprinkled on some scenic coal which I had on hand. Here is a photo of the coal bunker with the new load.
The rear tender deck shows spilled coal.
I spilled coal on the tender apron to give a more prototypical effect. I'm sure that back in the steam era, the firemen were not too particular about keeping a clean tender apron. I'm sure that every once in a while there would be a fireman was a case of OCD ... lol!
Attachments
@trumpettrain posted:Randy - That's a great first weathering job by Zora Maya!!

Last week I showed my weathering of a RailKing N&W 0-8-0 number 244 ( The prototype being last reciprocating steam locomotive manufactured in the U.S. ). At that time the coal load was not done. Here are photos ( before & after ) of the coal load ( which I also showed on the most recent edition of Switcher Saturday). Sorry I don't have a better before photo.
The loco after weathering.
After washing off the original factory installed coal load, I brushed on scenic cement to that factory installed load. I then sprinkled on some scenic coal which I had on hand. Here is a photo of the coal bunker with the new load.
The rear tender deck shows spilled coal.
I spilled coal on the tender apron to give a more prototypical effect. I'm sure that back in the steam era, the firemen were not too particular about keeping a clean tender apron. I'm sure that every once in a while there would be a fireman was a case of OCD ... lol!
Pat:
Your weathering of this locomotive is SUPERB!!!!!!! The coal load with the spillage on the tender deck and apron is the "icing on the cake".
BRAVISSIMO!!!!!!!
Attachments
I decided to jump in the weathering pool. Well maybe put my big toe in.
I have 8 of these hoppers that were unpainted red. Here are my first attempts with large decal strips. I did ok with the Farmingdale Traction Trolley; but these were much harder because the trolley had a defined space. I tried some weathering powder. Given the heat and humidity they won’t be getting a dull coat just yet.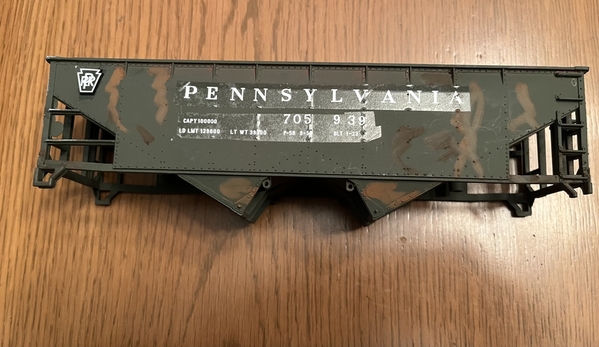
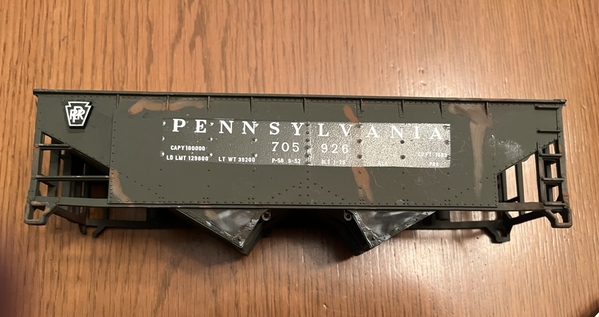
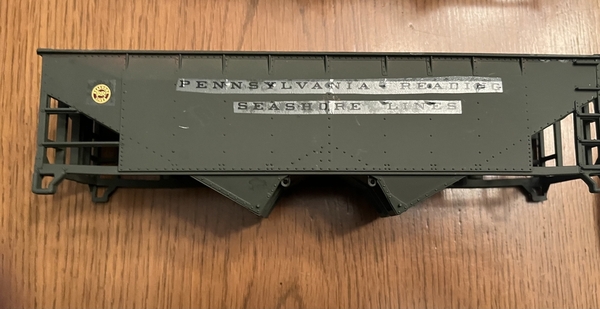


Attachments
@pennsyfan posted:I decided to jump in the weathering pool. Well maybe put my big toe in.
I have 8 of these hoppers that were unpainted red. Here are my first attempts with large decal strips. I did ok with the Farmingdale Traction Trolley; but these were much harder because the trolley had a defined space. I tried some weathering powder. Given the heat and humidity they won’t be getting a dull coat just yet.
I appreciate the likes; but I could really use some suggestions or constructive criticism.
I was born and bred in Brooklyn NY, and lived there for 70 years. You couldn’t insult me if you tried.
Applying an initial coat of clear gloss is not the perfect answer to hiding decal film, but it really helps. Using products equivalent to Decal Sol and Decal Set also make the decals lay down nicely over ribs and rivets, etc.

Your coal hoppers are not light colored like this GARX insulated boxcar, so weathering will not make any molded details stand out to the extent it does with light colors. The biggest mistake I have made doing cars like this is weathering directly after the decal work. At least one application of dullcoat should be made after the decals are applied. Then do any weathering and finish with several more passes of dullcoat. That is the grievous mistake I made with this car below...you can see the edges of the decals instead of achieving a "painted on look".

I created a lot of messes in the past before my methods got better.
Attachments
@Rob Leese posted:Applying an initial coat of clear gloss is not the perfect answer to hiding decal film, but it really helps. Using products equivalent to Decal Sol and Decal Set also make the decals lay down nicely over ribs and rivets, etc.
Your coal hoppers are not light colored like this GARX insulated boxcar, so weathering will not make any molded details stand out to the extent it does with light colors. The biggest mistake I have made doing cars like this is weathering directly after the decal work. At least one application of dullcoat should be made after the decals are applied. Then do any weathering and finish with several more passes of dullcoat. That is the grievous mistake I made with this car below...you can see the edges of the decals instead of achieving a "painted on look".
I created a lot of messes in the past before my methods got better.
Rob:
Rob:
Your work is EXCELLENT!!!! Also, thank you for being a voice of experience with your tips on decaling and weathering. Sharing your knowledge with the rest of us is also what Weathering Wednesday is about. Thank you for being a regular contributor.
@pennsyfan posted:I decided to jump in the weathering pool. Well maybe put my big toe in.
I have 8 of these hoppers that were unpainted red. Here are my first attempts with large decal strips. I did ok with the Farmingdale Traction Trolley; but these were much harder because the trolley had a defined space. I tried some weathering powder. Given the heat and humidity they won’t be getting a dull coat just yet.
Bob:
I am glad to see that you finally took the plunge and tried your hand at weathering and decaling. Rob Leese's post offers many helpful suggestions on both of the aforementioned.
I am a big advocate of Micro Set and Micro Sol. They are available from Amazon.com. When decaling, I use an artist's paint brush to apply both solutions as follows. First, with an artist's paint brush, I apply Micro Set to the area on the model where the decal will be applied. I hold my decal under water for 20 to 30 seconds and, with both hands, position the decal on its wet backing paper over the Micro Set on the model. Then, I gently hold my finger on the right side of the decal and begin to, with my left hand, gently slide the backing paper from under the decal while holding the decal in contact with the model very close or right on its final resting place. Micro Set does soften the decal so final adjustment of the decal's position should be minimal in that the softened decal may tear. Wash your brush in water and dry it with a handy paper towel. Use your brush to apply Micro Sol to the surface and edges of the decal. This will soften the decal even more and the decal will conform to any ribs or rivets on your model and the stark edges will smooth out and make the decal look to be a paint job. LET YOUR DECALS DRY OVER NIGHT BEFORE APPLYING "DULL COTE" OVER THE WHOLE MODEL INCLUDING THE DECALS!!!
I like the idea that you want to include a rust effect to your model. Don't overdo rust and make appear very stark. Think about where rust may appear on your model. On hoppers and boxcars, rust will generally appear on the rivets and the tops of the couplers and on the trucks. If you are using rust colored paint, use a small brush and a "dry brush" technique to apply the paint gently and sparingly to the rivets and on the top of the couplers. For a dry brush, have a paper towel lying next to your pant. dip your bush in the paint and, using a painting motion, gently stroke the brush back and forth on the paper towel removing excess paint. Then use your brush to GENTLY paint over the rivets and the tops of the couplers highlighting the rivets and the high parts of the coupler. On the sides of the car, the rust stains run downward, so start at the top of the car body and gently work downward with your brush. Think about "indicating" rust rather than shouting it. You may have to replenish the paint on your dry brush as you go.
There is much more I can say but, the information above is a good starting point. Keep at it. We all started from scratch at one time. Experience and trial and error are your best teachers. Also, feel free to ask for advice here on Weathering Wednesday.
The pitcher looks in for the signals. He winds up. He delivers it right down the middle (of the week, that is), Weathering Wednesday, 7-24-2024 Edition! So, it is, once again, time for you to swing and drive it over the fence and out of the park with photos of your weathered engines, rolling stock, buildings, scenery and post your results here on Weathering Wednesday. I and rest of the fans are eagerly cheering to see your see your artistry and learn from your techniques.
But first, here are the forum ground rules:
- Have fun and enjoy!
- Post only photos that you have taken.
- If you post a photo taken by someone else or a copyrighted photo be sure you have express written permission from the photo's owner to post their photo.
- Any individual who posts copyrighted material is subject to legal liability. Furthermore, that individual will be banned from the OGR Forum.
- Please consult the OGR Forum TOS (Terms of Service) for further information regarding copyrights.
My son, Chris has been at it again this week. Below is a photo of a K-Line, wood sided, New York Central reefer that he weathered.
Now it is your turn to show us your weathering artistry as well as how you achieved yours results.
Attachments
Hello everyone and happy Weathered Wednesday!
Here is my contribution. Recently finished weathering some wood sided reefers I have had for a few years. I still need to clear coat the PFEs but they are drying nicely. Currently I am working on two more reefers, a two bay hopper and a PRR ore car.
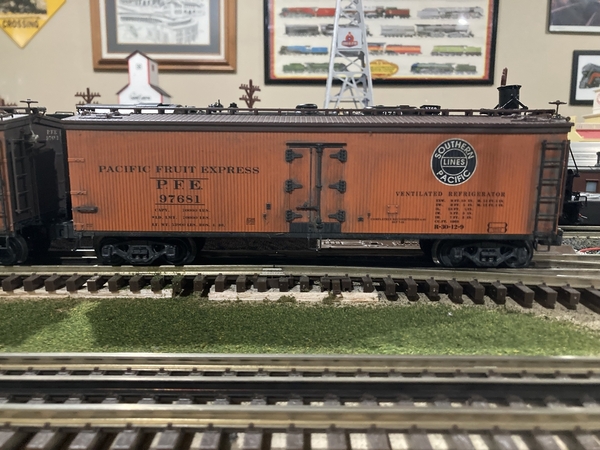

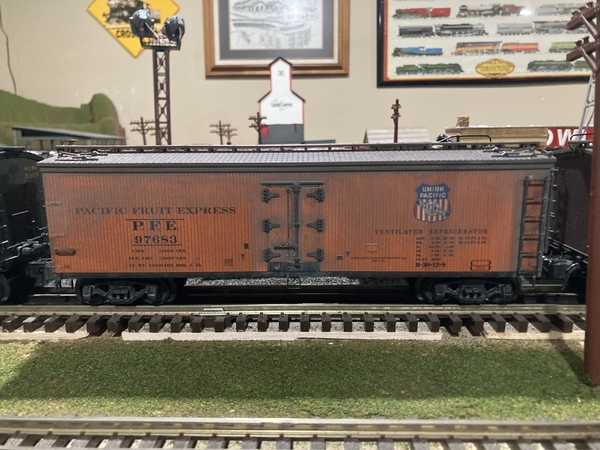

Attachments
@Trainmaster04 posted:
That is SUPERB work!!!! Thank you for sharing your photos.
@Randy Harrison posted:Bob:
I am glad to see that you finally took the plunge and tried your hand at weathering and decaling. Rob Leese's post offers many helpful suggestions on both of the aforementioned.
I am a big advocate of Micro Set and Micro Sol. They are available from Amazon.com. When decaling, I use an artist's paint brush to apply both solutions as follows. First, with an artist's paint brush, I apply Micro Set to the area on the model where the decal will be applied. I hold my decal under water for 20 to 30 seconds and, with both hands, position the decal on its wet backing paper over the Micro Set on the model. Then, I gently hold my finger on the right side of the decal and begin to, with my left hand, gently slide the backing paper from under the decal while holding the decal in contact with the model very close or right on its final resting place. Micro Set does soften the decal so final adjustment of the decal's position should be minimal in that the softened decal may tear. Wash your brush in water and dry it with a handy paper towel. Use your brush to apply Micro Sol to the surface and edges of the decal. This will soften the decal even more and the decal will conform to any ribs or rivets on your model and the stark edges will smooth out and make the decal look to be a paint job. LET YOUR DECALS DRY OVER NIGHT BEFORE APPLYING "DULL COTE" OVER THE WHOLE MODEL INCLUDING THE DECALS!!!
I like the idea that you want to include a rust effect to your model. Don't overdo rust and make appear very stark. Think about where rust may appear on your model. On hoppers and boxcars, rust will generally appear on the rivets and the tops of the couplers and on the trucks. If you are using rust colored paint, use a small brush and a "dry brush" technique to apply the paint gently and sparingly to the rivets and on the top of the couplers. For a dry brush, have a paper towel lying next to your pant. dip your bush in the paint and, using a painting motion, gently stroke the brush back and forth on the paper towel removing excess paint. Then use your brush to GENTLY paint over the rivets and the tops of the couplers highlighting the rivets and the high parts of the coupler. On the sides of the car, the rust stains run downward, so start at the top of the car body and gently work downward with your brush. Think about "indicating" rust rather than shouting it. You may have to replenish the paint on your dry brush as you go.
There is much more I can say but, the information above is a good starting point. Keep at it. We all started from scratch at one time. Experience and trial and error are your best teachers. Also, feel free to ask for advice here on Weathering Wednesday.
Randy, Rob, I finally received the MicroSol and MicroSet yesterday.
Would it do any good to apply either on the 7- 10 day old decals? Thanks again for your help
Does anyone believe that weathering can be done at a high level on a temporary basis, meaning using chalk dust, talcum powder, etc., that can be wiped off?
@pennsyfan posted:Randy, Rob, I finally received the MicroSol and MicroSet yesterday.
Would it do any good to apply either on the 7- 10 day old decals? Thanks again for your help
Bob:
I can't say for sure but, it might be worth a try using the Micro Sol solution on the surface and edges of the decal. If that does not work, if you have duplicates of the decals that you used, remove the existing decals by pressing tape (I use clear packing tape) firmly over the decals. Then, peel the tape off. The decal should also come off stuck to the tape. Next, Apply Micro-Set solution to the area to that the new decal will cover. Apply the new decal over the Micro-Set solution and gently smooth the decal onto your freight car. Then, apply Micro-Sol over the top of the decal and use the brush with which to apply the solution and stroke from the center of the decal to over the decal's edges and along ridges and rivet lines. The decal should then appear to be a "painted-on" lettering. Use several applications of Micro-Sol while the decal is still freshly wet until you are satisfied with the end result. Let the decals dry THOROUGHLY (I usually let them dry overnight). They will look better once they are dry.
Attachments
@Randy Harrison posted:Bob:
I can't say for sure but, it might be worth a try using the Micro Sol solution on the surface and edges of the decal. If that does not work, if you have duplicates of the decals that you used, remove the existing decals by pressing tape (I use clear packing tape) firmly over the decals. Then, peel the tape off. The decal should also come off stuck to the tape. Next, Apply Micro-Set solution to the area to that the new decal will cover. Apply the new decal over the Micro-Set solution and gently smooth the decal onto your freight car. Then, apply Micro-Sol over the top of the decal and use the brush with which to apply the solution and stroke from the center of the decal to over the decal's edges and along ridges and rivet lines. The decal should then appear to be a "painted-on" lettering. Use several applications of Micro-Sol while the decal is still freshly wet until you are satisfied with the end result. Let the decals dry THOROUGHLY (I usually let them dry overnight). They will look better once they are dry.
@Randy Harrison
Randy, It looks to me that the Micro Sol worked. The cars in the first 4 pictures were treated with Microsol. I worked to address the screaming rust on the car in the first two pictures. In the last two pictures I show a car that I used micro set and micro sol to place the decals. Now I have another question how do you patch a decal? If you look at picture 2 you will notice some text missing. That’s because when I tried to change the road number I messed it up. If you look at the car in picture 5 you can see that I cut the decal to change the number. That was a little askew. I thought I could do better on the other side oif I cut part of the number with a knife. I thought it worked; until I tried to place the decal and it got all over the place picture 6 shows that i just applied the decal the way it was.
Attachments
The end of July is upon us and, coincidentally, it falls on the same day as Weathering Wednesday, 7-31-2024 Edition! So, it is, once again, time for you to share with us photos of your weathered engines, rolling stock, buildings, scenery and post your results here on Weathering Wednesday. I and rest of the of this topic’s followers are eagerly looking forward to seeing your see your artistry and learn from your techniques.
But first, here are the forum ground rules:
- Have fun and enjoy!
- Post only photos that you have taken.
- If you post a photo taken by someone else or a copyrighted photo be sure you have express written permission from the photo's owner to post their photo.
- Any individual who posts copyrighted material is subject to legal liability. Furthermore, that individual will be banned from the OGR Forum.
- Please consult the OGR Forum TOS (Terms of Service) for further information regarding copyrights.
My son, Chris has been out of town on vacation this past week and has not had any time to do any new weathering. So, below are some previously displayed photos of The Great Northeastern Railway’s weathered locomotives done for us by Harry Hieki of Mt. Ephriam, New Jersey.
Now it is your turn to show us your weathering artistry as well as how you achieved yours results.
Attachments
@pennsyfan posted:@Randy Harrison
Randy, It looks to me that the Micro Sol worked. The cars in the first 4 pictures were treated with Microsol. I worked to address the screaming rust on the car in the first two pictures. In the last two pictures I show a car that I used micro set and micro sol to place the decals. Now I have another question how do you patch a decal? If you look at picture 2 you will notice some text missing. That’s because when I tried to change the road number I messed it up. If you look at the car in picture 5 you can see that I cut the decal to change the number. That was a little askew. I thought I could do better on the other side oif I cut part of the number with a knife. I thought it worked; until I tried to place the decal and it got all over the place picture 6 shows that i just applied the decal the way it was.
You need to gloss clear coat your entire model first. Then apply decals using the micro-sol and micro- set. When the decals are finished you then clear coat again over the entire model with flat, satin, or semi gloss... Whatever your taste is.
I would also recommend making smaller decals. Looks like you cut out one big piece and applied it. I would say you could have make 7 or 8 decals from that and separately applied all of them to reduce the clear parts.
If you do it this way, you will have zero sheen and evidence a decal is there. There are 8 decals in this photo. The only evidence of a decal is where my where weathering wash bunched up by a few edges.
Attachments
@Ron045 posted:You need to gloss clear coat your entire model first. Then apply decals using the micro-sol and micro- set. When the decals are finished you then clear coat again over the entire model with flat, satin, or semi gloss... Whatever your taste is.
I would also recommend making smaller decals. Looks like you cut out one big piece and applied it. I would say you could have make 7 or 8 decals from that and separately applied all of them to reduce the clear parts.
If you do it this way, you will have zero sheen and evidence a decal is there. There are 8 decals in this photo. The only evidence of a decal is where my where weathering wash bunched up by a few edges.
Thanks Ron! What’s the secret for keeping it all straight?
@pennsyfan posted:Thanks Ron! What’s the secret for keeping it all straight?
Use a fine tip brush or toothpick to move it around as you like. If it does not move freely, tap some water on top.
Use a q-tip or tissue to absorb excess water if needed.
Be careful not to over play with it to avoid rolling or tearing.
Here is a short video. If you don't want to watch the entire thing, just watch from 4:00 to 5:30.
Back to weathering.... Here was an early first try. My friend did not like the shinny toy like look of this K-Line car and asked me to tone it down. This is mostly powder, then clear coat.
The coal load is real coal.
I did not think to take a before photo, but here is a link from our forum sponsor to show what it looked like.
Attachments
@pennsyfan posted:Thanks Ron! What’s the secret for keeping it all straight?
If you can stretch a rubber band around the sides and ends of the car, measure it and get it straight and level. Then use it as a “line” to place the decals.
As Ron suggested, cut the decals smaller. Eliminate all the blank area between the letterings. Start on a glossy surface. This helps hide the decal.
Also use Solvaset or Microsol under the decal when placing it. Blot it lightly and before it dries, apply a bit of solvent on the top of the decal…
A couple weathering subjects.
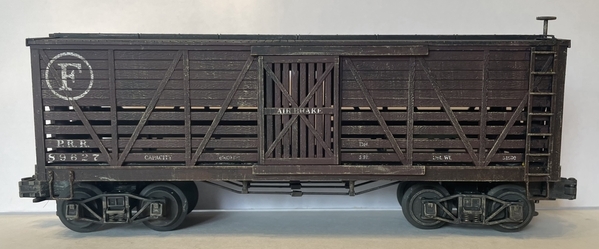
The stock car was weathered with washes and dry brushing to bring out the details…
Then a MTH car I weathered with light wash and brushing rust streaks…
Tom
Attachments
@Ron045 posted:Use a fine tip brush or toothpick to move it around as you like. If it does not move freely, tap some water on top.
Use a q-tip or tissue to absorb excess water if needed.
Be careful not to over play with it to avoid rolling or tearing.
Here is a short video. If you don't want to watch the entire thing, just watch from 4:00 to 5:30.
Ron:
Thanks for sharing your superb, self-made and narrated video! I have used Highball Graphics several times to make custom decals for me. Jim has been GREAT!!! He sends proofs prior to finalization and his turnaround time has been fast.
Also, BRAVO sir on your great custom tank car!!!!!
@Krieglok posted:If you can stretch a rubber band around the sides and ends of the car, measure it and get it straight and level. Then use it as a “line” to place the decals.
As Ron suggested, cut the decals smaller. Eliminate all the blank area between the letterings. Start on a glossy surface. This helps hide the decal.
Also use Solvaset or Microsol under the decal when placing it. Blot it lightly and before it dries, apply a bit of solvent on the top of the decal…
Thanks Tom
I was new to decaling a few years ago. Some great advice already given. I found like a lot of jobs. The right tools sometimes make the job easier. One of my best investments was a very small pair of scissors from Micromark.
They allow to get really close. Another thing I do is try not to leave a square edge. I just think it’s easier to hide the decal. Try to follow the shape of the last letter. These scissors aren’t cheap. But I’ve used them for years and they make the job so much easier.
Any small decals can easily get lost dipping them in a bowl or transferring them with tweezers. Try cutting them out and placing them about where they will be placed on the car.Hold them down with a toothpick and put a few drops of water on it using an eye dropper. Just let it sit in the puddle for about 30 seconds. Once it slides off it shouldn’t have to travel far.
Attachments
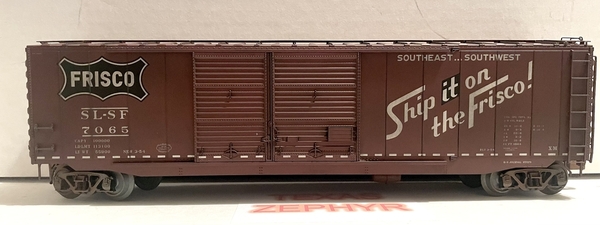
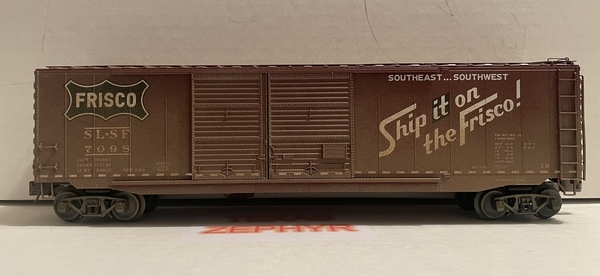
I repainted and decaled this outfit car years ago. After adding a few more decals and heavy weathering it turned out decent. Adding decals to something that has already been dullcoated can be a problem…the old decal film is going to show.

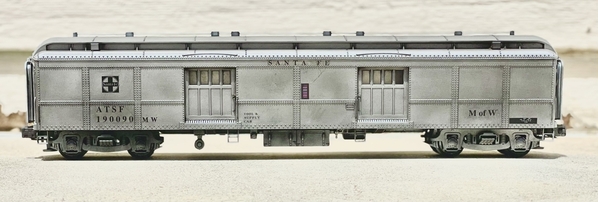

I like to run outfit cars at the end of a freight consist just like we did on the 1:1 railroad.
Attachments
@Dave_C posted:I was new to decaling a few years ago. Some great advice already given. I found like a lot of jobs. The right tools sometimes make the job easier. One of my best investments was a very small pair of scissors from Micromark.
They allow to get really close. Another thing I do is try not to leave a square edge. I just think it’s easier to hide the decal. Try to follow the shape of the last letter. These scissors aren’t cheap. But I’ve used them for years and they make the job so much easier.Any small decals can easily get lost dipping them in a bowl or transferring them with tweezers. Try cutting them out and placing them about where they will be placed on the car.Hold them down with a toothpick and put a few drops of water on it using an eye dropper. Just let it sit in the puddle for about 30 seconds. Once it slides off it shouldn’t have to travel far.
Thank you Dave!
@Rob Leese posted:I repainted and decaled this outfit car years ago. After adding a few more decals and heavy weathering it turned out decent. Adding decals to something that has already been dullcoated can be a problem…the old decal film is going to show.
I like to run outfit cars at the end of a freight consist just like we did on the 1:1 railroad.
Rob, I’m not familiar with the term outfit cars. I see the picture is of a M of W; is that an outfit car?
@pennsyfan posted:Rob, I’m not familiar with the term outfit cars. I see the picture is of a M of W; is that an outfit car?
That’s just the term the Frisco people used. There were various “outfits”…the steel gang, the tie gang, the chat gang, etc.
The “dog days” of summer are here and barking at us in full force! The weather outside is so hot that you can bake a lasagna in your street-side mailbox. But, who wants to go outside in this sweltering heat to do that? Therefore, as a public service, I offer the following solution to beating the heat. Stay inside and weather your engines, rolling stock, buildings, scenery and post your results here on Weathering Wednesday, 8-7-2024 Edition!. I and rest of the of this topic’s followers are eagerly looking forward to seeing your see your artistry and learn from your techniques.
But first, here are the forum ground rules:
- Have fun and enjoy!
- Post only photos that you have taken.
- If you post a photo taken by someone else or a copyrighted photo be sure you have express written permission from the photo's owner to post their photo.
- Any individual who posts copyrighted material is subject to legal liability. Furthermore, that individual will be banned from the OGR Forum.
- Please consult the OGR Forum TOS (Terms of Service) for further information regarding copyrights.
Today, we feature the weathering artistry of my friend and layout helper, Ms. Zora Maya Keith and another great weathering job on the Atlas O tank car, below her photo.
Now it is your turn to show us your weathering artistry as well as how you achieved yours results.
Attachments
Rich:
That is nice work. So, can we count on you for another 40 weeks of great Weathering Wednesday posts?
@Randy Harrison posted:Rich:
That is nice work. So, can we count on you for another 40 weeks of great Weathering Wednesday posts?
Randy, you are very kind. I have one for next week, but after that submission I’ll have to get busy !
@trestleking posted:Randy, you are very kind. I have one for next week, but after that submission I’ll have to get busy !
Rich:
We will look forward to your post next week. I was just joking about 40 more weeks in succession. As you continue to complete your weathering projects, don't forget us here at Weathering Wednesday.
Again, BRAVO on your submission this week!!!!!!
Headed your way, the Federal Forums Regulation Department has detected and is closely monitoring a 10 on the Richter Scale, 7 on the Mohs Scale, 1000 on the Fish Scale and 250 on your bathroom scale, mammoth OGR Forum event. It may be dangerous! OGR Forum members are advised to stay indoors, take shelter in your work rooms and weather your engines, rolling stock, buildings, scenery and post your results here on Weathering Wednesday, 8-14-2024 Edition! I and the rest of the of this topic’s followers are eagerly looking forward to seeing your see your artistry and learn from your techniques.
But first, here are the forum ground rules:
- Have fun and enjoy!
- Post only photos that you have taken.
- If you post a photo taken by someone else or a copyrighted photo, be sure you have expressed written permission from the photo's owner to post their photo.
- Any individual who posts copyrighted material is subject to legal liability. Furthermore, that individual will be banned from the OGR Forum.
- Please consult the OGR Forum TOS (Terms of Service) for further information regarding copyrights.
To begin this week’s festivities, my son, Chris, Executive Director and member of the Great Northeastern Railway’s (GNR) Grime and Schmutz Division, has been hard at work again with yet another addition to the GNR's fleet of freight cars. It involved a complete repainting in GNR freight light green, decaling, and weathering of the latest GNR coal hopper, an MPC era Lionel, O-27 hopper car. The before and after photos are below.
Before:
After:
After the photos were taken, number 249 was assigned to Mt. Carroll Yard and will be added to a freight train on this coming Switcher Saturday.
Now it is your turn to show us your weathering artistry as well as how you achieved yours results.
Attachments
Attachments
On my way to Canyon, TX I pass by one of the PGC elevators in Plainview, TX a couple of times each month. Unfortunately, I do not see these cars anymore...just BNSF three bay covered hoppers. There is an ancient SD unit there used as a car mover. These are all Atlas cars. I have not bought the Lionel version...yet.
Attachments
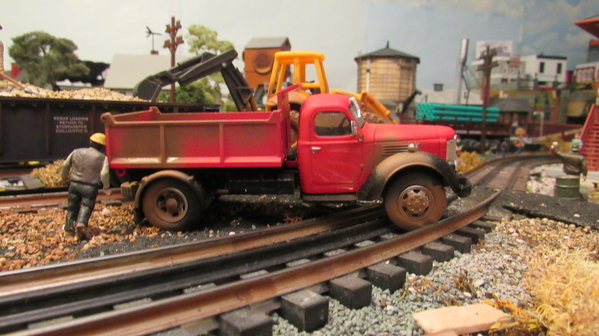
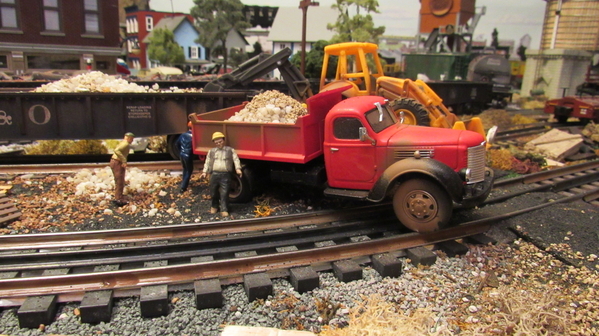
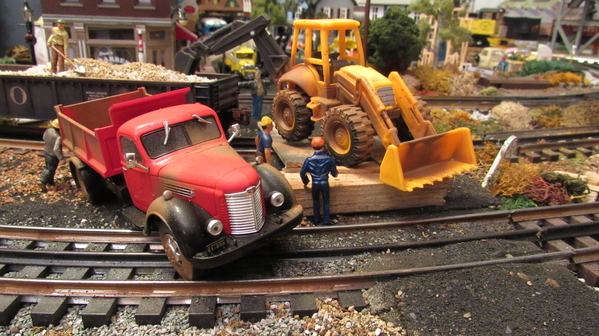
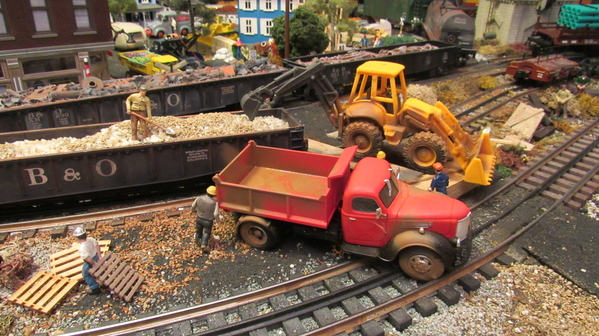
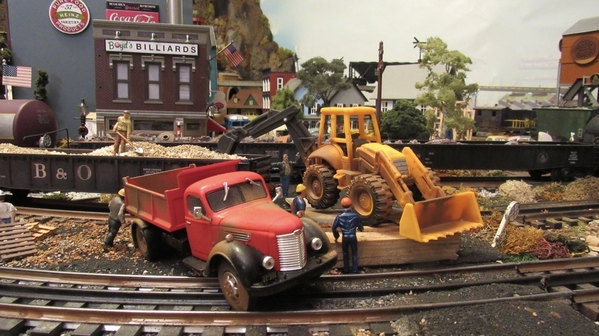
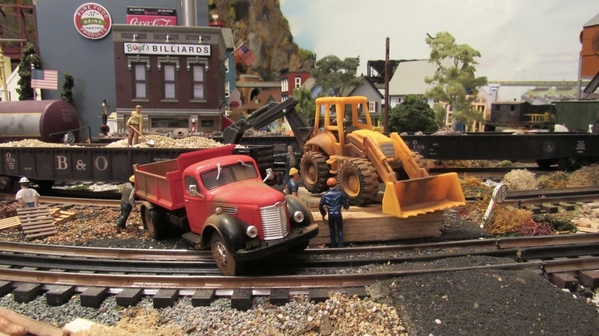
Here's some photos of a dump truck I weathered back in 2018. If it were today, I'd have spent more time on weathering for more detail. However at the time this much weathering created the scenic effect of my intention.
I also weathered the accompanying backhoe using a Floquil earth brown to show mud on the tires of both the dump truck and the backhoe.
Attachments
As another week passes, I hope you were in your work rooms weathering your engines, rolling stock, buildings and scenery. Because it is time to post your results here on Weathering Wednesday’s 8-21-2024 Edition! I and the rest of the of this eminent topic’s followers are eagerly looking forward to seeing your see your artistry and learn from your techniques.
But first, here are the forum ground rules:
- Have fun and enjoy!
- Post only photos that you have taken.
- If you post a photo taken by someone else or a copyrighted photo, be sure you have expressed written permission from the photo's owner to post their photo.
- Any individual who posts copyrighted material is subject to legal liability. Furthermore, that individual will be banned from the OGR Forum.
- Please consult the OGR Forum TOS (Terms of Service) for further information regarding copyrights.
Today, as an opening act, I present for your viewing pleasure, the combined artwork of both my son Chris and close friend, Pat (trumpettrain) Whitehead, in the following photo taken in the Great Northeastern Railroad’s (GNR) Mt. Carroll Yard of a line of the GNR’s ever increasing roster of rolling stock. Pat gets credit for his fine weathering job on the GNR road caboose all of the way to the left in the photo and splits laudits with Chris on the GNR bobber caboose originally weathered by Pat and modified by Chris. The 2 GNR hoppers are Chris’ handywork for repainting, decaling and weathering. BRAVO and thanks to both Pat and Chris!!!!!!!
Now it is your turn to show us your weathering artistry as well as how you achieved yours results.
Attachments
maybe 10 years ago I thought I might enjoy weathering. Tried it for the first time on this cheap plastic starter set flat car. Oh well, I decided after trying that weathering is not my cup of tea. Better left to those that can do it ![]()
- walt
Attachments
@walt rapp posted:
Walt - to my eyes you did a good job weathering this car! It looks like a flat car that sees or has seen decades of heavy use on a logging branch line. Don't underestimate your talents. Weathering model/toy trains and building is process oriented. It evolves over time. I encourage you to keep at it. Remember Thomas Edison didn't invent the light bulb on his first try. Nor was the Mona Lisa Leonardo da Vinci's first painting. We all have to start somewhere! ... just my 2 cents.
Here's a MTH Premier composite hopper I weathered back in 2017. I first sprayed the car in Dulcote ( it was still available back then ) then applied pastel chalk by smudging some on the side of the car ... then spreading it over the surface of each paneled portion with my thumb and fingers .. then working the chalk into hard to get corners with a small dry paint brush. I applied gray pastel chalk to the wheels to replicate the caking of ballast dust. After I was satisfied with the overall look, I applied a coat of Dulcote to seal the pastel chalks.
As a kid I remember often seeing loaded open hoppers loaded with coal on a B&O team track in my hometown. For some reason I always remember the ends of these cars as being quite grime ridden. I tried to replicate that grime here too.
As I now look at the coal load I'm reminded to create a new homemade coal load which will enhance the car's realistic appearance.
Attachments
Walt, don't sell yourself short, that is one weathered car! I think it looks great! If you enjoyed, don't give up! If it was a chore, well I get that as well. My first attempt was a caboose (somewhere in this thread) and I felt like I was to heavy handed on the paints, etc. But it received good reviews. Probably the biggest lesson I learned is to start out light and easy. You can always go back and more. ![]()
@Randy Harrison posted:As another week passes, I hope you were in your work rooms weathering your engines, rolling stock, buildings and scenery. Because it is time to post your results here on Weathering Wednesday’s 8-21-2024 Edition! I and the rest of the of this eminent topic’s followers are eagerly looking forward to seeing your see your artistry and learn from your techniques.
But first, here are the forum ground rules:
- Have fun and enjoy!
- Post only photos that you have taken.
- If you post a photo taken by someone else or a copyrighted photo, be sure you have expressed written permission from the photo's owner to post their photo.
- Any individual who posts copyrighted material is subject to legal liability. Furthermore, that individual will be banned from the OGR Forum.
- Please consult the OGR Forum TOS (Terms of Service) for further information regarding copyrights.
Today, as an opening act, I present for your viewing pleasure, the combined artwork of both my son Chris and close friend, Pat (trumpettrain) Whitehead, in the following photo taken in the Great Northeastern Railroad’s (GNR) Mt. Carroll Yard of a line of the GNR’s ever increasing roster of rolling stock. Pat gets credit for his fine weathering job on the GNR road caboose all of the way to the left in the photo and splits laudits with Chris on the GNR bobber caboose originally weathered by Pat and modified by Chris. The 2 GNR hoppers are Chris’ handywork for repainting, decaling and weathering. BRAVO and thanks to both Pat and Chris!!!!!!!Now it is your turn to show us your weathering artistry as well as how you achieved yours results.
Randy the hoppers look good; really can’t see the cabeese.
@pennsyfan posted:Randy the hoppers look good; really can’t see the cabeese.
Bob:
Only the end of it is in the photo. I just wanted give credit to all whose work is visible or partially visible in the photo. Below are before (my repainting result) and after photos of Pat's work.
Attachments
Thanks for the weathering encouragement. The comment about heavy on the paint was why I didn't care for my first effort. I no longer own any rolling stock that I dare try weathering on - I sold off my 120 car collection and now only own 2 NEW Lionel by MTH tin-plate sets.
- walt
The end of August is upon us. I hope you all had time to spend in your work rooms weathering your engines, rolling stock, buildings, scenery. Because, it is time to post your results here on Weathering Wednesday’s 8-28-2024 Edition, the last edition of the month of August. I and the rest of the of this topic’s followers are eagerly looking forward to seeing your see your artistry and learn from your techniques.
But first, here are the forum ground rules:
- Have fun and enjoy!
- Post only photos that you have taken.
- If you post a photo taken by someone else or a copyrighted photo, be sure you have expressed written permission from the photo's owner to post their photo.
- Any individual who posts copyrighted material is subject to legal liability. Furthermore, that individual will be banned from the OGR Forum.
- Please consult the OGR Forum TOS (Terms of Service) for further information regarding copyrights.
Since my son Chris has been EXTREMELY busy with his job this past week, he has had no time to spend in the Great Northeastern Railway’s shop to complete more of his weathering creations. So, I will get us started with a retrospective selection of Chris’ work.
Now it is your turn to show us your weathering artistry as well as how you achieved yours results.
Attachments
I sorta made a small fib: i did try to weather one other item before I decided weathering is not for me.
- walt
Attachments
@walt rapp posted:
Walt:
I beg to differ with you. The piece in your above photo looks very much like a piece of machinery that has earned its keep for many productive years on construction sites. I like your weathering work! Thank you for sharing it here on this thread.
Here's a few pieces a did pre-2015.
Western Maryland 40 ft boxcar by Weaver. Using Testors Grimmey Black, and pastel chalks.
Here's a MTH RailKing bobber caboose. I used Testor's Clear Coat then Testor's Black Grime to give a nod to use in the steam era. This bobber is on my list of cars for weathering advancement.
Quite some time after weathering the Western Maryland bobber, I weathered this B&O bobber using basically the same technique as used on the Western Maryland ... although I did use pastel chalks on this bobber in addition to the Dullcoat and Black Grime. I think the B&O turned out better than the WM.
Attachments
@Randy Harrison posted:
Thanks Randy. I don't have anything more that I would dare weather. All that I have now are 2 brand new Lionel by MTH tin-plate sets and I wouldn't dare touch those.
= walt
Spring has sprung. Fall will be falling. Christmas is coming fast and your trains are calling. So, answer their call by running to your work rooms and start weathering your engines, rolling stock, buildings, and scenery. Because it is time to post your results here on Weathering Wednesday’s 9-4-2024 Edition, the first edition of the month of September. I and the rest of the of this topic’s followers are eagerly looking forward to seeing your see your artistry and learn from your techniques.
But first, here are the forum ground rules:
- Have fun and enjoy!
- Post only photos that you have taken.
- If you post a photo taken by someone else or a copyrighted photo, be sure you have expressed written permission from the photo's owner to post their photo.
- Any individual who posts copyrighted material is subject to legal liability. Furthermore, that individual will be banned from the OGR Forum.
- Please consult the OGR Forum TOS (Terms of Service) for further information regarding copyrights.
Chris has been in the Great Northeastern Railway’s (GNR) paint shop to complete another of his additions to the ever-increasing fleet of GNR rolling stock, a GNR gondola. Photos of Chris’ work are below.
Now it is your turn to show us your weathering artistry as well as how you achieved yours results.
Attachments
This was a Santa Fe 0-4-0 from Lionel MPC era I did the best to match the color but is much lighter than the black green that I was hoping for. I did use powder weathering colors but after applying satin spray they got less noticeable, added a PW Bell to the boiler, added the railings, marker lights to the tender along with some real coal I broke up and glued in place, painted the fireman and engineer. Painted the inside of the boiler and added new Pennsy water decals. 1931 is used for my moms Birth date.


Attachments
Hi Randy and fellow weathering lovers! Chris did a really nice job on the gon!! The gon's length combined with the weathering gives it a " assigned to the MOW dept. look" ... at least to me.
Here are some of my early weathering projects from back in early 2017/late 2016 when I was just gathering the courage to "de-shine " and "dirty up" my shiny new ( and used ) freight cars.
N&W 50 ton hopper by Weaver. I like how this one turned out. I applied my usual technique of first spraying with Dulcote to take down the shine ... then pastel chalks worked up and down the panels with my finger/thumb and using a small paint brush to get the chalks tucked into the areas where the outside bracing and panels intersect ... used some flat grime paint for the wheels and couplers ... finishing the entire car off with another coat or two of dull coat. I like how it turned out.
Another Weaver 50 ton hopper ... this time Pennsy. This one turned on okay but is a candid for a redo.
This MTH RailKing junk gon was weathered in the same manner as the hoppers above. The junk load is a standard MTH junk load.
This Weaver Santa Fe boxcar is a bit overdone in my opinion, however, back in the 50s/60's I would see a few extremely dirty boxcars within the consist of long freight trains. For this car I got a little too flat black rattle spray can happy .. lol! If I were to do it again, I would have given this car a lite weathering ... however within the context of my layout and the trains I run this car works just fine either within a train or set out on a siding.
This B&O work caboose is one of my first ever weathering attempts which may have actually been don back in early 2015. Again I used a coat or two of Dulcote to take down the shine ... then applied gray chalk. For the trucks I used both rust and gray chalk ... I then sealed the entire car with Dulcote. This car was not my best weathering attempt but one must begin somewhere ... lol!! This car is definitely a candidate for a weathering upgrade, however until that time comes it works within the context of my layout.
A close up of the the front part of the work caboose and the weathered gon.
Attachments
@trumpettrain posted:Hi Randy and fellow weathering lovers! Chris did a really nice job on the gon!! The gon's length combined with the weathering gives it a " assigned to the MOW dept. look" ... at least to me.
Here are some of my early weathering projects from back in early 2017/late 2016 when I was just gathering the courage to "de-shine " and "dirty up" my shiny new ( and used ) freight cars.
N&W 50 ton hopper by Weaver. I like how this one turned out. I applied my usual technique of first spraying with Dulcote to take down the shine ... then pastel chalks worked up and down the panels with my finger/thumb and using a small paint brush to get the chalks tucked into the areas where the outside bracing and panels intersect ... used some flat grime paint for the wheels and couplers ... finishing the entire car off with another coat or two of dull coat. I like how it turned out.
Another Weaver 50 ton hopper ... this time Pennsy. This one turned on okay but is a candid for a redo.
This MTH RailKing junk gon was weathered in the same manner as the hoppers above. The junk load is a standard MTH junk load.
This Weaver Santa Fe boxcar is a bit overdone in my opinion, however, back in the 50s/60's I would see a few extremely dirty boxcars within the consist of long freight trains. For this car I got a little too flat black rattle spray can happy .. lol! If I were to do it again, I would have given this car a lite weathering ... however within the context of my layout and the trains I run this car works just fine either within a train or set out on a siding.
This B&O work caboose is one of my first ever weathering attempts which may have actually been don back in early 2015. Again I used a coat or two of Dulcote to take down the shine ... then applied gray chalk. For the trucks I used both rust and gray chalk ... I then sealed the entire car with Dulcote. This car was not my best weathering attempt but one must begin somewhere ... lol!! This car is definitely a candidate for a weathering upgrade, however until that time comes it works within the context of my layout.
A close up of the the front part of the work caboose and the weathered gon.
They all look good to me Pat. IMO, how can you go wrong with a weathering job whether it’s good, bad or ugly?
Gene
Here’s a couple of buildings I lightly weathered back in the winter of 21-22 when I started my original layout.
Attachments
I don't weather many of my cars, usually limiting it to ones with rather boring stock paint schemes, or any Lionel cars molded in their way-too-bright yellow. Dark cars seem more difficult to get right. I use a combination of flat black and rust red spray cans, and Testors acrylics. I find first spraying paint lightly overall and then gently wiping with paint thinner takes away gloss and gives softer color gradients between struts etc allowing the rust and grime to remain in the nooks and crannies. Have to be careful as the paint thinner will sometimes erase printing and graphics. I'll then dry brush acrylic into corners and areas that typically get more activity like levers and locks and swipe from top to bottom to mimic how rust and dirt tend to wash downwards on the cars. Randomly tapping a dry brush with various colors of rust gives the area between the struts a little character. It's not as fancy as air brushing and the results aren't up to the standards of say Norm's Trains, but they look good at normal distances and add some variety to the consist.
Attachments
Missed last week, but making up for it!
Great weathering work everyone!
Here is my contribution. These are cars I modified and weathered for my 19th century collection…
A MTH factory painted reefer, I detailed and weathered…
A MTH boxcar I repainted, detailed and weathered…
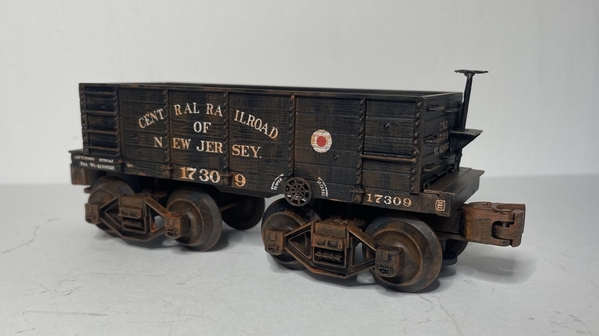
A Industrial Rail ore car. Modified, painted and weathered. This is a fictional car, loosely based on the CRRofNJ ore cars used in the iron mine regions of Northern New Jersey…
Tom
Attachments
@walt rapp posted:
Nah - I've seen - and done - worse. In fact, that el cheapo car looks like crap, which is exactly what you want, is it not? Looks like you're natural who just needs practice.
Some "O" guys buy low-end, grab-bag $1 car HO rolling stock to practice techniques before they attack the grown-up scale's cars. Then you could probably sell the weathered HO items for $2 each at a train show.....
HO - the Practice Scale.
To everyone that posted on yesterday's
Weathering Wednesday - 9/4/2024 Edition
I say a big BRAVO to all of you for your artistry and informative descriptions of your methods and materials used. I was busy yesterday with doctor's appointments and paying respects to a friend's mother who had recently passed away, so I did not have time until today to thank you all for your participation and support of our thread.
Attachments
Today, I don’t start this thread with a “cutesy” opening. This is a very significant day of the year of the year in American history, the anniversary of the day of the infamous terrorist attacks of 9-11-2001. So, take the time to remember those who lost their lives as a result of the 9-11 attacks, the heroics of the passengers that sacrificed their lives by taking down a plane in a field in Pennsylvania that was headed for the White House, and the bravery of the first responders that answered the call of duty and worked tirelessly for many days. Also, remember the resiliency of America as it recovered from the tragedy, returned to its former self and remains steadfast against terror to this day.
I now step down from my soap box and get to the business at hand, Weathering Wednesday. I hope that you all have had time to spend in your work rooms to weather more of your engines, rolling stock, buildings, scenery. Because it is time to post your results here on Weathering Wednesday’s 9-11-2024 Edition. I and the rest of the of this topic’s followers are eagerly looking forward to seeing your see your artistry and learn from your techniques.
But first, here are the forum ground rules:
- Have fun and enjoy!
- Post only photos that you have taken.
- If you post a photo taken by someone else or a copyrighted photo, be sure you have expressed written permission from the photo's owner to post their photo.
- Any individual who posts copyrighted material is subject to legal liability. Furthermore, that individual will be banned from the OGR Forum.
- Please consult the OGR Forum TOS (Terms of Service) for further information regarding copyrights.
This week’s kick-off star is once again, Ms. Zora Maya Keith, my friend and twice-a-week layout companion and helper. Here is another, lightly weathered tank car that she accomplished with a dry brush technique.
Now it is your turn to show us your weathering artistry as well as how you achieved yours results.
Attachments
Attachments
Attachments
Attachments
@Dave Ripp. posted:
Hi Dave, just curious did you add the door and then weather it; or did you weather the existing door. When I looked online, the only Menards station I found that looked similar to yours was the one that copied Woodland Scenics station that had the outdoor lift. Either way nice job.
Bob, thank you, I removed the yard on the side on the building stock station. I cut strips of wood for a frame and copied a door off google images. The door is what my dad would have called good from far but far from good. I do now have a door to fit the opening and will use the same image on it. I removed most of the signs and changed the pumps which were key chains and the perfect size. On a side note, it could have been a Woodland Scenic unit, but I bought it at Menards and can't remember.
Attachments
@Dave Ripp. posted:Bob, thank you, I removed the yard on the side on the building stock station. I cut strips of wood for a frame and copied a door off google images. The door is what my dad would have called good from far but far from good. I do now have a door to fit the opening and will use the same image on it. I removed most of the signs and changed the pumps which were key chains and the perfect size. On a side note, it could have been a Woodland Scenic unit, but I bought it at Menards and can't remember.
Dave, thanks for the additional pictures; it’s a really nice project.
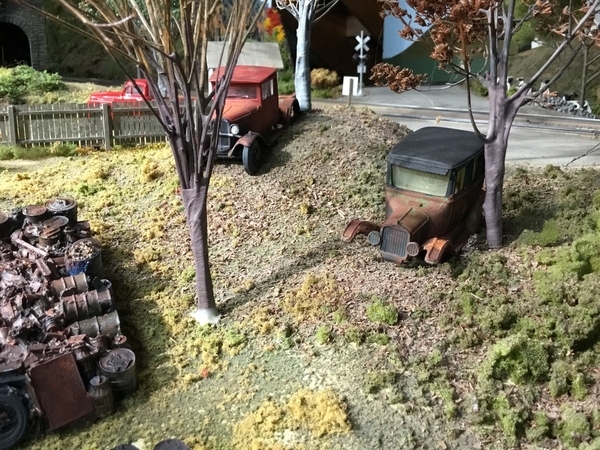
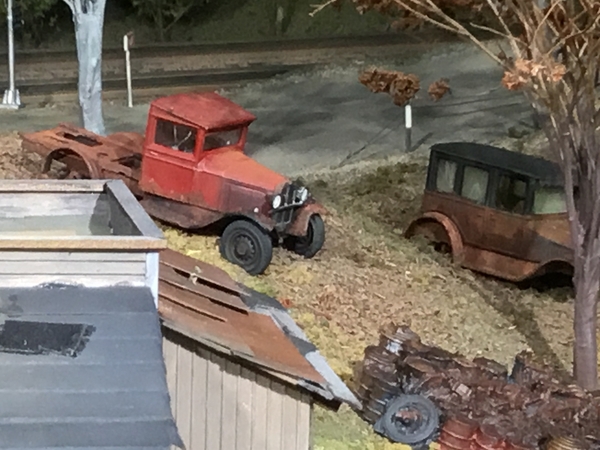
After completing my Bar Mills kit Bull’s Salvage. I got it placed and started working on the scene itself. I started out rusting out two older vehicles. My layout is based around 1950 so I didn’t want anything to new. I used a different approach on these. I blasted the paint with an air eraser using a mild grit. Faded the paint and dulled any chrome. Also gives it a little tooth for the weathering to adhere to. Then used tube acrylics and stipled in some rust colored chalk. It’s a start and like any junk yard. It will grow over time.
Attachments
My kit bashed park buildings shown here at the suggestion of Randy Harrison.
https://ogrforum.com/topic/726...4#185846712043337074
A bit of history; the balsa wood is from the 1950s. My cousin had an HO layout and the bundle of balsa was in his stock. When my Dad helped dispose of his layout he kept the wood. At some point I acquired the bundle.
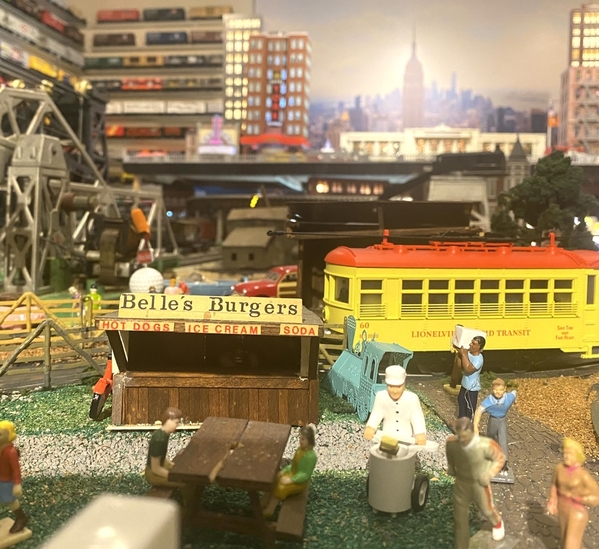
In the early 1980s my friend asked me to build a trolley track from his main level which was 40 ft long to a new second level at one end. The main level terminal was already in place. I asked what was the destination going to be. He said made up something. I proceeded to make the park buildings out of that balsa. I made the trolley station, a restroom and a burger stand. I named the burger stand Belle’s Burgers after my wife Isabel; and the whole park after our little guy that passed away a few years earlier. I used best guess overall measurements and then converted to 1/4 scale. I stained the balsa having no idea how quickly it would soak up the stain. I used black sandpaper to simulate roofing paper. The burger stand was unique because there was a limited amount of ribbed pieces available. When my friend passed away in 1999 I asked if I could have the buildings. They were in storage for about 15 years. The trolley station roof warped a little. It’s on the per verbal list.
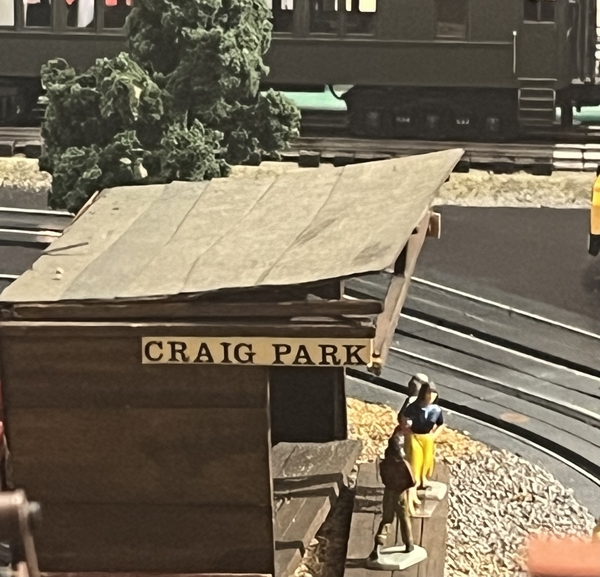
Attachments
@pennsyfan posted:My kit bashed park buildings shown here at the suggestion of Randy Harrison.
https://ogrforum.com/topic/726...4#185846712043337074
A bit of history; the balsa wood is from the 1950s. My cousin had an HO layout and the bundle of balsa was in his stock. When my Dad helped dispose of his layout he kept the wood. At some point I acquired the bundle.
In the early 1980s my friend asked me to build a trolley track from his main level which was 40 ft long to a new second level at one end. The main level terminal was already in place. I asked what was the destination going to be. He said made up something. I proceeded to make the park buildings out of that balsa. I made the trolley station, a restroom and a burger stand. I named the burger stand Belle’s Burgers after my wife Isabel; and the whole park after our little guy that passed away a few years earlier. I used best guess overall measurements and then converted to 1/4 scale. I stained the balsa having no idea how quickly it would soak up the stain. I used black sandpaper to simulate roofing paper. The burger stand was unique because there was a limited amount of ribbed pieces available. When my friend passed away in 1999 I asked if I could have the buildings. They were in storage for about 15 years. The trolley station roof warped a little. It’s on the per verbal list.
Bob:
Your scratch-built structures fit in perfectly with Craig Park and are a welcome addition to our Weathering Wednesday thread! Your story behind the naming of your structures is also quite touching and heart-warming. Thank you for this submission.
Now hear this! Now hear this! Report to your battle stations and man your air brushes, spray cans, chalks and pan pastels! Our objective has been spotted on the radar screen and is headed this way! Weathering Wednesday!!!!
I hope that you all have had time to spend in work rooms and weathered more of your engines, rolling stock, buildings, scenery. Because it is time to post your results here on Weathering Wednesday’s 9-18-2024 Edition. I and the rest of the of this topic’s followers are eagerly looking forward to seeing your artistry and learn from your techniques.
But first, here are the forum ground rules:
- Have fun and enjoy!
- Post only photos that you have taken.
- If you post a photo taken by someone else or a copyrighted photo, be sure you have expressed written permission from the photo's owner to post their photo.
- Any individual who posts copyrighted material is subject to legal liability. Furthermore, that individual will be banned from the OGR Forum.
- Please consult the OGR Forum TOS (Terms of Service) for further information regarding copyrights.
We will get started with another creation by my friend as well as Thursday and Sunday mornings layout helper, Ms. Zora Maya Keith. She beautifully, lightly weathered the New York, New Haven and Hartford wood-sided refrigerator car shown in the before and after photos below.
Now it is your turn to show us your weathering artistry as well as how you achieved yours results.
Attachments
Attachments
@Krieglok posted:
Tom - The "well worn ... exposed to the elements for decades " look you gave this car is phenomenal !!! I do believe this is a MTH RailKing caboose? To my eye you've upgraded it to a RailKing King of Kings caboose!
@Maxandy posted:
I would say that you aced those signs.
Nice job.
@pennsyfan Thanks for the feedback Bob. I would like to start constructing buildings and such and now I'm looking for a decent laser cutter/engraver. Kind Regards......Keith
Tom, Great work on the NYC caboose. I usually replace the marker lamps with lighted ones. As much for looks as function. It looks like yours still has the factory lamps. Amazing what a little paint does for them. Something I never considered. It really brings them into scale. Well Done.
@Maxandy posted:@pennsyfan Thanks for the feedback Bob. I would like to start constructing buildings and such and now I'm looking for a decent laser cutter/engraver. Kind Regards......Keith
Keith, I think that question would best be asked over on Scenery and Structures. Pull up the directory and scroll down.
@Dave_C posted:Tom, Great work on the NYC caboose. I usually replace the marker lamps with lighted ones. As much for looks as function. It looks like yours still has the factory lamps. Amazing what a little paint does for them. Something I never considered. It really brings them into scale. Well Done.
Thanks for your contribution to todays edition. Also. where do you get your lighted marker lamps? I have been looking for such a source for years. Thanks for any information and leads.
@Maxandy posted:
These photos show some phenomenal weathering skills!!! Please share some of your methods of achieving the different results in the above photos. You are already well on your way to your goal mentioned above if not there now. BRAVO, sir!!!!!!
Randy, lately I’ve been buying them on eBay. You might find them also at Trainz. They are made by Tomar. Adlake marker lamps. They are available with LED’s or 1.5v bulbs. Check your prototype as there are a couple variations of the lens colors available.
On this particular project. I find a piece of plastic square stock and sand it till it fills the factory hole. Glue it in place. With the right size bit. It’s pretty much a press fit.
Attachments
Attachments
Randy - You are very kind to say that. I'm thrilled that I can start to give back to the board in some small way since all I have bneen able to do to date is take tips and techniques from everyone here. Okay here it goes:
I purchased a variety of balsa and basswood to play with. I think I improved when I slowed myself down and just enjoyed the practice. If something did not work out I just started over and put that new knowledge in the bank.
Billboard:
I tried to copy a picture of an old tyme billboard I found on that net.
1. Find a 1950s add that looked good to me and print it out on regular ink jet printer. Took a few tries and paper to get the exact size I wanted.
2. Lightly sand the paper on the back unti I started to see very small holes in the paper.
3. Prep the backboard(basswood) prime and brace. The backboard was slightly larger than the picture to allow for a boarder to go around it
4. Use other sections of basswood for support on the back and the walkway in front. For the walkway, I wanted to show the planks all marked up from the workman who had to go up there and past on the advertisment. To do that I first stained the walkway with "Medium Cherry Brown" from VETERO. Then after a few coats of that, I painted over it with Avocodo Green and Black Acrylic Paints mixed together and some drops of water.
5. Once the walkway was dry, I used an exacto knife and scraped away some of the paint to make it look like it was worn out from workman walking back and forth over it.
6. The rest of the structure was weathered with a very light dusting of brown and black chalk. I also slightly dusted(chalk) the advertisement itself.
7 I found the lights for the billboard on ebay searching for "O scale lighting"
Lehigh Valley Anthracite:
1. I followed the procedure as outlined by "Jason Jenson Trains" on youtube. He is a really good artist working in HO scale. https://youtu.be/eiER-5bD_cM?si=MS1c1raGWJmohAFM. I also watch Norms Trains for ideas and techniques.
Coke Sign on Old Building
1. Purchased some sheets of o scale clapboard and roughed up the raw board with bristle brush and lifed a few boards off the piece by taking a razor and sliding it uner the clapboard and lifting the raxor up to force up the clapboard.
2. I did not prime the wood. I used bracing and it seemed to prevent warping. I also wanted to play with "Crackle Medium" from folkArt. I put down a think coat toward the bottom since that area would be in contact with the ground and start to rot the wood. After the Crackle medium was dry, I put down a watered down version of "Antique White from folkArt running the brush always along the c;apboard.
3. When that dried I started to lay down coats of "Swamp Rot" from VETERO on the bottom.
4. Dusted everything with a light coating of black pastels and rubbed it with my fingers. And that was it.
Please let me know if you have any questions.
@Dave Ripp. posted:
Dave that freight come with the car or did you make, very nice! Mark
@Sitka posted:Dave that freight come with the car or did you make, very nice! Mark
Mark, I purchased those on eBay. {O scale pallet load of Sakrete sacks 1/48}
@Krieglok posted:
Thanks Patrick! It is an MTH caboose that I practiced some weathering upon, early in my O scale career…lol.
@dave c. I wasn’t thinking detail improvement at the time. I definitely would now. I didn’t care for the existing markers when I used the caboose to practice on. I would like to install a single pair of Adlake markers like the Tomar type you recommended.
Tom
Thank you VERY much for your GREAT post with your detailed descriptions of how you achieved your weathering and aging effects!!!
You included products that were new to me and will possibly solve several effects that I have always wanted to accomplish, one of which is crackling old paint. I did google searches on Vetero and Crackle Medium. They are both now included on my "Scenery Sources" spreadsheet. Also, I love your idea of lightly sanding small holes in the back of paper signs to simulated years of aging.
I have compiled a MS Word document combining your photos and your tips and techniques into one document. You and your posts are worth their weight in GOLD!!!
Fall has fallen 3 days ago. The weather is getting cooler. Christmas, 2024 is approaching rapidly. Not that I have any qualifications to do so (but that has never stopped me in the past) I, as the self-appointed Grand Poohbah of this thread, officially declare that the holiday train season is opened. So, if you have not done so already, start working in earnest on your train layouts.
In light of this proclamation, I hope that you all have had time to spend in your work rooms and weathered more of your engines, rolling stock, buildings, scenery. Because it is time to post your results here on Weathering Wednesday’s 9-25-2024 Edition. I and the rest of the of this topic’s followers are eagerly looking forward to seeing your artistry and learn from your techniques.
But first, here are the forum ground rules:
- Have fun and enjoy!
- Post only photos that you have taken.
- If you post a photo taken by someone else or a copyrighted photo, be sure you have expressed written permission from the photo's owner to post their photo.
- Any individual who posts copyrighted material is subject to legal liability. Furthermore, that individual will be banned from the OGR Forum.
- Please consult the OGR Forum TOS (Terms of Service) for further information regarding copyrights.
Ms. Zora Maya Keith is again in the Great Northeastern Railway’s (GNR) back-shop spotlight. She has finished weathering a Plasticville switch tower that she so masterfully painted in Pennsylvania Railroad colors. In honor of her GREAT painting and weathering work, the GNR is naming the tower “Zora Tower” or “Z Tower”. Photos of the finished product are below.
Now it is your turn to show us your weathering artistry as well as how you achieved yours results.
Attachments
Zora Tower looks fabulous!!!! You should have Zora Maya weather a second tower and name it M Tower for Maya.
Here is a short B&O MOW train I weathered back in 2020. I think? ... I may have shown this train before. Sorry if it's a repeat. The junk load is my own doing. I wanted something that looked unique, so I scrounged around my junk pile, which exists as a scene on my layout, and came up with the contents shown in the gondola.
The locomotive, gondola, and work caboose were all weathered using pastel chalks and dullcote. The locomotive and work caboose also got a lite spray of grimy black here and there.
Attachments
Attachments
Attachments
@trumpettrain @RandyH Guys this is really nice work. I'm finally ready to start weathering the track in the yards. Lots of coal will be on the ground! I'll submit photos when I'm done.
@Maxandy posted:@trumpettrain @RandyH Guys this is really nice work. I'm finally ready to start weathering the track in the yards. Lots of coal will be on the ground! I'll submit photos when I'm done.
We are looking forward to your photos. Also, a description of your process and materials used would be good to share us.
@Randy Harrison posted:Fall has fallen 3 days ago. The weather is getting cooler. Christmas, 2024 is approaching rapidly. Not that I have any qualifications to do so (but that has never stopped me in the past) I, as the self-appointed Grand Poohbah of this thread, officially declare that the holiday train season is opened. So, if you have not done so already, start working in earnest on your train layouts.
In light of this proclamation, I hope that you all have had time to spend in your work rooms and weathered more of your engines, rolling stock, buildings, scenery. Because it is time to post your results here on Weathering Wednesday’s 9-25-2024 Edition. I and the rest of the of this topic’s followers are eagerly looking forward to seeing your artistry and learn from your techniques.
But first, here are the forum ground rules:
- Have fun and enjoy!
- Post only photos that you have taken.
- If you post a photo taken by someone else or a copyrighted photo, be sure you have expressed written permission from the photo's owner to post their photo.
- Any individual who posts copyrighted material is subject to legal liability. Furthermore, that individual will be banned from the OGR Forum.
- Please consult the OGR Forum TOS (Terms of Service) for further information regarding copyrights.
Ms. Zora Maya Keith is again in the Great Northeastern Railway’s (GNR) back-shop spotlight. She has finished weathering a Plasticville switch tower that she so masterfully painted in Pennsylvania Railroad colors. In honor of her GREAT painting and weathering work, the GNR is naming the tower “Zora Tower” or “Z Tower”. Photos of the finished product are below.
Now it is your turn to show us your weathering artistry as well as how you achieved yours results.
Randy, Zora tower looks great. I asked my Son Keith (a train engineer) about people’s names on towers. The most significant one is Harold that controls the rails between Penn Station and Sunnyside yard. He said that they name them after the person that designed the interlocking. So I put Keith on this tower because I wasn’t going to put my own name on there.
Staying on course. Here is a tower that I painted. The only weathering so far is a patched roof. I got the idea while visiting in Kingston NY. There’s an estuary off the Hudson River and there’s a dock with a harbor master. Here is my version using a P’ville building.
i


Attachments
We discuss applying decals here, i think it’s ok to ask this here. K4 doesn’t have the decals I need; is there a custom shop?
Bob:
Contact me by E-Mail at hbcrandy@aol.com. I have a suggestion, but it is not an OGR Forum advertiser.
Fall is in the air. The York train meet is imminent. Christmas, 2024 is approaching rapidly. Your trains need attention. So, if you have not done so already, start working in earnest on your train layouts.
I hope that you all have had time to spend in your work rooms and weathered more of your engines, rolling stock, buildings, scenery. Because, it is time to post your results here on Weathering Wednesday’s 10-2-2024 Edition, the first in the month of October. I and the rest of the of this topic’s followers are eagerly looking forward to seeing your artistry and learn from your techniques.
But first, here are the forum ground rules:
- Have fun and enjoy!
- Post only photos that you have taken.
- If you post a photo taken by someone else or a copyrighted photo, be sure you have expressed written permission from the photo's owner to post their photo.
- Any individual who posts copyrighted material is subject to legal liability. Furthermore, that individual will be banned from the OGR Forum.
- Please consult the OGR Forum TOS (Terms of Service) for further information regarding copyrights.
I will kick off this week’s edition with Ms. Zora Maya Keith’s wonderful weathering job on this Industrial Rail Shell tank car. Photos of the finished product are below.
Now it is your turn to show us your weathering artistry as well as how you achieved yours results.
Attachments
Zora, nice job on the tank car!
A weathering job, not by me…
This is a Weaver brass Lackawanna 4-8-4 and a Weaver DL&W caboose…It was weathered by the previous owner.
Critique the weathering for me. I think it needs a slight bit of “toning down” Maybe by airbrushing some weathered black over the grime?
The caboose is a bit better. A light amount of road dust looks good on this car…
Tom
Attachments
May I have your attention please. Now boarding on track number one, the Weathering Wednesday Express. Please take your seats in your work rooms and weather more of your engines, rolling stock, buildings, scenery and have your posts ready because, it is time to post your results here on Weathering Wednesday’s 10-9-2024 Edition. I and the rest of the of this topic’s followers are eagerly looking forward to seeing your artistry and learn from your techniques.
But first, here are the forum ground rules:
- Have fun and enjoy!
- Post only photos that you have taken.
- If you post a photo taken by someone else or a copyrighted photo, be sure you have expressed written permission from the photo's owner to post their photo.
- Any individual who posts copyrighted material is subject to legal liability. Furthermore, that individual will be banned from the OGR Forum.
- Please consult the OGR Forum TOS (Terms of Service) for further information regarding copyrights.
It has been a busy week for all here at the Great Northeastern Railway that left little time for weathering. So, I will start with a retrospective look at previously projects by me, Chris and Zora.
Now it is your turn to show us your weathering artistry as well as how you achieved yours results.
Attachments
I bought a cheap makeup airbrush, just to try one out. They are for sale on Amazon. They are airbrushes with an attached air pump that fits into the palm of your hand.
I wanted to see if it was good for small weathering projects at my work table, instead of going to another part of the house and using my main airbrush and compressor.
The results were okay. I haven’t airbrush weathered anything recently, so my lack of refinement shows. I used a cheapie Weaver hopper car as my Guinea pig. Here are the results…
Tom
Attachments
@Krieglok posted:I bought a cheap makeup airbrush, just to try one out. They are for sale on Amazon. They are airbrushes with an attached air pump that fits into the palm of your hand.
I wanted to see if it was good for small weathering projects at my work table, instead of going to another part of the house and using my main airbrush and compressor.
The results were okay. I haven’t airbrush weathered anything recently, so my lack of refinement shows. I used a cheapie Weaver hopper car as my Guinea pig. Here are the results…
Tom
Tom:
That is a GREAT job! If you are out of practice, it certainly does show from that photo.
Attachments
This is the week of our long-awaited 2024 Fall York meet. Many of us are preparing to make our semi-annual pilgrimage to the great mecca of train shows. I am sure schedules are busy but, hopefully not too busy in the past week to weather more of your engines, rolling stock, buildings, scenery and post your results here on Weathering Wednesday’s 10-16-2024 Edition. I and the rest of the of this topic’s followers are eagerly looking forward to seeing your artistry and learn from your techniques.
But first, here are the forum ground rules:
- Have fun and enjoy!
- Post only photos that you have taken.
- If you post a photo taken by someone else or a copyrighted photo, be sure you have expressed written permission from the photo's owner to post their photo.
- Any individual who posts copyrighted material is subject to legal liability. Furthermore, that individual will be banned from the OGR Forum.
- Please consult the OGR Forum TOS (Terms of Service) for further information regarding copyrights.
My son, Chris, that King of the hopper cars, got some Great Northeastern Railway shop time and did a fabulous job of weathering this Lionel, MPC era hopper.
Now it is your turn to show us your weathering artistry as well as how you achieved yours results and then go to York, have a GREAT time and come home with exciting new things for your layout.
Attachments
Just one car to contribute this week. A modified and repainted MTH box car. I used washes and dry brush very lightly…
Attachments
Randy - thanks for keeping this thread going!!
Here are some boxcars I weathered back in 2018. I believe I've shown these cars before individually, however here they are shown in context with their natural surroundings. Weathering really brings scenes to life IMHO. I do like shiny new looking rolling stock and locomotives ( especially around holiday time ) , however, I've grown to deeply appreciate weathered pieces as well. I now can put together entire freight trains of weathered rolling stock and locomotives. Only a few of my steam locomotives are weathered and none of my diesels or electrics are weathered ... yet![]()
To my eye it's the weathered boxcars that really make this scene pop! If the boxcars were shiny new looking, this scene would not be as convincing .. probably alluding to a "toy" train layout instead ... not that there's anything wrong with a toy look. I just prefer as much realism as I possibly am able to create. 
Attachments
Attachments
Attachments
@Jesse ferguson posted:The switch tower from Menards. I just added to the look of abandonment. 
I love it.
York, 2024 is now history. I hope that you all made some great purchases of items for your layouts. With the upcoming holiday season as the next stop on our timetables, layout preparation is high on all of our priority lists. I hope said preparations include weathering more of your engines, rolling stock, buildings, scenery and posting your results here on Weathering Wednesday’s 10-23-2024 Edition. I and the rest of the of this topic’s followers are eagerly looking forward to seeing your artistry and learn from your techniques.
But first, here are the forum ground rules:
- Have fun and enjoy!
- Post only photos that you have taken.
- If you post a photo taken by someone else or a copyrighted photo, be sure you have expressed written permission from the photo's owner to post their photo.
- Any individual who posts copyrighted material is subject to legal liability. Furthermore, that individual will be banned from the OGR Forum.
- Please consult the OGR Forum TOS (Terms of Service) for further information regarding copyrights.
My son, Chris, that King of the hopper cars, strikes again with this fabulous job of weathering this PRR hopper.
Now it is your turn to show us your weathering artistry as well as how you achieved yours results.
Attachments
Attachments
Attachments
Not really good, but it's not all my fault. I got this Marx metal 3/16"(S) scale/O gauge tanker a while back - I got it because I did not have a "Shell" version. I love these things (see SHPX version to the right that I painted/detailed); SHPX had some very small tankers.
The Shell example that I got was dirty - I thought. Actually, someone had messed it up with black overspray. I probably could not get it off without damaging the factory lettering/paint, so I decided to go with it - I actually added to the overspray a skosh, put on some nice Lionel die-cast trucks and called it weathered. I plan to add a brake reservoir.
Attachments
@Dave Ripp. posted:
That sign looks killer!
@Jesse ferguson posted:That sign looks killer!
Thanks Jesse!
Thanks Randy for another edition of WW!!! Wonderful posts everyone!![]()
Here is a K line die cast boxcar which I weathered back in 2015. This car was one of my first weathering projects. I may "upgrade" the weathering at some point by brushing on more gray pan pastel around the bottom of the car to give the impression of ballast dust having blown up on the car as it traveled over mainlines for many years.
Attachments
Attachments
Autumn, 1964...
"Squirrel" Sudmiller sits patiently in the tatty looking KC&G GP7 #402 as the other crew members of the Piney Turn are finishin' up their bull session with one of the local loggers, "Ox" Milligan. No doubt there's some heavy squirrel huntin' takin place among those three. However, none of them are as deadly in the woods as "Squirrel" Sudmiller. He didn't git that nickname fer nuthin'!
As for that tatty looking #402: All through the 1950s the finances of the KC&G kept on dwindlin' through really bad management. So bad, that just a while back the KC&G declared bankruptcy. Fortunately, the court appointed Receiver is truly tryin'/ to git the KC&G back on its feet, and all on the railroad as well as those livin' in the Ozarks are pullin' for the KC&G's "reorganization" effort and come out on the other side in better shape.
However, you couldn't tell that by looking at ol' #402. It's still wearin' its very worn and faded original paint from when it was delivered in 1950! #402 is pretty much the most beleaguered looking of the GP7's on the KC&G... HOWEVER... given the cash-strapped nature of the KC&G, the question isn't "how good does it look"? Nope, the question is: "Does it still pull?". If the engine in question still pulls... then run it... it can be painted later!
That's railroadin' on the KC&G!
About the pic:
The 402 started life as an undecorated HO Atlas "Gold" model. It came from the factory DCC and ESU "LokSound" equipped. I modified it to my liking, then painted, applied decals, then weathered it to reflect a unit that has been cosmetically neglected throughout the duration of its life. As such, 402 truly is the most hard-used looking of all my painted/weathered KC&G GP7's.
I've had a lot of fun since creating my KC&G theme so many years ago. I still get a lot of enjoyment continually developing my KC&G theme to this day!
Andre
Attachments
To All Weathering Wednesday Contributors and Readers:
Thanks for making this and past Weathering Wednesday threads GREAT!!!! I look forward to another next week.
@laming posted:Autumn, 1964...
"Squirrel" Sudmiller sits patiently in the tatty looking KC&G GP7 #402 as the other crew members of the Piney Turn are finishin' up their bull session with one of the local loggers, "Ox" Milligan. No doubt there's some heavy squirrel huntin' takin place among those three. However, none of them are as deadly in the woods as "Squirrel" Sudmiller. He didn't git that nickname fer nuthin'!
As for that tatty looking #402: All through the 1950s the finances of the KC&G kept on dwindlin' through really bad management. So bad, that just a while back the KC&G declared bankruptcy. Fortunately, the court appointed Receiver is truly tryin'/ to git the KC&G back on its feet, and all on the railroad as well as those livin' in the Ozarks are pullin' for the KC&G's "reorganization" effort and come out on the other side in better shape.
However, you couldn't tell that by looking at ol' #402. It's still wearin' its very worn and faded original paint from when it was delivered in 1950! #402 is pretty much the most beleaguered looking of the GP7's on the KC&G... HOWEVER... given the cash-strapped nature of the KC&G, the question isn't "how good does it look"? Nope, the question is: "Does it still pull?". If the engine in question still pulls... then run it... it can be painted later!
That's railroadin' on the KC&G!
About the pic:
The 402 started life as an undecorated HO Atlas "Gold" model. It came from the factory DCC and ESU "LokSound" equipped. I modified it to my liking, then painted, applied decals, then weathered it to reflect a unit that has been cosmetically neglected throughout the duration of its life. As such, 402 truly is the most hard-used looking of all my painted/weathered KC&G GP7's.
I've had a lot of fun since creating my KC&G theme so many years ago. I still get a lot of enjoyment continually developing my KC&G theme to this day!
Andre
Andre - OUTSTANDING!!!! ... both your weathering and your accompanying story![]()
![]()
Welcome to Weathering Wednesday’s All Hallows’ Eve, Eve Edition. The best way to keep away the ghosts and demons that will be appearing during this season is to lock yourselves safely in your workrooms, weather more of your engines, rolling stock, buildings, scenery and post your results here on Weathering Wednesday’s 10-30-2024 Edition. I and the rest of the of this topic’s followers are eagerly looking forward to seeing your artistry and learn from your techniques.
But first, here are the forum ground rules:
- Have fun and enjoy!
- Post only photos that you have taken.
- If you post a photo taken by someone else or a copyrighted photo, be sure you have expressed written permission from the photo's owner to post their photo.
- Any individual who posts copyrighted material is subject to legal liability. Furthermore, that individual will be banned from the OGR Forum.
- Please consult the OGR Forum TOS (Terms of Service) for further information regarding copyrights.
My son, Chris has been at it again, producing the following video of a freight train, 23 cars long, consisting of hopper cars weathered by both himself and Ms. Zora Maya Keith, running on our “under refurbishment” (please excuse the junky platform) layout. The train is being pulled by our MTH, Rail King, PRR, M-1a steam locomotive.
Now it is your turn to show us your weathering artistry as well as how you achieved yours results and then go to York, have a GREAT time and come home with exciting new things for your layout.
Attachments
Attachments
@Randy Harrison posted:Welcome to Weathering Wednesday’s All Hallows’ Eve, Eve Edition. The best way to keep away the ghosts and demons that will be appearing during this season is to lock yourselves safely in your workrooms, weather more of your engines, rolling stock, buildings, scenery and post your results here on Weathering Wednesday’s 10-30-2024 Edition. I and the rest of the of this topic’s followers are eagerly looking forward to seeing your artistry and learn from your techniques.
But first, here are the forum ground rules:
- Have fun and enjoy!
- Post only photos that you have taken.
- If you post a photo taken by someone else or a copyrighted photo, be sure you have expressed written permission from the photo's owner to post their photo.
- Any individual who posts copyrighted material is subject to legal liability. Furthermore, that individual will be banned from the OGR Forum.
- Please consult the OGR Forum TOS (Terms of Service) for further information regarding copyrights.
My son, Chris has been at it again, producing the following video of a freight train, 23 cars long, consisting of hopper cars weathered by both himself and Ms. Zora Maya Keith, running on our “under refurbishment” (please excuse the junky platform) layout. The train is being pulled by our MTH, Rail King, PRR, M-1a steam locomotive.
Now it is your turn to show us your weathering artistry as well as how you achieved yours results and then go to York, have a GREAT time and come home with exciting new things for your layout.
Randy, Nice video showing all the great weathering jobs by Chris and Ms Zora. Does the caboose have a bad wheel or bent axle?
@pennsyfan posted:Randy, Nice video showing all the great weathering jobs by Chris and Ms Zora. Does the caboose have a bad wheel or bent axle?
Bob:
Thanks for the compliments. I will pass them on to Chris and Zora.
The caboose is a repaint and weather job on a VERY cheaply made, all-plastic, Kusan, model. It is EXTREMELY light in weight with plastic wheels in plastic truck frames. Due to its light weight, it is the perfect thing to put at the end of a very long train so that its weight will not pull train cars in front of it off the track when rounding the tight curves in our layout. Its downside if that, due to its weight, it is also very sensitive to any unevenness in the track. I think that is what you are seeing in the video.
Attachments
I had some DPM modules sitting around and decided to make a shallow depth factory flat. I painted them with Rustoleum's colonial red then used a light gray acrylic for the mortar. Gloss black for the door and window frames and matte buff for the stone work. I wanted the factory to look decrepit and abandoned so a goodly amount of ground foam was glued on to represent vines growing and taking over the building.
Attachments
@Dallas Joseph posted:
Dallas - I like your version better than the MTH. Your's depicts a workhorse locomotive that's been in the elements for over a decade without a wash job. Well done!!!
@trumpettrain posted:Dallas - I like your version better than the MTH. Your's depicts a workhorse locomotive that's been in the elements for over a decade without a wash job. Well done!!!
Thank you Patrick. ![]() I always enjoy seeing your artistry .
I always enjoy seeing your artistry .
MTH and all the manufacturers sure give us a good place to start having some fun like this.
Are you aware that Friday the 13th falls on Weathering Wednesday this month? Well, it does. So, for all of you triskaidekaphobiacs, the best way to avoid bad luck caused by the number 13 is to head to your workrooms, weather more of your engines, rolling stock, buildings, scenery and post your results here on Weathering Wednesday’s 11-13-2024 Edition. I and the rest of the of this topic’s followers are eagerly looking forward to seeing your artistry and learn from your techniques.
But first, here are the forum ground rules:
- Have fun and enjoy!
- Post only photos that you have taken.
- If you post a photo taken by someone else or a copyrighted photo, be sure you have expressed written permission from the photo's owner to post their photo.
- Any individual who posts copyrighted material is subject to legal liability. Furthermore, that individual will be banned from the OGR Forum.
- Please consult the OGR Forum TOS (Terms of Service) for further information regarding copyrights.
Today, the entire Great Northeastern Railway (GNR) shop team of me, Chris and Zora Maya join forces and begin the interior detailing of the second level of our model of the former PRR “J” Tower. As the great New York Yankee, Yogi Berra once said, “It ain’t over ‘til its over”, so, stay tuned as more progress on the interior is reported as new detailing parts come in and are painted weathered and installed.
Now it is your turn to show us your weathering artistry as well as how you achieved yours results and then go to York, have a GREAT time and come home with exciting new things for your layout.
Attachments
My only weathering project this week…
A new RMT reefer that I changed the trucks on, and gave it a light weathering treatment with a “make up” air brush and Badger grimy black and sand airbrush colors.
Tom
Attachments
As a public service announcement, there are only 8 more days prior to Thanksgiving, the day we stuff turkeys with stuffing and then stuff ourselves with turkey. To put it in terms that Weathering Wednesday followers will understand, there is only this and one more Weathering Wednesday before the big day. So, it is again time to head to your workrooms, weather more of your engines, rolling stock, buildings, scenery and post your results here on Weathering Wednesday’s 11-20-2024 Edition. I and the rest of the of this topic’s followers are eagerly looking forward to seeing your artistry and learn from your techniques.
But first, here are the forum ground rules:
- Have fun and enjoy!
- Post only photos that you have taken.
- If you post a photo taken by someone else or a copyrighted photo, be sure you have expressed written permission from the photo's owner to post their photo.
- Any individual who posts copyrighted material is subject to legal liability. Furthermore, that individual will be banned from the OGR Forum.
- Please consult the OGR Forum TOS (Terms of Service) for further information regarding copyrights.
I will start this week’s edition with yet another great repaint and weathering job by my son, Chris. He added another piece of Great Northeastern Railway (GNR) rolling stock to the GNR roster, GNR Boxcar 3076. It is a repaint of a Weaver Boxcar that turned out beautifully!
Before
Weathered
Due to the high demand for the GNR's freight services, GNR Boxcar 3076 was immediately assigned to Mt. Carroll Yard and is coupled to an outgoing train.
Now it is your turn to show us your weathering artistry as well as how you achieved yours results and then go to York, have a GREAT time and come home with exciting new things for your layout.
Attachments
Attachments
@Bill Park posted:A beat up Great Northern gondola is caught resting in the New Haven yard before catching another load west. I used a hair dryer to heat the sides so they could be pushed out to show wear and some 3/4" round wood dowel to bend the sides and a mixture of 70% alcohol and india ink to apply a dirt and grime look.
I like the dents Bill, the next time I do a gondola I'll add dents and stretching to the ends. I did 3 a few years back but have 3 or 4 for future prodjects.
@trumpettrain posted:For this delightfully soggy ( in Maryland ) Weathering Wednesday!
I bought this hopper off e bay back in 2018. I bought it as is for $5.00 plus $4.00 shipping because I was interested in the obtaining the Weaver trucks. The car was listed as having heat damage, as the photos depicted. Once I received the car, upon unboxing it I suddenly had an idea to created a scene depicting a wrecked hopper car that had been towed to a siding for possible repair. As the car was brand new and suffered severe heat damage, it still had to be weathered to replicate its' dues paying time on the railroad.
For weathering I sprayed it with Dullcote to take down the shine. After the Dullcote dried, I later sprayed some Floquil Grimmy Black with the spray can held about 18 inches away from the car. After the Grimmy Black dried I applied pastel chalks, rubbing them in with my fingers and a dry paint brush for the crevices. Once the weathering process was completed, I created a scene and took photos to use in the a thread I once created and hosted " Team Track Tuesday" which ran for 2.5 years hear on the OGR Forum. These are the photo I took then. The guys from the car dept are on the scene checking the car over after it arrived on the the Mountain Division team track at Danlilu.
Patrick, nice smashing! There's a few like this on a siding in Wedron Illinois. You captured it well for not seeing them. Next time I get out that way I'll get some pictures.
@Dave Ripp. posted:Patrick, nice smashing! There's a few like this on a siding in Wedron Illinois. You captured it well for not seeing them. Next time I get out that way I'll get some pictures.
I don’t know how I missed these photos.
They actually bring back less than stellar memories from my very short stint working at the Maryland Midland. I sideswiped an ancient C&O coal hopper with a loaded cement car. The coal hopper was destroyed. I was “punished” by having to work the track gang for two weeks. They used me as a conductor a few time during that two weeks, but then ended up firing me on the last day of punishment. It was my first railroad job.
38 years later, I retired from my position as a Locomotive Engineer, with a more or less spotless record…lol.
Tom
Well onward with better things…
I did some weathering on a freelanced CNJ covered ore hopper I built from a K-Line ore car and a scratch built roof and ends…
The next car is a Weaver, I believe, covered hopper I picked up cheap. I added metal trucks to it and gave it a good weathering job…
Tom
Attachments
Tomorrow Is Thanksgiving Day. So, in addition to wishing all of you a happy one, it is again time remind you to head to your workrooms, weather more of your engines, rolling stock, buildings, scenery and post your results here on Weathering Wednesday’s 11-27-2024 Thanksgiving Edition. I and the rest of the of this topic’s followers are eagerly looking forward to seeing your artistry and learn from your techniques.
But first, here are the forum ground rules:
- Have fun and enjoy!
- Post only photos that you have taken.
- If you post a photo taken by someone else or a copyrighted photo, be sure you have expressed written permission from the photo's owner to post their photo.
- Any individual who posts copyrighted material is subject to legal liability. Furthermore, that individual will be banned from the OGR Forum.
- Please consult the OGR Forum TOS (Terms of Service) for further information regarding copyrights.
Since preparation for the big day has taken much of my time, I will begin with a retrospective of some of our creations here at the Great Northeastern Railway:
Now it is your turn to show us your weathering artistry as well as how you achieved yours results.
Attachments
Here is another Atlas Great Northern I weathered. I also included a top view to show the scrap load.
Attachments
In another forum I participate in, there a call went out for "family portraits" photos of one's engine roster.
So, I assembled all of my currently painted/weathered Kansas City & Gulf (freelanced theme) engines at the small yard at Ozarka, Arkansas (The name "Ozarka" is fictional) for a "Family Portrait". What doesn't show are the 15 or so unpainted units that are already in service that are awaiting their turn through th paint/decal/weathering process!
All fer now!
Andre
Attachments
So, I assembled all of my currently painted/weathered Kansas City & Gulf (freelanced theme) engines at the small yard at Ozarka, Arkansas (The name "Ozarka" is fictional) for a "Family Portrait". What doesn't show are the 15 or so unpainted units that are already in service that are awaiting their turn through th paint/decal/weathering process!
15 more to go yet ![]() ?
?
You are certainly not letting paint dry in your spray booth Andre. NICE PHOTO of the " FAMILY " sir. 
@Dallas Joseph posted:15 more to go yet
?
You are certainly not letting paint dry in your spray booth Andre. NICE PHOTO of the " FAMILY " sir.
Yup, and more in the pipeline. I may not get all of them painted/decals/weathering before I get too old, but oh well!
Eight of the above were painted years ago, however, I did get 6 painted spread over four months in 2023.
For 2024, given our daughter's health issues and subsequent passing, I've done very little with my trains this year.
However, I still have hope that I can make a showing in the paint/decal/weathering department "soon".
Fingers crossed!
Andre
@laming posted:Yup, and more in the pipeline. I may not get all of them painted/decals/weathering before I get too old, but oh well!
Eight of the above were painted years ago, however, I did get 6 painted spread over four months in 2023.
For 2024, given our daughter's health issues and subsequent passing, I've done very little with my trains this year.
However, I still have hope that I can make a showing in the paint/decal/weathering department "soon".
Fingers crossed!
Andre
🤞 I HAVE MY FINGERS CROSSED for you right now Andre. 🤞............
........and wishing you God Speed sir. 
After my wife of 41 yezrs passed it was almost 2 years before I could let her go......still talk with her sometimes. I can't imagine losing my daughter. We'll be looking for you on the Forum Andre 🙄


