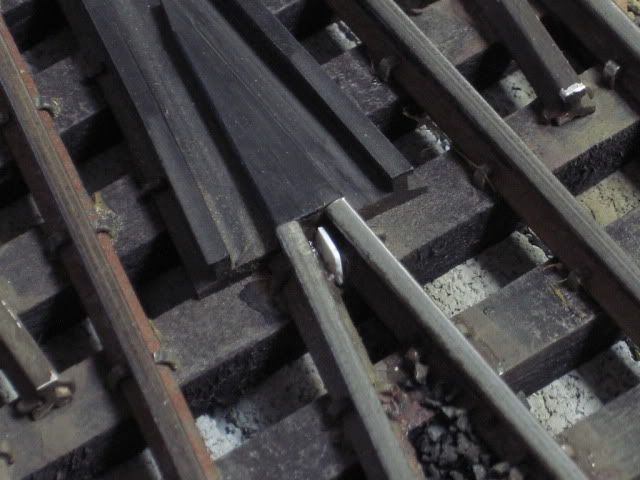
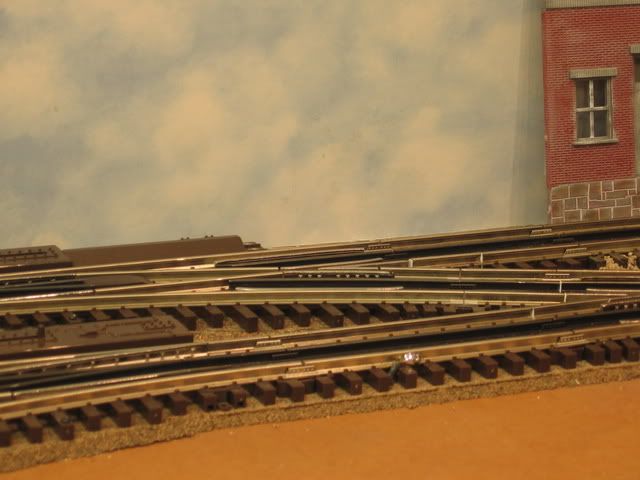
So, after setting up, and wiring in, my first pair of Ross Crossover Switches, with Non Derailing: I discovered that the flange tips of the rails that are used for non-derailing were actually touching. Per Steve's direction, I had removed the spikes at the tips of those rail flanges, but there was still contact, and the switches would just flutter back and forth when one button was pushed, and would do nothing when the other button was pushed.

Switch Rial Flange Tips Touching

I ended up taking a small flat blade screwdriver and sticking it down between those flange tips, and rotating it back and forth to force them apart, which did work, and the switches, now, operate perfectly, with correct non-derailing action as well.

I am still concerned that as these rails relax over time, those flange tips will, again, make contact. Has anyone out there figured out a way to insure that these rail flange tips stay separated, and/or insulated from each other?

1. Would id work to put a small slit in the tie, between these flange tips, and slip a small piece of plastic into that slit?
2. Would it work to put a drop or two of some kind of epoxy there, that would actually stick to the tie, to hold the flange tips apart?

All ideas are welcome,
Roger

Attachments

Images (1)
  • Switch Rial Flange Tips Touching
Original Post

Replies sorted oldest to newest

@BenLMaggi posted:

Could you cu and glue in the gab a piece of styrene plastic, painted black?

I am not sure what I would glue it to.
That is the guidance that I am looking for.

Maybe a drop or tow of hot blue would do the trick.
it might stick to the tie enough to stay in place, and hold those tips apart.

If they would, simply, bevel off the corners of those rail flanges, at manufacture, the problem would be solved, and they would never come in contact.

Roger, maybe there is a glue or epoxy solution that would work.  If not, there is another solution to possibly consider, keeping in mind that I don't have any actual experience with Ross switches.  Anyway, here's my thought.

If you were to loosen the 4 rail clips, circled in blue (maybe they're staples) on both sides of the short rail, it appears that the rail could slide out the end of the switch.  You could then file off the offending rail flange indicated by black smudges where the red arrows are pointing, slide it back into place and re-tighten the clips. This should create a sufficient gap between the rails where they meet at the frog.

Ross Switch Non-derail

Attachments

Images (1)
  • Ross Switch Non-derail
Last edited by SteveH
@SteveH posted:

Roger, maybe there is a glue or epoxy solution that would work.  If not, there is another solution to possibly consider, keeping in mind that I don't have any actual experience with Ross switches.  Anyway, here's my thought.

If you were to loosen the 4 rail clips, circled in blue (maybe they're staples) on both sides of each short rail, it appears that the rails  could slide out the end of the switch.  You could then file off the offending rail flange indicated by black smudges where the red arrows are pointing, slide it back into place and re-tighten the clips. This should create a sufficient gap between the rails where they meet at the frog.

Ross Switch Non-derail

Bingo.

You really only need to file one of them back. Pull the spikes out of one side of the rail, pull the rail file the edge and put it back. You dont need to re-glue it, but if theres glue on the bottom of the rails, just touch the rail flange above the tie with a soldering iron, it'll melt the glue and re-attach it.

@dkdkrd posted:

Black card stock.   


BTW...Isn't it nice to be able to call a company...like Ross..., talk with 'Mr. Big', Steve, who is there and cares to help you, and gives you a solution...that works??  Better than a sleeping pill.

KD

Absolutely,
Steve is awesome.

I actually went to his factory a couple of years back and he gave my wife and me the grand tour.
I have also spent a lot of money with him, and I believe his equipment is worth every cent.

Now, I mostly email him, and let him respond at his leisure.
I always get a response within a day

I think I'd use something like a dab of JB-Weld.

Thanks for all of the suggestions.
I like the idea of JB Weld.
I am reasonably sure that is I force a good gap between those flange tips, clean them with some alcohol, then ad a dab of JB-Weld, it would stick to them, and form down in between them to hold them apart, even if it didn't stick to the wooden tie beneath.
That stuff really sticks.

Last edited by RWL

Dremel cutoff wheel.

That's what I used. Diamond abrasive cutoff wheel. Cuts a very fine line. I used a drop of gel CA in the gap and once it's cured the rails can never touch. Hard to even see the repair. I had my brother hold a vacuum close to the cutoff wheel while I ran the grinder.  I also ran a big magnet over the area to pick up any filings.          j

Last edited by JohnActon
@JohnActon posted:

That's what I used. Diamond abrasive cutoff wheel. Cuts a very fine line. I used a drop of gel CA in the gap and once it's cured the rails can never touch. Hard to even see the repair. I had my brother hold a vacuum close to the cutoff wheel while I ran the grinder.  I also ran a big magnet over the area to pick up any filings.          j

Great plan.
But I have to ask:
Did you use the cut off wheel on the rail flange tips?
If so, how did you get the diameter down in there without cutting up the frog?

Last edited by RWL
@CAPPilot posted:

I did a topic on this issue a while back, and for my fix I used a piece of a black heavy duty zip tie.  I cut the other end at an angle to form a point and pushed it into the roadbed, then glued it.

Based on this suggestion, I am now considering a sort of hybrid approach.
I am considering using the piece of black Zip Tie, cut at a sharp angle, then pushed into the wood tie, then anchored in place with the JB-Weld.
Sounds like a pretty iron clad plan.
But of course the proof will be in the actual doing.

@RWL posted:

Based on this suggestion, I am now considering a sort of hybrid approach.
I am considering using the piece of black Zip Tie, cut at a sharp angle, then pushed into the wood tie, then anchored in place with the JB-Weld.
Sounds like a pretty iron clad plan.
But of course the proof will be in the actual doing.

Actually, that is what I did.  Memory is not that great and its been a while since I did it, but that is why you need a stiff piece of plastic.  To push it into the soft tie material.

@CAPPilot posted:

Actually, that is what I did.  Memory is not that great and its been a while since I did it, but that is why you need a stiff piece of plastic.  To push it into the soft tie material.

I went one better.
I drilled approx. a 3/32" hole thru the tie, between the rail flange tips, and right up against the frog.
The pic shows a hole not quite up against the frog, but that was the first hole that I drilled.
I then cut the piece of a black zip-tie, with a sharp point, as shown in the pic below, and forced it down into the hole in the tie, so that it is truly locked in place.
When the JB-Weld goes on, and around this piece, it should hold everything well in place, and never allow any contact.
IMG_1268
IMG_1270

IMG_1266

Attachments

Images (3)
  • IMG_1268
  • IMG_1266
  • IMG_1270

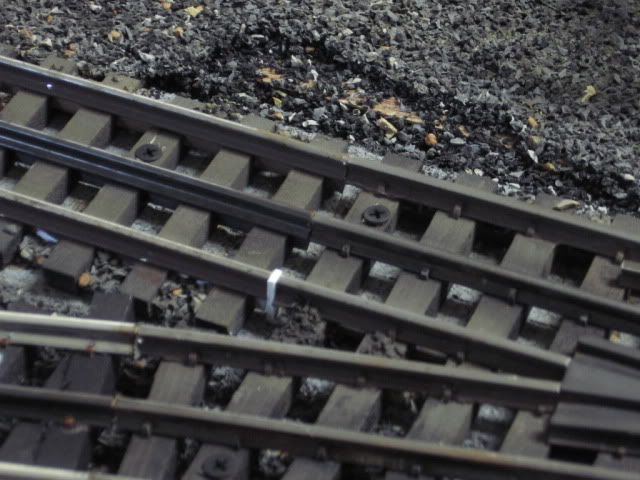
I am building a new layout using traditional Lionel tinplate track and so I plan to use a number of the Ross Plate tubular rail switches.  I am glad I read this thread because the first ross plate switch I installed and tested had the same issue noted by the OP.  Turns out it was the  same problem, there was a screw touching both anti derail track pieces.  This is a simple fix for the ross plate switches when you find the problem- remove the offending screw.  Top picture shows the screw removed and the bottom one shows the screw in place.

102_7660 [3)_LI102_7663 [3)_LI

Attachments

Images (2)
  • 102_7660 (3)_LI
  • 102_7663 (3)_LI

Add Reply

Post
×
×
×
×
Link copied to your clipboard.
×
×