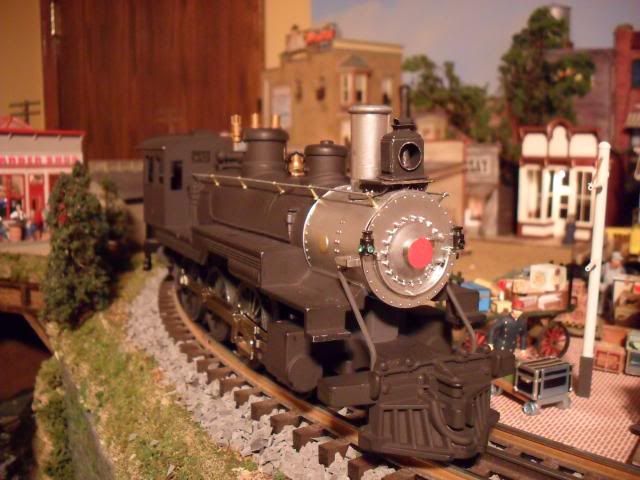
Baldwin 4-6-0s were common on many shortlines throughout the South, and my favorite local one - the Virginia Blue Ridge Railway - was no exception.  They purchased this one third-hand, from Georgia & Florida RR, built for the Augusta Southern:


3

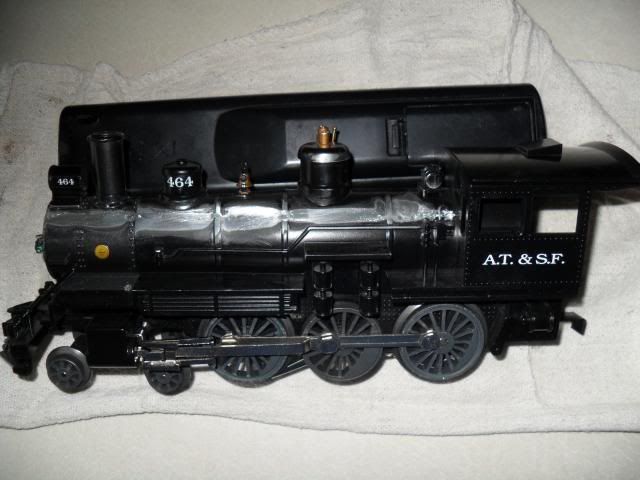
I have a thing for small steam, so when I realized the WBB Ten-wheeler had almost identical overall dimensions, I knew what I had to do.  Get one, strip it, cut, grind, and file off all the cast-in detail, and turn it into an almost brass-quality scale model.  Here is the victim, looking handsome already:


before

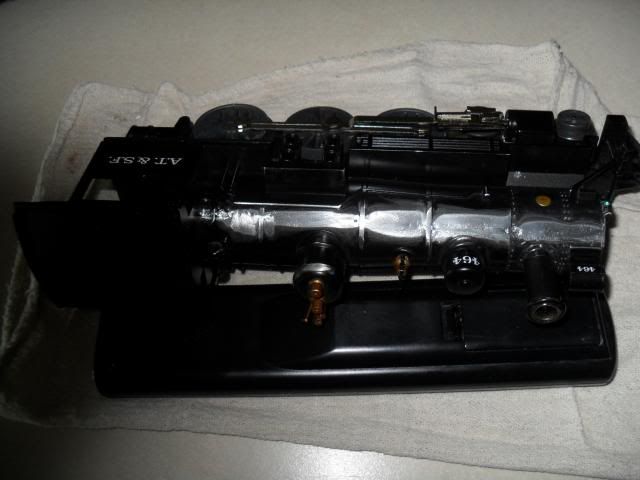
The first step was to remove all add-on details - headlight, stack, bell, whistle, pop valves, and generator.  They're all going to be replaced by better-looking brass parts.  This is how it looks after an initial disassembly:

first step

I've begun to order detail parts, with more to come - from PCS, Stephenson, and Wiseman.  It's going to get slide-valve cylinders, Walschaerts valve gear, and most everything else you see in the photo above.  I expect this project to take several weeks, if not months, but I thought I'd get the thread started.  I'll post, periodically, when I'm able to get some work done.  Hope you enjoy watching the progress!


PS - If anybody has advice on the best way to remove cast-in piping, handrails, etc. without removing too much material or leaving visible marks/gouges, please post here!

Attachments

Images (3)
  • 3
  • before
  • first step
Last edited by 49Lionel
Original Post

Replies sorted oldest to newest

I did a little work on my ten-wheeler. Removing the cast-in handrails took some effort. I drilled holes for the stanchions first, before I started grinding. I didn't use a dremel. I used a 2" die grinder with both sanding pads and a cut-off wheel. Finished up with files and sandpaper. I did have to use some epoxy to get the bands that go around the boiler back to the correct height, and to get some of the rivets back.


Originally Posted by Norton:

This is a flashback to upgrading Model Die Casting engines. The pipes (injectors?) near the walkways will be a challenge. It might be easier to lop off the running boards and replace with diamond plate.


Pete

You know, I have been wondering that myself.  It's a slippery slope, and adding new running boards does take it to a whole different level...  I guess I'll see once I'm into it.

Love these things; my only complaint (as I always say) are the cheesy rods and crossheads.


Below, one of my 2; completely new (old - die-cast model from 1940's) and accurate tender (for this loco); scratch built headlight; ERR DC Commander. Accurate Alabama, Tennessee and Northern decals.


I wish that I had removed more of the original headlight mount on top of the smokebox;

I'll get to it.


DSCN0449


Original 1940's trucks/wheels; added pick-up (pretty much invisible when on track) and

frame-mounted Electrocoupler:


DSCN0457

Attachments

Images (2)
  • DSCN0449
  • DSCN0457
Last edited by D500

The tender is one hurdle I haven't figured out yet.  I like the looks of the Senco tender, and have been keeping an eye out for one. I wish I was lucky enough to find a Lionel Mogul tender - other than dropping $125+ for one from the Lionel parts dept.  The other option I'm considering is to shorten and cut down the USRA tender it came with, but it'll still be a little too wide.  Either way, I don't expect to be able to fit in sounds.

49Lionel -


The WBB 4-6-0 projects always interest me - looking forward to yours.


I actually found another Senco tender on DaBay a few months ago, and jumped on it.

They do show up there from time to time - and neither of mine was expensive.

I was lucky (and persistent).


You may be able to get sound in the Senco or Senco-like tender. It will be a wrestling

match, but I think it might be done. A plastic body would help, actually. I did not do it - but would like to. Funny that there is no sound in my tender, which was designed for just that, back in the day.


I have -heard- of a Lionel 0-4-0 with the small plastic slope-back tender that was equipped

with ERR command AND sound. Unconfirmed. I put a Cruise Commander in one, but not sound.


I doubt that there is room for the CC boards in the loco (the sound boards could be in the tender).

Last edited by D500

I was very enthusiastic about this loco when it first came out.  It does not jackrabbit on starting and is a particularly smooth runner at lower speeds.  Price seems to have gone up more than most and I suppose it depends any more on if you found a good price.  


Here are several conversions I did.


 Here is the first one I bought.  I added some "stuff" to make it a bit less plain looking and painted it very industrial.  Sometime later I cut down the cab, lowering it: grandkids layed with this at Christmas and they wanted it to go under a "low bridge" made of presents they and stacked, so . . . they also taped Christmas cards to the tender, you can see the tape marks.  This loco has taken gobs of abouse and still runs fine, even if its appearance is a bit worse for wear.

Slide1


This is another early one I had.  I added even more "stuff" to the engine and again painted it black black to make it more industrial looking.  There are two center pickups on the tender and some sort of voltage-sensitive chuffing-rate sound board I added.  It is a nice little loco.

Slide2


This, too, is a ten wheeler.  The body is from the Lionel Mogul: I had one that didn't run that well but looked really good.  I transferred it over to the WBB chassis, added a one-axle truck under the tab since this body is a bit longer, and did some work on the tender.  It has rather primitive chuffing sounds of some sorit the board came from. This is a nice running, good looking little loco.  

Slide3

Attachments

Images (3)
  • Slide1
  • Slide2
  • Slide3

 Got some work done today.  I was not crazy about the rectangular cross-section of the drive wheel spokes (also the strange parts left over by the counterweights), so - using my O-scale drop pit - I took the wheel sets out of the frame, re-contoured the spokes using a Dremel tool, and painted them black.  Much better!


Before painting:

P4280002


 After:

P4280005

Attachments

Images (2)
  • P4280002
  • P4280005
Last edited by 49Lionel

Made some slow but steady progress this week to the back part of the frame.  There was a lot of metal below the cab, around the drawbar, that didn't represent anything on the prototype.  So, I cut it out, and you can also see the re-contoured drive wheels (sorry for the blurry picture):


P5040004


 Others have commented on the lack of headroom in the cab.  I realized it's not that the cab is too short: it's that the floor is too high.  Typically, the sides (where the seats are) will be up a foot or more from the floor where the fireman shovels.  So, I removed a whole bunch of metal that didn't serve any purpose, and voila:


P5040005

I also fabricated a cab bulkhead that will look great when installed.  Next step is running gear work that I think will make a big difference.

Attachments

Images (2)
  • P5040004
  • P5040005
Last edited by 49Lionel

Steamer -


Just picked up this thread again today; your Senco tender/coupler question answer

is that I used an Electrocoupler (a Protocoupler or a mechanical O-gauge coupler would do just as well) mounted with a sheet metal screw in a hole in the frame. There is a spring under the screw head to make the coupler stand up. Tighten to a reasonable degree and it will swing just fine (make sure that the coupler hole is a bit larger than the screw threads). The sheet metal screw threads have a lot of bite.


Centering, as I recall, was taken care of by a homemade flat "spring" using brass sheet, cut and bent into a squared "U", then epoxied in the frame above (when right side up) and straddling the coupler shaft. Seems to work fine; you'll have to fiddle. 

Coming along well, with many small tasks such as this one: narrowing the side rods, and making the lubricator blob a little more realistic.  Top is before, bottom after:

P5050002


 The biggest news is I've just about finished removing large details on the shell:

P5070003

P5070004

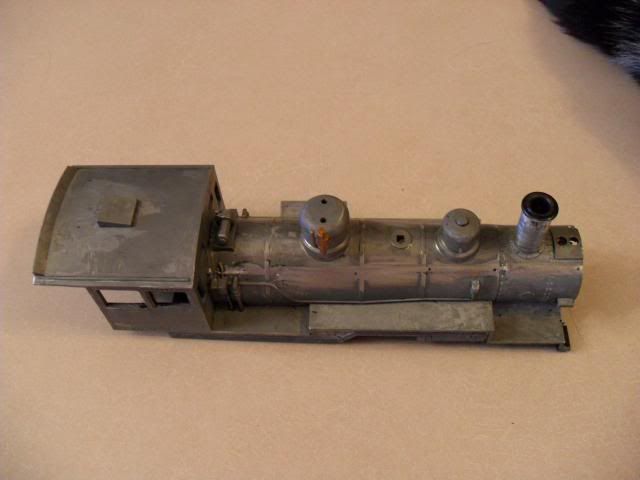
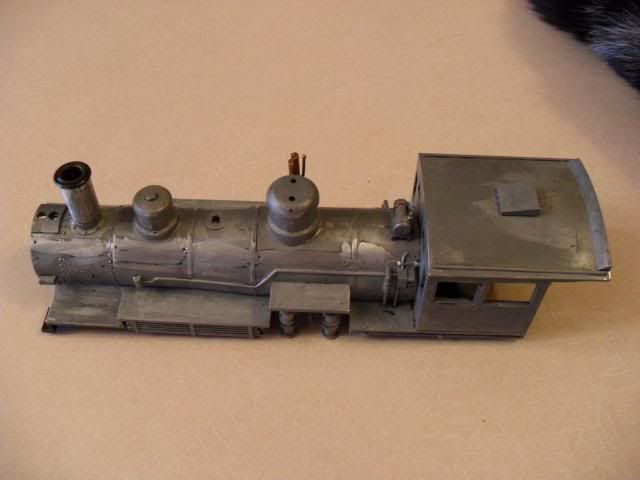
Note that everything under the running boards is gone, along with the headlight, stack, domes, etc., to be replaced with brass parts.  Gone, also, are the running boards along the smokebox and above the air pumps.  Next step will be to strip the paint, and file off the piping and handrails.  Some of the three dozen-odd brass detail parts have been coming in, and it's exciting to get a glimpse of how it's going to look!

Attachments

Images (3)
  • P5050002
  • P5070003
  • P5070004
Last edited by 49Lionel

Shell is clean of paint.  I tried the oven cleaner method I've heard some suggest, but it didn't touch the grey paint at all.  $8 and some caustic chemicals later:


P5130002

The last few days have been spent filing away the detail on the fireman's side:


P5130001

It's a slow process, but seems to be coming along well.  I'm doing it with a Dremel cut-off wheel, one coarse and one fine file, and some fine-grit sandpaper.  Hopefully it'll look OK when painted!

Attachments

Images (2)
  • P5130002
  • P5130001
Originally Posted by 49Lionel:


It's a slow process, but seems to be coming along well.  I'm doing it with a Dremel cut-off wheel, one coarse and one fine file, and some fine-grit sandpaper.  Hopefully it'll look OK when painted!

Get some Dupli-color gray filler primer and that will help a lot with any minor scratches left over.  You can bake it on after applied to a really good hard surface for color. 

Originally Posted by AMCDave:
Originally Posted by 49Lionel:


It's a slow process, but seems to be coming along well.  I'm doing it with a Dremel cut-off wheel, one coarse and one fine file, and some fine-grit sandpaper.  Hopefully it'll look OK when painted!

Get some Dupli-color gray filler primer and that will help a lot with any minor scratches left over.  You can bake it on after applied to a really good hard surface for color. 

Thanks for the suggestion.  I plan to do just that with JB Weld, which also works well for that purpose.  After the filing, it seems virtually impossible to not end up with a few gouges or scratches.

Last edited by 49Lionel
Originally Posted by 49Lionel:
 It seems virtually impossible to not end up with a few gouges or scratches.

That isn't necessary.  I use Bondo auto glazing and spot putty.  It is a non-mixable, red putty that dries hard in 24 hours and sands easily, filling cracks, scratches, etc.  I prefer Rustoleum gray primer to Duplicolor or other primers - it seems to hide more tiny scratches and imperfections but it really needs to dry and harden for 24 hours for best results - doesn't dry as quickly as the others.  

Preparation of the shell is complete:

P5250001

This photo does a good job showing the spots I filled in with JB Weld.  In the hard-to-reach areas (like ahead of the cab or just above the running boards), I found it was easier to just take away a little too much material, and fill it in later.  I applied the JB Weld with a small, straight piece of metal - like you would do with dry wall - and after it dried sanded it with 320-grit paper.  Next step is to drill holes for handrail stanchions, detail parts, etc., and start adding things back on!  Meanwhile, waiting for my new PSC cylinders to tackle the running gear.

Attachments

Images (1)
  • P5250001
Last edited by 49Lionel

While waiting for more parts to arrive, I've turned my attention to the tender.  Having failed to find a suitable one to replace the original, I decided to try my hand at modifying the original.  To represent the prototype even remotely, it needs to be made shorter in both length and height.  First, using a micro-saw, I took out a vertical slice (sorry, UP fans):

P5260001


Then, a horizontal one:

P6010004


In the second picture the parts are just set up together to see how it'll look.  Now I'll glue it all back again, add back the curved collar on top, file off the cast-in handrails and ladder, and replace them with brass parts.  The frame will also need to be shortened, and the Tru-Blast board and speaker removed - no room for them now.  Anybody interested for $25 shipped, OBO?

Attachments

Images (2)
  • P5260001
  • P6010004
Last edited by 49Lionel

I've got the same problem with my tender. Way too long. Like you, I've considered cutting it down (looking forward to seeing your progress), or just building a new one. I keep looking at the tender on the MTH h-3, and the Lionel general, and it almost seems that it would be easier to build a new one.

Lots of small things being done - here are a few:


Cab before (some details ground off):


cab before


Cab after:


cab after

The detail parts are from Wiseman Model Services - always a go-to source for me.  I cut the bulkhead from the bottom of a coffee can, and it really improves the appearance of the back of the engine.  It's nice to see parts going back on the loco!


Much of my work lately has been on the front end.  I was lucky to acquire the carcass of a Lionel 4-6-0, from which I plan to use the pilot and valve gear.  Here's the engine with its "new" pilot, plus cylinders and saddle built up from Precision Scale parts:


pilot

I cut the old cylinders and pilot off the front-end casting that screws to the front of the frame, then JB Weld-ed the new ones on.  I wanted to use scale-sized cylinders, and mount them at a prototypical width, but I'm now facing the same dilemma designers of commercial models do.  The pilot truck swing severely limits the model's ability to traverse curves.  The front wheels hit the cylinder heads on the inside of anything less than O54, but that's fine for me.  More troublesome are the back pilot wheels, which sideswipe the crosshead on the inside of even an O54 curve.  I'm a bit stumped at the moment, but I'll try to solve that problem by mounting the crosshead guides a little outside of center (a compromise).  Hopefully I won't to have to move the cylinders - JB Weld is some tough stuff!

Attachments

Images (3)
  • cab before
  • cab after
  • pilot
Last edited by 49Lionel

Add Reply

Post
×
×
×
×
Link copied to your clipboard.
×
×