
Whenever I see model railroad wiring done this well, it looks to me like a utility company did it.
Former Member
@Putnam Division posted:John, both of my thumbs are arthritic……..ratcheting crimpers are a great help.
Peter
Hi John, Peter, I needed to look up what "lever nuts" were, so did a google search and found these, which were what I used when I rewired my layout last year. LOL Really allows for having a well organized wiring system under the layout.
Peter, congrats in getting your layout to this operational milestone, really enjoyed following your progress, THanks for sharing, Best, Dave

Attachments
Images (1)

@leapinlarry posted:@Putnam Division, Peter, this is a great milestone, from a complete top floor remodel, new floors, new shelves, (Painting/Ceiling work) new model railroad table bench work, a fantastic track plan, now, and this sets the pace for setting up blocks, beginning scenery, and Question, what will you be using as an outside guard rail around the layout and will you have a skirt around the layout to hide your wiring and boxes? Your wiring friend did excellent work, the trains in the video below run flawlessly…. It’s a Wow… Congratulations on a spectacular train room…. Happy Railroading Everyone
No guard rails…..I seldom run greater than 20-30 s mph.
I will have a skirt…..probably similar to the group modular layouts….

Attachments
Images (1)
@Arnold D. Cribari posted:Whenever I see model railroad wiring done this well, it looks to me like a utility company did it.
I am blessed to have the collective skills of the modular group to back me up. I could do the wiring, but it would look horrible……I am very thankful for Tom’s work.
Peter
@Putnam Division, Peter, thank you for the clarification, the green curtain will be very nice, I’m surprised about your not going to use a outside border rail as even at slow speeds things can happen especially if you run conventional trains. I know an outside border it isn’t a must have, I’m simply a safety nut. Your train room area, Your personal man cave to enjoy your beautiful collection is one of the best I’ve ever seen. Also, @NJCJOE’s layout, is also a very beautiful layout is also coming together so beautifully and now his O gauge trains are running. Both of these layouts show great track plans, lots of proper planning, both in climate controlled environments, both with lots of room for folks to enjoy what I call, Beautiful model train Eye Candy. Thanks or all of the updates. Happy Railroading Everyone
Peter, what type of wire did you(Tom) use?
Another great milestone reached Peter. The Wago lever-locks are great. Tom has done a great job.
Your granddaughter looks right at home....the beginning of many great family memories.
Bob
@coach joe posted:Peter, what type of wire did you(Tom) use?
14 gauge solid Copper stranded…….I bought 250’ of 4 conductor and 500’ of two conductor……..in addition, 500’ of 2 conductor 18 gauge……
Peter
WOW Peter the layout is looking amazing and the wiring is great looking! I too love the lever connectors! I learned of them from @Mark Boyce.
Keep up the wonderful progress!
Nothing big.......just moving buildings around to see where they might fit. I still have three Buildings Unlimits city structures to build as well as two from River Leaf Models. Then, I have some 2 and 3 story Lionel 'built ups" if I need them.
I'm trying to "double up" the Walthers building fronts to see if I can add some depth to the scene.
Nothing definte here, just getting ideas.....sidewalks, streets, green areas, alleyways are all in the future.....


Have a great week.
Peter
Attachments
Images (4)
@Putnam Division, Peter, all I can say is Wow, looking like fun, beautiful buildings. Thanks for the update… Happy Railroading Everyone
@Putnam Division posted:No guard rails…..I seldom run great than 20-30 s mph.
I will have a skirt…..probably similar to the group modular layouts….
IMO, that pleated Kelly Green skirt is the most attractive train table skirt I've ever seen.
@Arnold D. Cribari posted:IMO, that pleated Kelly Green skirt is the most attractive train table skirt I've ever seen.
Thank you, Arnold………I let the gang know!
Peter
@leapinlarry posted:@Putnam Division, Peter, all I can say is Wow, looking like fun, beautiful buildings. Thanks for the update… Happy Railroading Everyone
Thank you, Larry
Peter
Looks great Peter. You have a great collection of buildings to play with.
Bob
Looks great Peter. A lot of work went into that. I really like the F.W. Woolworth store. Great for transition era railroads. Where did you get that?
Gerry
@gmorlitz posted:Looks great Peter. A lot of work went into that. I really like the F.W. Woolworth store. Great for transition era railroads. Where did you get that?
Gerry
Andre Garcia and River Leaf Models……he closed up the business last year…..I wish someone will pick up the designs…..they were super and fun to build.
Peter
The F.W.Woolworth store sure takes me back to nice times!
Ron
I miss Andre's posts here on the forum.
Peter I think this block of buildings needs to be going uphill just like the Jahn's location on Kingsbridge Road near Fordham Road.
Speaking of Andre, I just started another of his kits that I bought in 2016. His website is still running with downloadable instructions for his kits. I didn’t realize he had so many, though I bought 4 myself. Andre made custom signs for two of my buildings. You did a fine job on your Woolworth’s, Peter. I don’t know why I didn’t buy Woolworth’s when I first learned of it. I miss Andre’s posts as well.
Here’s another of my favorite River Leaf structures, the Texas Tavern……the real one is in Roanoke, VA. It’s also waiting for a spot on the layout.
Peter

Attachments
Images (1)

Peter, that is the one I am starting to build. I got Andre to make the sign read “Burger Hut” which is here in Butler. The two look very similar.
I always liked this one 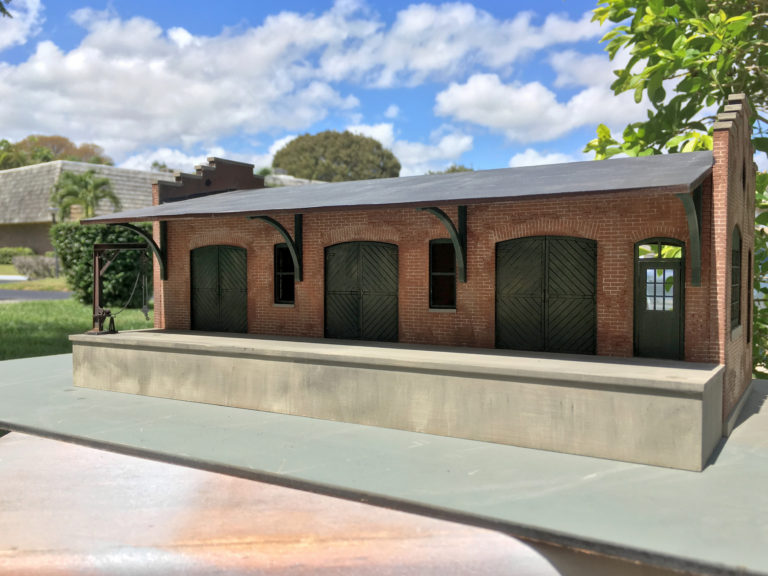
Is anyone still making it ??? - his stuff was beautiful
@Arnold D. Cribari posted:IMO, that pleated Kelly Green skirt is the most attractive train table skirt I've ever seen.
Arnold,
My wife volunteered to make the skirts for the club modules about 10 years ago. They're her own design and the comment is appreciated. The club's added additional modules over the years but my wife retired from making any more. We now use local seamstresses following the original design.
Ken
@dorfj2 posted:I always liked this one
Is anyone still making it ??? - his stuff was beautiful
I do not think anyone has picked up his designs…i would think that if anyone picked up his designs, they would let the O gauge forums know……..if anyone knows something, please share it……
I believe that structure is a model of an N&W fright station and it is a beauty!
Peter
Peter,
I really like how you are laying your buildings out. This process is very fun to watch. Yes, the building is the N&W freight station and one I really wanted from Andre as well as a few others. Steve Nelson, if you're reading this would you consider working something out with Andre?
Dave
Peter, I like the layout of the buildings. Doing this will sometimes give you a vision to see the right combination or location that you feel is best. I enjoy Andre’s kits too. I have a few waiting to be built.
Andy
Peter, I finally got through this thread of your layout build. It's a magnificent project and a fabulous build and great use of resources, thank you for sharing your journey! It has inspired me to get moving on laying some track on my languishing layout.
Backing up a bit, how did you guys mount the transfer table underneath the layout to make it level with the layout surface? I have the Ross 36" 10 stop table and that motor on the side makes it cumbersome to fit the opening.
Brian, Peter’s layout build is inspiring for sure. He has some great help, but the overall concept of the whole attic space is his. What a wonderful thread to follow!
I always enjoy seeing quality work, your layout and your recent wiring look great. Gives me something to strive for. I too used those levernuts when John recommended them to me nearly 2 years ago, must be 30 of them under my layout with not an issue. Congrats on all fronts.
@Traindiesel posted:Peter, I finally got through this thread of your layout build. It's a magnificent project and a fabulous build and great use of resources, thank you for sharing your journey! It has inspired me to get moving on laying some track on my languishing layout.
Backing up a bit, how did you guys mount the transfer table underneath the layout to make it level with the layout surface? I have the Ross 36" 10 stop table and that motor on the side makes it cumbersome to fit the opening.
Brian……..let me shoot some detailed pics and put something together.
Peter
Really enjoy the updates. Your layout is looking great!
catching up on your updates, I have a couple of comments. First, you must have sent your flying squirrels over to Goochland. I had to take my wood burning stove apart twice in June for a pair that kept trying to find a way in through the stove chimney.
Second, now I know where to go to get tips on building the River Leaf kit. I have the same kit, but it’s a S.S. Kresge Co. version. My great grandfather job was to travel around the East Coast opening new stores for Kresge.
@Putnam Division posted:Brian……..let me shoot some detailed pics and put something together.
Peter
Thank you Peter, I appreciate it!
Peter, the buildings are looking great, and you are moving at an amazing pace! At this rate you will be doing scenery anytime soon! I really like the Texas Tavern building! I think that would look sharp on anyone's layout!
@Traindiesel posted:Thank you Peter, I appreciate it!
Brian......I trust this will answer your question............
I'll start off with cutting out the hole. I changed Mianne Benchwork bracing from a 2x2 hole to a 2x3 hole in the area where the Transfer Table was going to go.
This is January when the gang came over for the "drop in". Like I have said on many occasions, it's great to be in a group where the cumulative knowlwdge and skill sets of the members are pooled to accomplish projects......I am very blessed to have such skilled and generous associates.....


Here's what Tom (Gilly@N&W) came up with.....two 1x3 48" boards paced along the long side of the opening.....then, eight 1x2 pieces of wood. Four of the scewed into the Transfer Table base and four of them into the support beam. A Krieg tool was used to make the screw holes.
The leveling screws were placed in as you can see them and the Transfer Table box was leveled. What follows are variuos shots from different angles......


I'm sure you will agree that Tom's engineering work was masterful!
Peter
Attachments
Images (19)

Great job, Peter. I totally agree that having great friends with many skills enables us to accomplish otherwise impossible tasks, but it also makes the hobby so much more enjoyable. Thanks for sharing.
Art
That’s a good point about Peter’s multi skilled group! My layout is a one-man show, and the carpentry shows it! 😄
Looking great Peter.
Thank you for all the kind comments……however, I want to thank OGR Magazine for providing this Forum…… it was 23 years ago today when I joined on a “dial up” computer. I can say with some truth that if it wasn’t for this outstanding Forum, I probably would not know many of you……
The number of friends I have made and people that I have become acquainted with over the years, has truly transformed my O Gauge experience. I sincerely thank the owners and staff of OGR ( both past and present)……….you guys have made the experience of O Gauge great!
Peter
So true about OGR Peter. And thank you for the friendship you have given to me and so many others on this Forum.
Gerry
Add Reply
Sign In To Reply
