
Mark,
What a moment when all the plans and efforts come to life. Terrific!!
DL
|
|
Mark,
What a moment when all the plans and efforts come to life. Terrific!!
DL
Glad you are up and running. Interesting configuration.
Nice golden spike moment for you, Mark, congratulations! Now you can run a train and work on other things, if you wish.
Rusty
Thank you, Larry! I think you hit the two things I am happy about. The up and over is working out well and being able to get this much into the space I have.
Thank you DL, pennsynut, and Rusty!
Rusty, I forgot to get my Golden Spike out of the box! Well, I guess we have been putting off a lot of things with the pandemic. ![]() It is good to be able to run a train and work on other layout projects at the same time or interchangeably.
It is good to be able to run a train and work on other layout projects at the same time or interchangeably.
Mark, I just watched the video, Awesome, and very smooth. Your Western Maryland diesel sounds great and ran easily and effortlessly over the up and over. When you add the scenery it’s gonna be a WOW. Great work. More review later. Happy Railroading
Congrats Mark! Things are really coming together and looks great! Nice first run and with as smooth as it went you have to be very pleased with yourself! I hope to see more and try to get on here more as I thing I am almost done with all my other projects!
Keep up the wonderful work as I really enjoy seeing your layout come to life!
Great payoff, Mark! There is real satisfaction in reaching this stage.
Thank you Larry, Mike, and Palallin!! There are a few places I think will need adjustment for the 2-6-6-2 to negotiate, since I haven't tried it yet, but all in all I am happy with it.
Mike, I hope you will be able to get back to your layout soon.
Last weekend I came across the opportunity to purchase an O scale Carolina Craftsman Kits built model of the Thomas, West Virginia two stall engine house. It was offered by a modeler who is changing scales on a Facebook Western Maryland modelers group. I thought it would go great with my Thomas Station kit by the same CCK. After some discussion and some measuring to see if it would fit, we came to an agreement. It arrived Thursday. It is 20 1/2" x 12" just a shade shorter than my Premier H9 Consolidations. The seller took the doors off for transport and a couple of rafters came loose from the near side wall, but a little glue will fix that right up.


It dawned on me after I placed it on the layout that I may be able to squeeze a wye into one of the stalls. I set some track on the curve where the USRA 0-8-0 is sitting, and it seemed like it would work. By using the existing switch in the foreground, and placing my extra 054/072 curved switch near the wall, I was able to fit in my extra #4 switch to go to the other stall. The stalls are 6" apart. I opened my latest SCARM file, but found I could not make any changes because it had forgotten my license. After logging in, updating the license, and restarting the pc as per instructions I thought I was good to go. It still wouldn't let me log in. Also, the link to support wouldn't work. I decided to just build that curve as a new drawing and was able to get it all to fit. I used the 0" point at the bottom of the drawing as the straight leg of the existing switch, which is 48" from the wall. It all fits in 46". Amazing!!! All I need to buy is an 042 Wye switch.

I'm pretty excited about this new possibility!! ![]()


Mark - brilliant way to get a direction change on your engine(s).
I am combining switch operators so I don't have to worry about switching both ends of a line. I have one switch operating 4 DZ switches on a Ross crossover works fine. Just have to make sure I am using the same DZ motor and operator.
Also - SO EXCITED - I picked up an MTH Milwaukee Road EP2 PS2 to go with my Milwaukee Road Hiawatha Passenger Set - yeah I know the time periods are wrong - but C'est La Vie. It is a really nice runner. So a long story really short - take the time to watch this incredible video - this guy apparently has won academy awards for cinematography and shot this video of his layout https://www.youtube.com/watch?...11&v=liGxckhiLek
Anyway - with a little research discovered the Milwaukee Road ran out to the west coast and the electrics of the day allowed them to move through long tunnels without gassing people to death,
I'll post a few videos after I get all that wiring straightened out.
Also thanks to all who replied on the oiling question, my fine tip needle oilers arrived today.
Jeff
Mark, we have a "Y" on our narrow gauge here and they use slip switches. Why don't you try that, then you won't need motors or even pushing a button. Jeff, I'm the guy that made that layout and shot the video. They were Emmy Awards not Academy Awards. Glad you liked the video. Don

Hi Don, nice to meet you. I have shared your video and two other with a bunch of people. Everyone really likes it and usually comment on how relaxing it is to watch. Apologies for mixing up the Emmy award. Did you really take that down? There are a few other producers of high quality model RR video, but yours IMO is absolutely the best. Mark - apologies for getting a little off track on your thread. Jeff
Mark, that looks good. You gained a turning wye and added a 2 stall enginehouse. It looks like you will have a little over 4 inches of straight portion coming off the 042 wye before entering the engine house looking at your measurements. I’d try it first with just a curved piece of 042 if you have one before you spring for the wye. My one concern would be the cab roof hitting the door entrance to the house going in and out if you plan on running steam.
Thank you, Jeff! That is quite alright posting Don's video. It is excellent.
Don, I have never used slip switches. I will have to take a look at that.
Dave, I just measured the height of the doors and they are exactly 5" high. That is enough for my two H9s sitting on track. If I don't like it, I can raise the foundation a bit. Thank you for questioning it early on.
Mark, it’s not the height. It’s the width. Steamers tend to go straight for a bit before the start to turn in the curve without all the drivers flanged. The corner of the cab may come close to the opening. The entrance to the house is only about 4 inches off the 042 curve. In your pic. . The house is as far back as it can go. ‘
Dave, Now I understand!! Yes, you have an excellent point!! I will have to set up some track and see if there is a problem with the side clearance coming out of the curve!! I don't know why I didn't see what you meant the first time. I have been checking clearance to backdrops and supports a lot on this layout! Thank you very much!!!
I had this issue (longer steam engines clipping the tunnel entrances with their cab roofs) for my Century Club 773 and my Legacy K4. But after I began to run something "scale"- this became a problem.
I was not willing to tear out and replace my tunnel entrances. IF I had anticipated ever buying these larger locos, I would have made allowances while building the layout. I might have not done it to a 1950 773, but for the later ones each case, I had to clip the aft cab corners to get clearance.
Yeah, I know- heresy!! Let's face it fellow O Gauge enthusiasts- an engine built in 2000 - after the same one built in 1953 and 1964- is not as much "collectible" any more, once they are run, and run pretty often. I don't expect to last another 40 years so that a CC 773 appreciates in value from the $800 I paid to what?? $ 1000?? $ 1200?? So I don't see a lot of collector value left. Run 'em!!
So far no visitor has even noticed the slightly angled back corners of the cabs.
Love that engine house!
Peter
Mark- the engine house is a very nice find. I think it will look great on the layout.
I took your mock up plan with the Y and laid it on your original plan. It looks like you have a little more room to play with than you thought. The curved turnout can move to the left a bit which may free up the Y to move as well. The only issue may be that you will need a custom curve out of the left side of the Y to meet up with the turnout off of the main coming off the bridge.
My other thought was to rotate the entire corner to the left by adding a small curved section right after the liftout. I didn't play with all of it so I don't know how changing the angle of the curve off of 90 deg will affect the turnouts and Y. Maybe the structure sits on an angle into the corner too. I'm sure Dave will pop up at some point and figure it all out for you.
Since the building will be against the wall you might just want to shorten it a bit if you have clearance issues with the steamer's overhang.
Here is the updated file.
Bob

Great progress Mark! It seems you are being meticulous with and rechecking every step of the way. That will save a lot of time in the long run also less stressful. I am jealous.... ![]()
Hi Mark,
Since my name was mentioned ![]() , I cleaned things up a bit and double-checked to make sure all the flex curves were O-42 or larger.
, I cleaned things up a bit and double-checked to make sure all the flex curves were O-42 or larger.
I added a mock-up of the engine house, though I wasn't sure how large the doors were, so the openings are 4" wide with 1" side walls and a 2" center wall. The roof is on a separate layer so you can turn it off to see the tracks inside the house. As Dave mentioned, the Wye switch is pretty close to the entry door, so you'll have to check clearances for your locos turning into the lower stall. Bear in mind that when the lower stall is occupied, the Wye will be of little value for turning engines unless you move things around.
Anyway, I tried various configurations, including rotating the engine house and switches, to try to get you more room going into that lower stall, but didn't come up with anything better than what you have. The limiting elements are the 6" distance between track inside the engine house and the combination of switches, including the Wye switch. As it is, I don't know if you plan to bend/cut flex tracks to fill the gaps, but it will be very easy to end up with curves on the ends that are tighter than O-42. If you look at all the red flex tracks, you can see the little dots inside them. This is were the curved transitions begin so the tracks line up properly with the tracks they are going to connect to. I know you're meticulous when laying track, so it's just a word of caution. They can all be done cutting sectional straights and curves, but then you end up with several small pieces of both and that might be worse.


Thank you Mike, Peter, Bob, John, and Dave.
Mike, you have a great point about the steam engine cab clipping the door of the engine house. If you ran the 773 or K4 when I was at your house, I certainly didn't notice the angled back corners of the cabs. I'm sure I won't again unless you being it to my attention. We will see what I have when I set it all up on a sturdy base, and I'll do whatever is necessary to make things work.
Peter, Jeff Grove of Carolina Craftsman Kits did a really nice job researching that engine house kit as he did on all his kits. The owner who I bought the kit from told me Jeff built this one as the final pro-production run. I'm looking forward to building the station to go with it.
Bob, thank you for working on the SCARM drawing. Yes, if necessary shortening the engine house will probably be the way to go.
John, I know myself too well to know I will overlook something. I didn't want to buy the building without knowing it would fit. In this case I knew I could get the two tracks in. I just didn't think of the wye until afterwards. Somewhere way back in this topic we discussed a turntable and wye and discarded the ideas. Of course this is the 4th plan, the 3rd I started building since January 2107. ![]()
Dave, Thank you for working on the plan also. You guessed correctly on the width and positioning of the doors. I still can't get SCARM to load either yours or Bob's files and can't link to the scarm.info to follow instructions. That's fine for now. I can see from both I can get the track in. I have no problem cutting some solid track sections to fit. I have already done a couple. I have plenty. My flex track bends leave something to be desired. They worked okay for slight bends as needed in the original plan, but I haven't had success with smooth bends. I have one that is a little wavy, but at the angle it is viewed it isn't noticeable, and all my engines have run on it without trouble. Maybe a car will sometime. Yes, this is certainly a compromise on turning engines and storing engines with the same track, but isn't the whole plan a compromise? ![]()
Thank you everyone!
All the planning usually goes out the window once the construction starts Mark. At least you have a few options to work with to see what works best.
I remember a layout build thread on here from a while back. The OP used a short block of 2X4, about 4" long, to as a guide to bend GG flex. He marked the rails on the surface of the block and cut the three grooves into the block. I remember the pix of his curves and they were nice and uniform.
Bob
Bob, Yes planning does go out the window once construction starts. I think this will work out somehow.
I can see that person's method with the grooves in the block of wood would work. Thank you!
Looking good Mark, nice engine house BTW. Planning can go out the window at anytime, doesn't have to wait until construction starts. However, it has happened. One of the engineers that used to work with us found out the hard way because the drawing wasn't accurate to the building we worked in. So a foot here, a foot there, really compressed what he needed to get done. Needless to say it worked out, but was tighter than he liked.
Dave, a foot here or there...For An O gauge Layout in an 11x11 room, a few inches here or there and the engine house could go out the windowed door right beside the proposed spot on the layout! 😄 I wonder if Mrs B would mind if I left the sliding glass door open! 😄
Time to build that "addition". Just make sure Mark it is the tool room on the engine house.
Engine House addition ![]()
Dave and Bob, both great ideas! ![]()
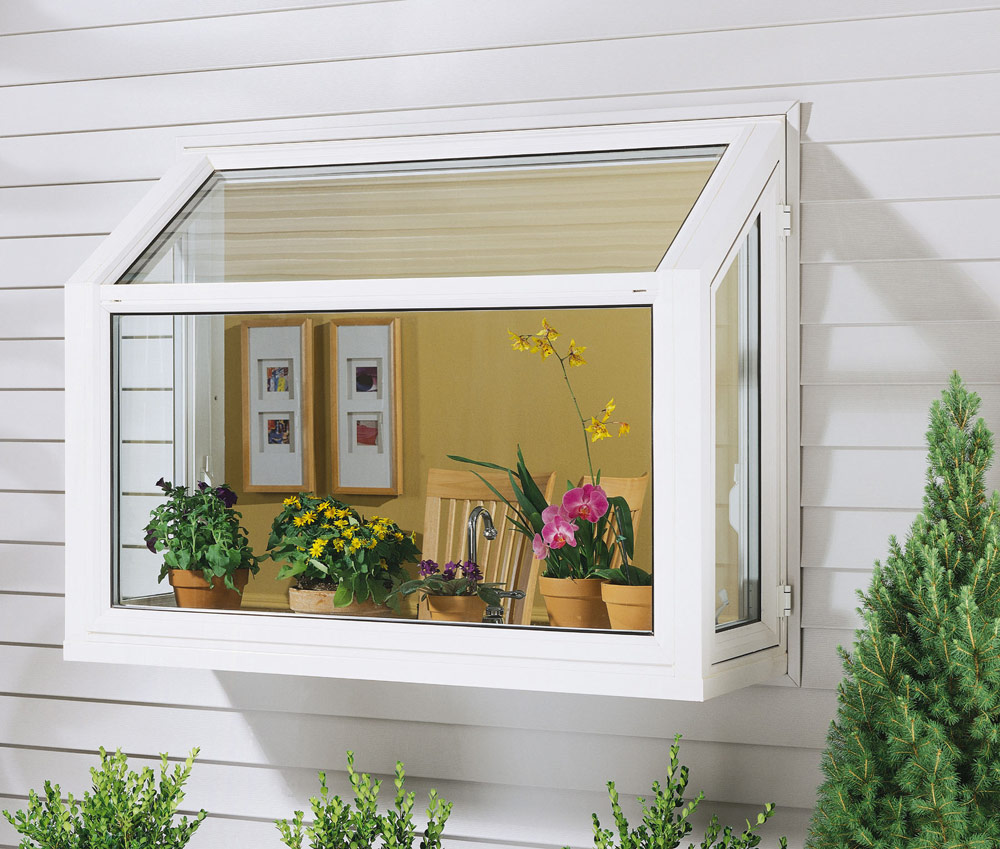
![]() Our younger daughter has one of those 'greenhouse' windows above her kitchen sink!
Our younger daughter has one of those 'greenhouse' windows above her kitchen sink!
Enjoying this thread Mark. Nice progress.
Thank you, Marty!
Other than glueing the loose parts to the engine house, I didn't get a chance to work on the layout until today. I was going to work on some other areas of the layout, leaving the corner go for a while until I got the engine house. That caused me to change direction. I want to get that built and make sure I can get the track to work. I didn't order the 042 wye switch yet, but have all the others that are needed. I decided to build the lower level tabletop and then support the upper level for the enginehouse, station, and a few downtown buildings above that. For the lower level, I used all but a two-foot section of the large bookcase I tore apart and have been using. Also, I will have just enough plywood to finish the top level. It was discussed long ago on Plan A and Plan B about having staging tracks on the lower level in a similar location. I have no interest in maintaining all those switches, etc here on Plan D. I do think I could use the area for a place to store a few cars that can be swapped manually. I'll see how that goes. You can see I need to raise that section of the backdrop a bit. That won't be a problem.


I then laid the switches and a few sections of straight and 042 track in place for a very rough estimate of how it will work. As we discussed a few weeks ago, I'll need the wye switch and bend some flex instead of using 042, but I think it will work out. I see from this photograph, I got the track a bit more cockeyed than I thought. I still have to add in a triangular piece of plywood to support the front curve.


looking great Mark !! have a good weekend !
Thank you, Brian!
Looks great, Mark. You’ve been busy!
Looking really good Mark great work like the engine house but what about the rear doors how are you going to deal with them?
Mark, it has been a while since I checked in on your layout. It is coming along beautifully. That is a good location for your engine house. Great use of space available.
Keep up the steady progress and take some time to reward yourself by running some trains. It will keep your internal battery charged.
Looks good Mark.
I hate to be an enabler but ![]()
A right hand turnout before the curve on the lower level could give you a couple of short sidings for storing a few cars. Looks like it would line up to go right into the first opening below the engine house.
I like to avoid the giant crane whenever possible. ![]()
Bob
that would work Bob, then you could make it a two story building,
with the car shop on the bottom level... ![]()
@briansilvermustang posted:
that would work Bob, then you could make it a two story building,
with the car shop on the bottom level...
Another enabler......![]()
![]()
![]()
Mark: I think Bob has got a great idea for the lower level. You could take out the vertical support board and put in a couple of round columns using any kind of round stock. Like a clothes hanging rod would look sharp and have a great car shop on the lower level. Could even leave it open for folks to view and give you something else to detail. 🚂😁
Thank you, Jim M, Rick, Santa Fe Jim, Bob, Brian!!
Rick, I was intending to leave the doors on the back next to the backdrop closed. Of course, I could leave them off as well.
Bob, I think that is the reason most of us post descriptions of what we are doing and photographs; to encourage the enabler to point out something the writer did not see or think of. ![]() I suppose there are some showoffs, but that isn't the case with me or you.
I suppose there are some showoffs, but that isn't the case with me or you.
Brian, is certainly an enabler as well!! ![]()
There are two ways to take a siding off the curved mainline. I had thought of the case where the switch would be under the overpass and the tracks would be parallel to the edge of the layout. I think that is the thought leading to the two level house or carbarn under the enginehouse. I had thought of that, but it wouldn't work with the siding I had put facing the opposite direction after the suggestion a couple months ago. I thought it would a good place to park the 2-6-6-2 when not running. My giant crane isn't hefty enough to be lifting that engine off and on the layout much. ![]()


That would lead to tracks underneath as shown here. Of course, the nearest track would be pushed farther back since the support would be changed.

The other option would be to take the switch off the other tangent, the one shown in the last photograph. It would have the cars going perpendicular towards the rear wall, and probably shorter tracks and one fewer track. It would enable me to keep the track on the other side of the overpass where the big engine is sitting now.

Now is the time to take it apart, buy a couple more switches and provide for better storage and operation. I can take the plywood off the supports by removing screws and changing the supports wouldn't take much more.


ENABLERS 1- MARK BOYCE 0
![]()
![]()
![]()
I used 1" dowel for my upper level Mark. They are nice and sturdy. A car barn would look nice under the engine shed.
Bob
Bob, You miscounted. I counted 3 enablers. It is more like ENABLERS - 3 , MARK - 0
Reminds me of a Pirates or Penguins score! ![]() And here my younger son-in-law's boss, who is from Long Island, was looking forward to another Islanders-Penguins series. Well he will have to wait until next year!
And here my younger son-in-law's boss, who is from Long Island, was looking forward to another Islanders-Penguins series. Well he will have to wait until next year!
Jentz, I just happen to have 4 5-foot long rake handles my father-in-law passed on to us when my mother-in-law sold us the house. He used to do that; when he needed something, he would buy 3 or 4, because you just never know. Oh, the stuff he left behind. ![]() They happen to be 1.1 inches in diameter. Discounting the one end is rounded and the other is tapered for the rake, that makes 9 supports out of each handle. I haven't needed any of them in the 9 years we have been here, so I think I have ready made stock.
They happen to be 1.1 inches in diameter. Discounting the one end is rounded and the other is tapered for the rake, that makes 9 supports out of each handle. I haven't needed any of them in the 9 years we have been here, so I think I have ready made stock.
Measuring from the tangent track on the other side of the overpass, it's center rail is 13 inches from the layout edge. Looking at the enginehouse/carbarn end, I think I could get three 36-inch long tracks in there.
Moral of the story; The Penguins and Pirates deserve to lose! ![]() But the Enablers provided me with a great idea!
But the Enablers provided me with a great idea!
Mark, lots of great ideas flying around here. I especially like Bob’s idea for a two story building. That would be a unique and interesting feature. You are wringing every inch of space out of this room!
Andy
Thank you, Andy!
I spent some time removing the supports of the overpass that were in the way of the lead track for the little yard. Then I laid some cork for a roadbed. I ordered some switches, but when they arrived I realized I forgot to order a right hand switch instead of a left hand switch. Today a good Forum member came to the rescue with the correct switch for sale, so it is on the way.

With that project on hold, I decided to go to the other side of the room to see how I could fit a town in between all the tracks. This will be a work in progress repositioning buildings and deciding what else I need before I make any bases, streets, and other features. Here is the first rendition. I think it will work out better than I thought when I started. Please note the Menards Train Shop and the Plasticville church are actually sitting on the brick window sill. I might as well use that to give a little more depth to the town to suggest it goes beyond the tracks since there will be no backdrop there.


It is a rather nice vantage point to see the layout from while doing laundry. ![]()


Slow but sure wins the race. It's coming along nicely, Mark.
Ahhhh! Laundry. One of the easiest chores for me. I like the sky you painted. The light color just above the hill/tree line contrasting with the darker blues above works well. I might try that if I can ever get around to it. Lot's of cool buildings!
Thank you, Pat and Pennsynut!!! The sky worked well. Actually I bought the backdrops from Forum member George (G3750). He had them painted for his PRR Panhandle Division Version 1. I do have to do a little more painting and will get my artist daughter to help me pick matching colors to try to blend in the best I can. We have examined the technique, and it shouldn't be a problem once I have the right colors and learn to mix properly. That will be a winter project. Since she and her husband live less than a mile away, I can get her inspections almost any time. Our other daughter and her husband live a whopping 2 miles away, so I get input from them also.
Mark, things are really looking good on the Blackwater canyon line! Keep up the great work and keep having fun doing it!![]()
Thank you, Mike! Scenery is my favorite part of the hobby besides running trains.
@Mark Boyce posted:Thank you, Mike! Scenery is my favorite part of the hobby besides running trains.
Your more then welcome Mark, I am getting that way! But I also still like scratch building things!
Looks great Mark! Things are coming together nicely.
Andy
Looks great, Mark! I needed that - haven't done a lick of work on my layout all summer, so your pics help a lot. ![]()
WOW, the put together town looks like a well planned part of your layout! Great job 😀
Thank you Andy, Firewood, and John,
Starting to really look like a layout now Mark. Nice to have your vision come to life.
Bob
@Firewood posted:Looks great, Mark! I needed that - haven't done a lick of work on my layout all summer, so your pics help a lot.
I know the feeling. For months I got too busy on other things to run trains let alone tackle long thought about modeling projects. As a result of staying home and restrictions on traveling, I am refocused. Reading posts by the folks like Mark who are building or rebuilding layouts and others who have great imaginations and scratch build really cool things is inspiring.
Thank you, Bob! You are right about it being nice to see it coming to life. It was 4 years ago when our older daughter, last to get married, was cleaning out this room, her art studio, and moving things to the house they bought. Her husband-to-be was living in the house by himself until the wedding Sept 10th. I opened this topic in early January 2017. It was a somewhat rocky road getting to 2017 and a similar road developing plans, facing missteps, and reconfigurations, as you well know getting the layout going. This is Plan D as I like to call it. ![]() Good things do not come easy. That makes them all the more satisfying!!
Good things do not come easy. That makes them all the more satisfying!!
I think it is a good time to once again thank each and every Forum member for his or her suggestions, constructive criticism, and encouragement. This layout would not be what it is today without all of you members and the OGR ownership and staff for providing this venue!!!! ![]()
@Firewood posted:Looks great, Mark! I needed that - haven't done a lick of work on my layout all summer, so your pics help a lot.
@pennsynut posted:
I know the feeling. For months I got too busy on other things to run trains let alone tackle long thought about modeling projects. As a result of staying home and restrictions on traveling, I am refocused. Reading posts by the folks like Mark who are building or rebuilding layouts and others who have great imaginations and scratch build really cool things is inspiring.
I understand completely!! I spent too many years in a rather limbo state trying to get layouts started but life got in the way. That is a huge reason why we share what we are doing here; to encourage others as we have been encouraged. Thank you both!! ![]()
MarK, very nice work !
Thank you very much, Leandro!!!
Looking good Mark.
Thank you, Dave!!
Looking great Mark! Come a long way from since I last saw it! Keep up the great work!
Thank you, Lance! I hope you are getting time to work on your layout too!!
Yesterday I received the GarGraves 042 right hand switch from Sidehack Ray that I needed for the yard. I assembled the tracks for the yard and placed 40-foot boxcars on to see how many the yard will hold. It looks like 8 if I foul one switch with a car. If I filled the yard with 2-bay hoppers, I should be able to get one additional car on each of the two longer tracks. It would be nice if the tracks were longer, but this isn't bad for a small layout that I want to emphasize mountain scenery. None of the yard tracks are wired or fastened to the roadbed yet. I did run a train both ways through the new 054 right hand switch leading off the mainline and all worked well. I still have lots of wiring to do.


Looks good Mark, great job on making adjustments ad hoc!
Thank you, John!! Ad hoc seems to be the way of it for me! The trouble is, I have so many left over parts and pieces! ![]() I'll have to have a GarGraves-Ross discount sale when I get all the track finally in for good!
I'll have to have a GarGraves-Ross discount sale when I get all the track finally in for good! ![]()
The yard looks great! I always think high density track areas look exciting.
Thank you, Bill! I wish I had more room, but I am glad I have what I have!!
HOLY CANNOLI MARK!!! Nice work! Yes... I have 21' but you have *Depth*!!!
~~~Maybe my wife doesn't *really* need to go upstairs~~~~
dennis - the envious
Mark,
You have been moving things right along as of late. It's great to see your progress. Your yard is nice and the boxcars look good there.
Dave
Mark, Wow, I like your new yard, cool idea, nice work. Your layouts coming alive in a vibrant way. Keep the pictures coming. Your friend in Tennessee.
The wisdom of your approach to the construction is manifest in the way these problems get worked out. Plan, yes: but then lay the thing out for real and adjust for the inevitable disparities between the plan and reality.
Every one of the disparities has become an opportunity for you, Mark, and you have a talent for making the most of them.
Mark really looking good is that the area that was underneath the 2 stall engine house? No space goes to waste smart use of limited real estate.
Thank you, Dennis, Dave, Larry, and Palallin!!
Dennis, there you go; each of us sees the good part of what the other has. We both are very well off!! I think your wife will want to go upstairs and use that great kitchen and bathroom you posted over on your topic!!!
Dave, and the funny thing is, I wasn't even going to put in switches there, just a shelf to hold cars for moving by hand up top. Bob, Brian, and others convinced me to do this. Smart men!!
Larry, It is coming alive. An extremely dry and hotter than normal July and August gave me incentive to stay in the train room more than normal. It may not look the prettiest, but all but the track will be covered up at some point.
Palallin, I had a manager many years ago who would say, "Mark, I have an opportunity for you." Maybe he contributed to my ability.
I was looking at the three 042 GarGraves switches for the yard. All the rest on the layout are Ross-Ready switches which are pre-wired underneath. I think they spoiled me, since I will have to put more attention into wiring to make sure all the tracks have power no matter which way the switch is thrown. The right hand one directly under the overpass is manual, so I ordered a DZ1000 and a tie extender to make it automatic. I still have to wire up all the DZ1000s, I have just been sliding the little button on the DZ1000s manually to change positions. There are so many things to do on a layout of this size, I can't imagine building a layout that takes up most of a basement.
@RJT posted:Mark really looking good is that the area that was underneath the 2 stall engine house? No space goes to waste smart use of limited real estate.
Thank you, Rick!!
@Mark Boyce posted:Dave, and the funny thing is, I wasn't even going to put in switches there, just a shelf to hold cars for moving by hand up top. Bob, Brian, and others convinced me to do this. Smart men!!
Mark- would you mind if I frame this and show it to my wife....she never believes me when I say it. ![]()
The yard looks great. It will give you some nice options when running trains.
Bob
Bob, LOL!!! I’m always glad to help! LOL. I do appreciate the idea and encouragement.
Mark.....things are moving along nicely.....excellent work!
Peter
Thank you, Peter!!
Yard looks good Mark. I used to foul my switches in my HO days. I would always have issues keeping things organized in the yards. What a mess. Of course this was way before I was an adult, but I should have learned.
Thank you, Dave!! If I had space for much longer tracks, then I wouldn't have said I have room for one more car by fouling the switch. Also, If I was trying to run a prototypically operated layout like is so common in HO, and the switch list said to take only the farthest back car on a particular track, it would be a problem. I just want to be able to have a place to keep some cars ready to switch in and out and don't care which ones or what order so it works. I haven't decided yet how I will store cars ready to be put on the yard and be taken off. One problem at a time is all I can handle! I don't know how I handled multiple problems during my working years. ![]()
I agree Mark. One of the other things my brother and I did so long ago, we had the famous track that goes nowhere. Just sitting there holding cars that could only be accessed to trains by hands, lol. Sometimes that is necessary with no real space.
Dave, I was just looking at the layout today contemplating that very thing for a couple of heavy steamers. It seems the only way for me to be comfortable moving engines. I could keep shelves below the layout for cars, but I am afraid I would drop a hefty steamer. The enginehouse is two spots, and I was thinking of a track with no connection adjacent that could store one. Also, I have a spot on the lower level that could do the trick. After two carpal tunnel surgeries in each hand, a broken dominant hand and arthritis especially in the thumbs, I just don't have confidence in my gripping power. After so much therapy and exercises, I have to what my dad taught me as a teenager; "Use your brain, not brawn." ![]()
Yeah, don't need a slip up. That is always the "not fun" situations we all try to avoid.
I’m glad you have things on the move and trains running on the layout!
I’m hoping for things to slow down so I can work on my layout this Fall.
Al
Al, Thank you very much!! It's a jerry rigged mess of jumpers right now to check the functionality of all the track. I am dawdling on starting to wire permanently. As a recently retired electronics technician/engineer of 43 years, I do not like wiring and soldering. Electronics and electricity was always a job to me, not fun. I dread the thought of having to go back. ![]()
I hope to see you are able to get back to your layout soon too!
I have not been able to get a lot done on the layout in September and October because of trying to get outside work done that I didn't do during the unusually hot summer. Usually we do not get highs to 90 degrees in the summer, but it happened many times this summer. Now I have everything done outside and am waiting for the rest of the leaves to fall.
I installed track and power drops for two long sidings that can be seen in the photographs. Putting power to everything with alligator clips, all the tracks work and the trains move across the switches in either direction. I have the leads for the switch machines for the yard through the table, but have not powered any yet.


Next will be putting new traction tires on the H9 that is sitting on the tabletop and building the supports for the enginehouse tracks and wye above the small yard. I have several broom handles my late father-in-law had here that I can cut to length for supports. When he bought something, he usually bought several, more than a lifetime supply so to speak.


Mark:
Your layout is shaping up well.
@Mark Boyce posted:Al, Thank you very much!! It's a jerry rigged mess of jumpers right now to check the functionality of all the track. I am dawdling on starting to wire permanently. As a recently retired electronics technician/engineer of 43 years, I do not like wiring and soldering. Electronics and electricity was always a job to me, not fun. I dread the thought of having to go back.
I hope to see you are able to get back to your layout soon too!
Mark, I was an appliance tech for many years. Every house I entered held an unhappy customer because the thing quit had working. I am such a happy customer I'm delighted to do wiring&electrical work for myself. ![]()
![]()
Thank you, Randy!!
Lew, I do have to agree with you it is very beneficial to be able to do it myself than hire an electrician to or appliance technician to repair what I can do myself!
@Mark Boyce posted:Thank you, Randy!!
Lew, I do have to agree with you it is very beneficial to be able to do it myself than hire an electrician to or appliance technician to repair what I can do myself!
Mark
I need this Covid thing to be over, so my son can come down here (from Canada) and do the wiring for me. I know how to, but at my age, I don't want to. As an engineer, I was always a reluctant technician. Although with only one technician for 6 engineers I didn't always have a choice. I was good with through hole components, but SMT was a challenge and that was 15 years ago. At no age, have I had good manual dexterity.
@Oman posted:Mark
I need this Covid thing to be over, so my son can come down here (from Canada) and do the wiring for me. I know how to, but at my age, I don't want to. As an engineer, I was always a reluctant technician. Although with only one technician for 6 engineers I didn't always have a choice. I was good with through hole components, but SMT was a challenge and that was 15 years ago. At no age, have I had good manual dexterity.
Keith, my manual dexterity wasn’t very good either. I moved to engineering at age 51. Now turning 64, I’m done. Wiring is slow for me like carpentry. Fortunately my layout is in a room that is 11x11. 😄
Looking great Mark. Track is coming together very nicely, pretty soon scenery will be coming in before you know it.
It's coming along nicely, Mark. Great to see your progress.
Being a retired engineer, wiring control panels, adding timers, relays etc. is my main role at my club. I don't go under the table anymore though.
Dave NYC Hudson PRR K4 Dave, Thank you!! Once I got the main line in I would have started scenery because that is my favorite part of the hobby, besides running trains. However, I wanted to see how these sidings would fit in, so I might as well get the track down. Also, I wanted to get the yard in and make sure I could get the wye and enginehouse in since it was an afterthought. I am looking forward to working on scenery.
Pat Kn Pat, Thank you!! I worked for 43 years, mostly as an electronics technician, but the last 10 years as a network engineer. I have crawled into so many tight spots and underneath desks, tables, and cubby holes, and up in ceilings over the years, that I don't like going under the layout. I am like you, I don't want to go under the layout even though it is fairly high at 44 inches. That is why I didn't power up the mainline permanently yet. I have a good adjustable roll around stool now that helps. I think I will work on the wiring in stages as I work on scenery to break up the time under the layout.
I worked four 44 years as an electronic engineer. At 68 years old with two bad knees it's not that I won't work under the table but I can't work under the table.

Access to this requires an OGR Forum Supporting Membership
