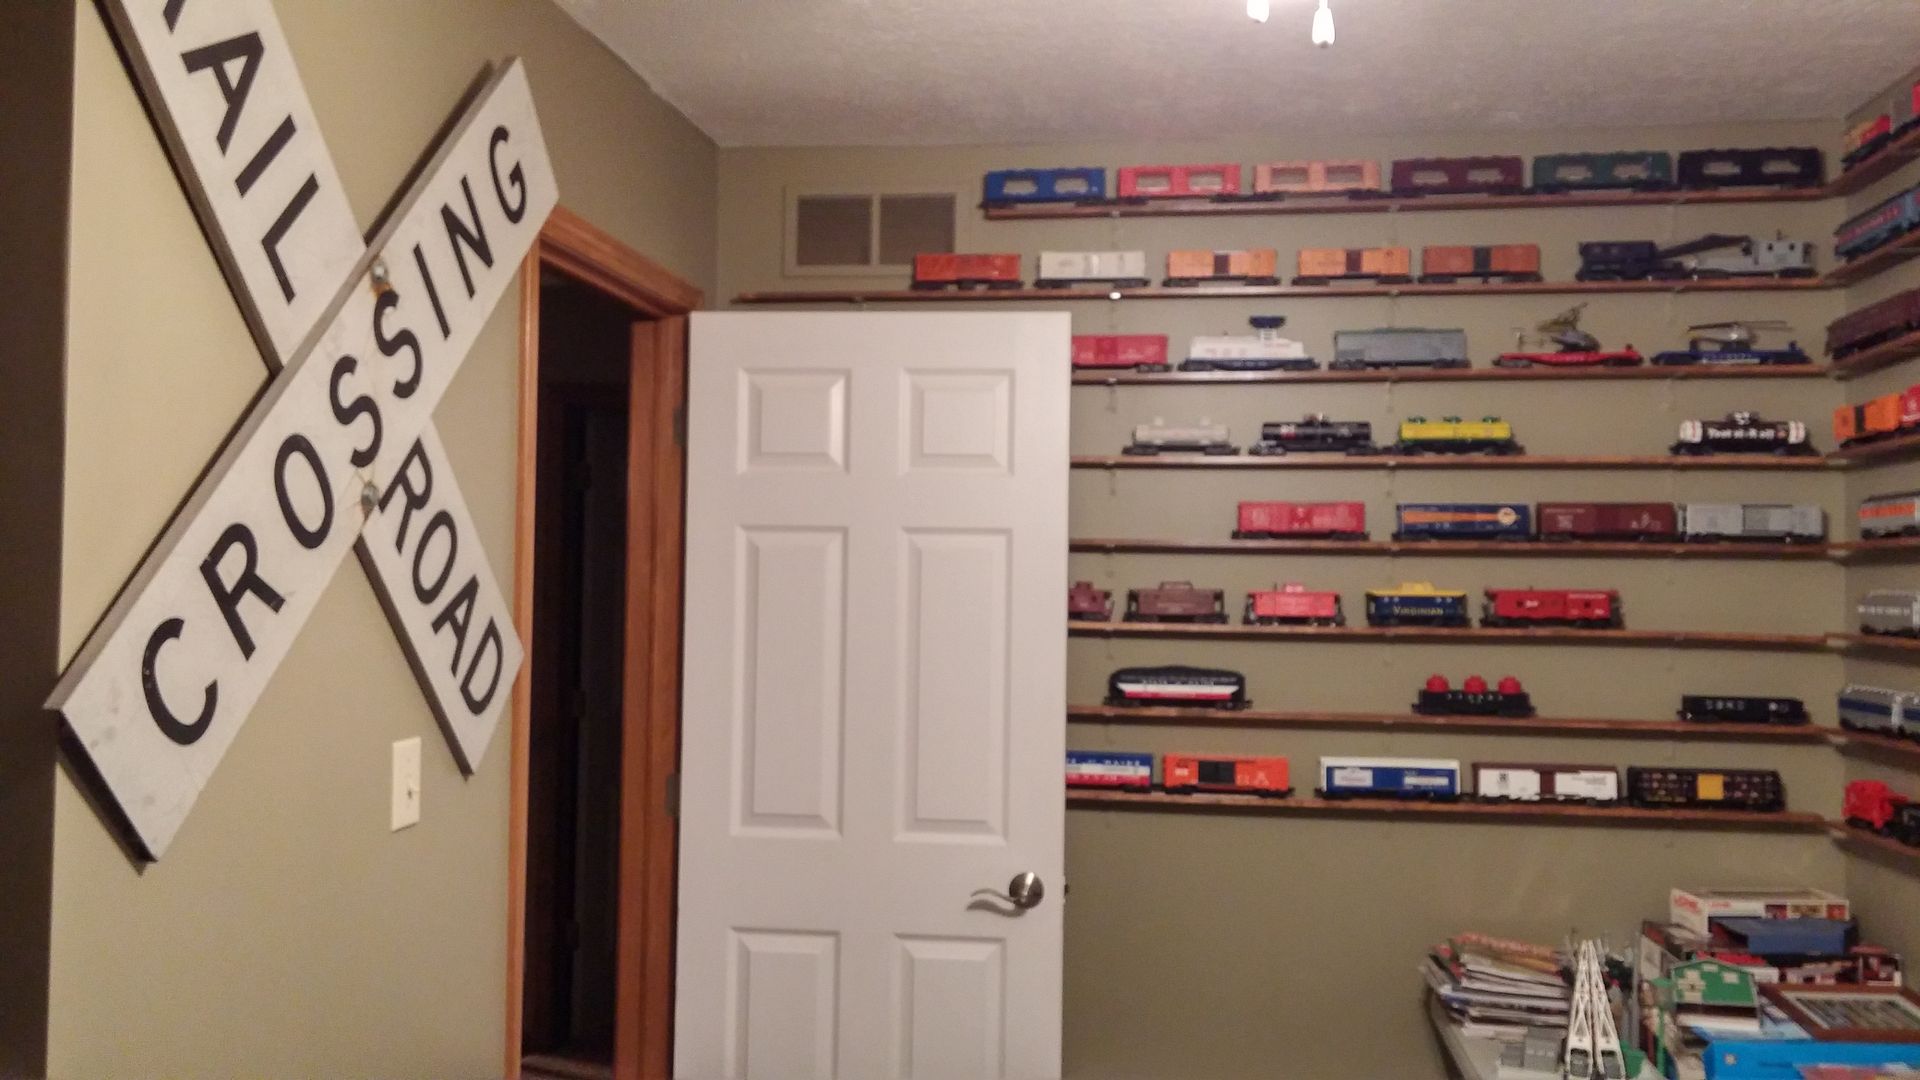
So let's see those shelves!
So let's see those shelves!
Replies sorted oldest to newest
Glenn Synder Display Systems
You can also use the SEARCH feature and type in "display shelves" as this topic has been discussed numerous times with tons of photos of everyones collections and ideas.
I like the Snyder system but I see they don't take plastic money. That's how I do all my business so they will be a no go.
These are some of the shelfs in my train room. The B&W Prints on the wall, were taken by myself & processed in my home darkroom.
Click photo for description & to enlarge.
Attachments
Thanks......... ![]()
So let's see those shelves!
As LOS said, the search function is an excellent feature of the forum; especially, while you wait for responses to your query.
TRG, nice plate girder presentation of the shelves, and supplying current to the rails and structures is a big PLUS.
Mine done on the cheap, lower shelves are cut from a 8x4 ply sheet & the upper shelves are decking planks.James

I built my shelves using grooved molding from Home Depot that I stained and used L brackets to mount them to the walls.

Paul
Attachments
I used my so-called carpentry skills to make a few shelves by simply cutting slots on my table saw for the wheels, and assembling them in the configuration below.
And for trains that I don't have room for on the walls, I made drawers to store them until called upon to run. By the way, ALL my trains can be run and I try to rotate them on the layout. That's what they were made for, right?
Attachments
two sets, one are mine that I take to shows to display my rolling stock and locos.
the other is my brothers shelving units he displays his collection of hess trucks.
my shelves have grooves cut in and inch and a quarter apart so wheels will sit
in grooves and cars don't roll off shelves.
Attachments
The are no good sitting in the box! I display what I can... Makes it easier to run them too.
Oh and that space available on the one shelf... yeah its gone now...
What is the spacing between the shelves, the depth of the shelves and the type of 90 bracket you used? I see it's an adjustable shelving system, which is what I'd like to use, but all the 90 brackets I've seen are such that I couldn't get teh shelves that close together.
Gap, not sure of the height spacing. Rails have notches approximately every inch. Brackets do extend beyond the shelf.
Glenn Snyder display shelves:
Peter
1 x 4 pine boards, cut the wheel slots on the table saw, stained a cherry tone, attached to wall with 2" brass brackets. could save money by skipping the staining and using the steel brackets, but this is in my home office, so i wanted a little more of a finish to the look.
Attachments
My experience:
1)build modular - you will move your display around and the shelf spacing
2)I used no2 pine 1X3X 10 ft. - buy from a lumber store- otherwise your shelves will warp up to 1 year after you install. learned the hardway
3)I let the engines rest on the soft pine right on their flanges.
When I cut groves on the first set of shelves the traction tires would stick to the shelf, and then when you pulled the engine off of the shelf...
Also the variation of the grooves needs to be determined so your engines and rolling stock will fit in these grooves... I would always find on engine that would not rest in the grooves...
4) I put my shelves up and into service for one year, then sealed them with polyurethane. Thus the ones that warp beyond its usefulness could be replaced easily
5) Absolutely make sure your rails are mounted into 2X4 studs, and are firmly torqued down. Use all holes given in the rails. I mounted a rail every other stud.
6) Make sure all the shelves are screw into the brackets to avoid somebody hitting a shelf and bringing a few prized locomotives to the ground.
7) You will have to dust your display a bit with these shelves.
8) cost was cheep less then 200.00 for one display.
9) Sell the flex track, it just adds weight, and space from each shelf to the next. thus you display fewer trains. Also track is expensive...so I sold my extras on the bay and used that money to buy more engines ![]()
Attachments
I like the Snyder system but I see they don't take plastic money. That's how I do all my business so they will be a no go.
Yes their old school technology really drags things out, but I have so many of them now, I just keep buying more. I live in CA, and NY to CA shipping for 50 plus pounds ain't cheap either ![]()
Speaking of which, since Christmas, I think it's time to order more ![]()
Attachments
When I came home from York with two 6' sections of Glenn Snyder shelving, it was not "well received". While it isn't an actual picture, this should give you an idea of what happened to my Glenn Snyder shelving....

Considering there was not a word said about the 7 cases of Natty Boh or the new Lionel N&W "A" too, it wasn't as bad as it could have been. At least no trains got shot, buried, or drowned in the process. In the end I was only out about $45. For now, locomotives "live" in their respective OEM boxes.
Gilly
My shelves are made from re-cycled wood planks from a house my son helped rip down. I used the old wood, because it matched the decor of our closed in porch. I added more shelves on the tree other walls of the room, but no pics are available yet. The shelves are all filled, so what do I do now?
Don
Attachments
Wow Jim, I was just thinking, that shelving looks familiar.
My train shelves are made in two sections each to allow moving thru doors. They also stand on the floor and are held to the wall by two 1" x 1" angles screwed into a wall stud.
Construction is 1" x 4" straight pine lumber with grooves routed in for train wheels. They are glued and nailed together and have 1/8 " Masonite nailed on the back to keep the shape square and keep from marking wall. Pieces of white felt are glued on the back of Masonite to keep from marking wall also.
Over all view shown above
View below shows joint between two halfs of shelves
Some 6 inch wide shelves allow display of accessories.
Photo below shows powered track to allow lighting cars
Next picture shows shelf legs setting on floor
Top shelf is 8 inch wide to hold other train items
Over all view of all 3 shelves
The two large shelves on the left and right of the picture were in the halls of my present house and three prior houses for many years until the train room was built making the spouse very happy! I built the smaller center shelf to fit that spot between the windows.
Notice in last picture I have added two more small shelves under two windows for more trains. One never has enough trains and thus shelves.
Charlie
Attachments
Some of my shelves are close to 30 years old.
When I started to have more trains than track that was on my first 4x8 table,I started to build these crude shelves so I had a place to put them when not in use.
You could go downtown to the local lumber yard Miller Bergen and Welsh and buy 1x3 pine boards for
.75 cents a piece and 1x6s for 1.40 a piece and those where in 6 foot lengths !
Those days are over !!!....I can still hear old Mr Welsh saying."your killing me kid" as I would take a piece from the rack and examine it to see how bad it was bowed then put it back looking for a better piece !
Attachments
I did mine 3 deep using brackets I purchased at York (might have been from Glenn Snyder -- I don't recall) and some wood to elevate the back two sets of shelves.
The picture is a bit old but you get the idea. I think it worked really well.
Gerry
Attachments
When I came home from York with two 6' sections of Glenn Snyder shelving, it was not "well received". While it isn't an actual picture, this should give you an idea of what happened to my Glenn Snyder shelving....

Considering there was not a word said about the 7 cases of Natty Boh or the new Lionel N&W "A" too, it wasn't as bad as it could have been. At least no trains got shot, buried, or drowned in the process. In the end I was only out about $45. For now, locomotives "live" in their respective OEM boxes.
Gilly
Recycling day is on Friday. You'll never know when something really good is sitting at the curb.
Precisely!
Gilly
To: Mark Strittmatter
I'll bet it does.
Some great looking shelves and nice collections, look great.
I use pine paneling boards with 2 inch L brackets just drill the boards and use small nuts and bolts to attach the brackets at the location of the wall studs. If heavy engines long track lengths work well for support.
In the main train room I have the empty model train boxes behind the shelves against the wall for somewhere to store them out of the way.
Attachments
The shelves are all filled, so what do I do now?
Don
That TV has got to go!![]()


