I have observed the product with some interest. Any experiences or review?
Replies sorted oldest to newest
I tried the stuff and didn't like it - it always turned "Barney the Dinosaur Purple" no matter what brown paint you would use plus it never really dried solid after a few weeks and following the directions to the "T". I prefer the old carved foam method. I still have half a bag in the basement.
Boy was I skeptical before I tried the Tru Scene product. I have semi successfully carved foam, and watched the old school plaster cloth methods. Tru Scene is so much easier.
Using the paint type in the instructions makes a big difference. I found that the final mix color was not critical. Your eye tends to focus on the effects created by the addition of ground covers.
I believe that it is the easiest product to use by the beginner and is not limiting to those with great scenery skill.
My experience is only positive. There is no waste. Once you have mixed a batch, it can be used until finished with only some rehydration. There is no need for the glue step that disturbs your dry ground covers. You can add additional effects, even after drying. It can be truly a one step process from troweling on the Tru Scene to completion with ground covers. It is the only product that I have ever used that I got more coverage out of than claimed by the manufacturer/distributor.
John,
Talk to Terry.
Chris
LVHR
I'm not at the point of doing scenery in my layout construction yet, but I tried Tru Scene on a small test. I used a piece of thin plywood as a base, and applied Tru Scene in various thicknesses. I was amazed at it's ease of use. I followed the directions in every way, including earth colored paint, and it performed exactly as advertised. Once I added ground cover, etc. the result was very impressive. This being my first attempt at scenery, I was very pleased.
I've been using it for a couple of years now and love it.
Very easy to use, if you can spread frosting on a cake then you can use this stuff with no problem.
I bought an old 3 quart cooking pot at a local CHKD Thrift Store for a buck and use it to mix the fibre with hot water and whatever color paint I add to the mix. When it starts looking like oatmeal I start spreading it out using a putty knife, trying not to make it too smooth so it looks like real ground (I've even used a wire brush to "pick" it up). While it's still wet I apply Woodland Scenics ground cover. I've even used a small paint roller to help embed the ground cover, when the roller is lifted it also helps "pick" the area so it's not so flat.
My last project (not done yet) was putting it BETWEEN the ties of the track. Bill recommended that the fibre be put down THEN the track place on it but I did it in reverse. I used the paint roller and tongue depressors/popsicle sticks to press it down and again after I spread ballast over it. It took a lot longer to place between individual ties, but I was in no hurry.
I don't think it makes much difference what color you buy as the paint you add will turn it to that color anyway.
Bill and Maria were very helpful answering my questions, they also have some great how-tos on their website.
Here's a quick photo of an area on my layout:

The areas where the trees are is covered with the fibre as well as the ballasted track. The track in the foreground was recently taken up (removed a switch, you can see the imprint), you can see the thickness of the fibre I laid down, approx 1/8" or so. Putting the fibre down with ballast on top of it saved a lot of ballast material, just a thin layer on top of the fibre is all that's needed.
In this photo:

you can see the main line (gray ballast) and the lower spur (brown ballast). The area in between the 2 tracks has fibre applied and the area where the truck and buildings are is still flat, painted and covered with ground foam.
The ground foam covered fibre give the landscape a 3 dimensional look to it over the flat surface.
I'm lousy at doing scenery anyway, but I do believe the True Scene fibre has helped me do a better job.
From looking at their website it appears they have a new, improved material now called "Fusion Fibre". I haven't used any yet, I still have 1/2 big bag of the old stuff I need to use to patch up the areas where I've removed track and others i just haven't gotten to yet.
I say go for it. Before, doing scenery was just a chore, but I really enjoyed using this fibre.
To really see some nice scenery, look on their website at some of the photos they have:
This is the best and easiest scenery material to use. We call it the moosh. Gives great texture If you don't like how it came you just wet it again and resculpt what you had I love this stuff
Interesting.
Thanks, guys, for the information!
I haven't tried the stuff (always have been a Sculptamold guy), but certainly will give it a try now. If the NJ Hi-Railers like it, that's good enough enticement for me.
I love this stuff. Easy to use and has a built in adhesive when wet. The new stuff is white so it takes tint. The old stuff was colored and had 3 different textures now it's just one.
You won't be sorry.
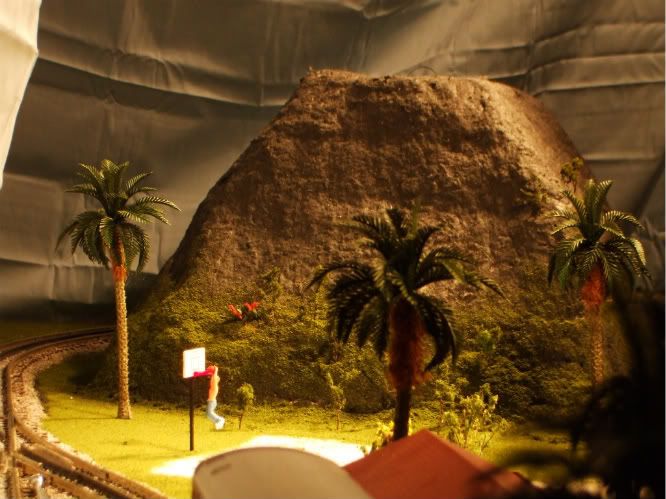
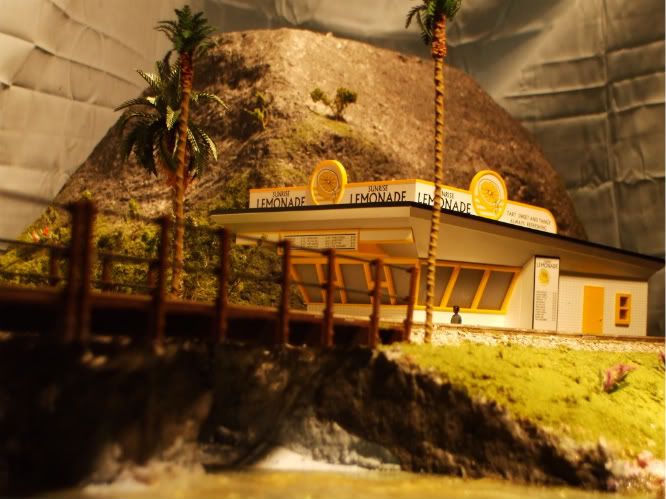
I have been hooked on it since I first tried it. Here is a sample of what I have done with it. The volcano and rock walls under the bridge were created by cutting blocks of pink foam, wrapping them in drywall mesh tape, and then applying true scene modeling fibre. The color was mixed into fibre before application. Before the fibre dried, I added the ground color.


I highly recommend True Scene Fusion Fiber. Very easy to mix and apply. Its great for areas that need filling in. After it dries, a little diluted white glue and a sprinkle of ground cover and you have terrain that blends into existing scenery.
Attachments
This product is great IF there is little or no moisture in your train room. If your layout is in a basement with normal basement humidity there will be problems with getting it to dry.
--Greg
I apologize for not seeing this thread sooner. Last night I had a chance to google our name and review mentions and this thread came up.
SCJ is correct about "the purple dinosaur color" when tinted with brown craft paints* with some of our original bulk modeling fiber. This is probably still true with with certain craft paints*.
To the best of my knowledge low end craft paints* have different absorption properties (think paper chromotgraphy) for the basic and secondary colors. Each basic color is not sufficiently similar ( chemically) on the low end range of paints. When used in our product the blue is not absorbed as well as the other colors and purple results. The cotton fiber/ cellulose mix is very much like paper chromotography.
When using quality paints there is no issue and for basic colors there is no issue on the paints/ powders I have recently used.
Artist acrylics: liquitex and some similar store brands. I used Hyatt's version as the shop is convenient.
Concrete tinting powders: Scenic Express sells these as tinting powders. Btw I saw a person using these powders to weather buildings and rolling stock at the Big E with excellent results. A dullcoat or clear krylon spray is used to set them.
Greg, you are correct if its wet then you could be talking weeks with no light or heat. Think what it would take to dry a wet rag. So put your work light over it about 30 inches.
Allan:
your advertizing department has at least one bag.
Thank you for trying and using something very new. Its also a very kid friendly to use.
====
On a personal note: Frank in Steam, is (was) affiliated with the Hi rail group, FCTT to which I belong, and so consider his opinion biased.
Frank was instrumental in getting FCTT moving towards highly realistic structures and scenes. Mention the word train and his eyes would light and a big smile would fill his whole face. His last show was done on a high note, in August 2012 when FCTT hosted one of the national conventions with a layout that may end up being the largest and most detailed hirrail modular layout ever built ( or at least I have ever scene). Frank passed away suddenly after a sort illness as many of you know.
Bill D


