@Sean007 posted:

Nice work Vinny! I wouldn't worry about the size of the bricks, the factory looks great.

The lighting really adds to its appearance. Did you add that or was it part of the kit?

@Vinny DeAngelis I agree about the size of the bricks.  I am working on a scratch build where the size of the bricks on the Plastruct sheet are a different size from the ones on the laser cut kit I just finished.  In the real world, a house down the road from us used bricks noticeably larger than the bricks on our house.

Installed a Lionel Coal Loader, that did not work.  So, I converted it to be loaded and dumped manually.  Thought is that kids can do that

I pic 1- you see the red button- push and the chute operates, filling a hopper car.  Still an operating accessory- sort of, and maybe adds interest for the grandkids.

And it (to me anyway) looks more realistic than the operating units.

Pic 2 shows the back- I made polystyrene chutes to direct the "coal" into the center area over the chutes.  Just dump the coal down the chutes.

Pic 3 shows it on my layout's coal mine scene. 

Next, I will assemble additional Walther's Cornerstone HO scale conveyors simulating the coals path from the mine. (You can see some of the conveyors already installed in the background of pic 1, and to the right  in pic 3.)

Coal Loader 1


Coal Loader 2

coal loader 3

Attachments

Images (3)
  • coal loader 3
  • Coal Loader 2
  • Coal Loader 1
@Mike Wyatt posted:

Installed a Lionel Coal Loader, that did not work.  So, I converted it to be loaded and dumped manually.  Thought is that kids can do that

I pic 1- you see the red button- push and the chute operates, filling a hopper car.  Still an operating accessory- sort of, and maybe adds interest for the grandkids.

And it (to me anyway) looks more realistic than the operating units.

Pic 2 shows the back- I made polystyrene chutes to direct the "coal" into the center area over the chutes.  Just dump the coal down the chutes.

Pic 3 shows it on my layout's coal mine scene.

Next, I will assemble additional Walther's Cornerstone HO scale conveyors simulating the coals path from the mine. (You can see some of the conveyors already installed in the background of pic 1, and to the right  in pic 3.)

Coal Loader 1


Coal Loader 2

coal loader 3

Nicely done! I've been wondering what that coal loader would look like modified and weathered. Hrmm

Well not on my layout but connected. I’ve been wanting to do an inventory; my son said that he would come with the boys. Last week my grandson said that there’s an to use. You take a picture of a barcode, send it to the app which fills a spread sheet. That would save a lot of time for the newer boxed items. Turns out the Lionel and MTH bar codes aren’t compatible with the app. My grandson took pictures of all the box ends and the older unboxed items.  Plan is I sit at my desk and do the data fill. A lot easier than juggling a laptop on a ladder. Here are two examples .IMG_0224IMG_0223

Attachments

Images (2)
  • IMG_0224
  • IMG_0223

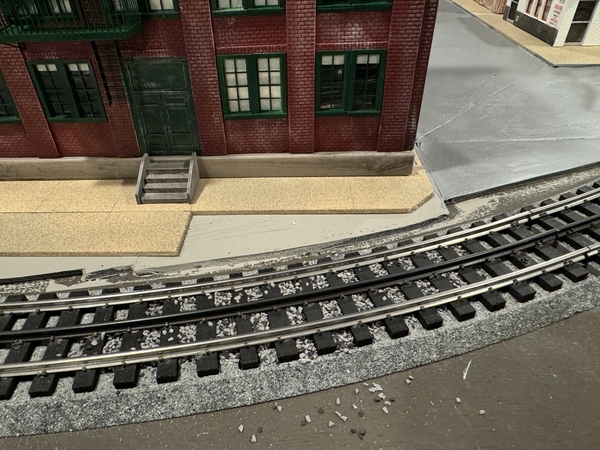
The sidewalk looks impressive Peter. You may have mentioned this but where did you get the sidewalks and were they already scribed? Thanks, Jay

Thank you, Jay.

The sidewalks are 1/8” Balsa glued down. They come in1, 2, 3, 4 & 6 by 36” sheets.

The sidewalk is basically 2” squares (8 scale ft) and the curbs are 3/16-1/4” The scribing was done by me with a pencil and my 18” metal ruler. The scribing is done before the spray painting and shows through the paint.

I, for the most part, only scribed areas you can see. You can see that when I took the buildings off to repaint the street,,,,,

IMG_1750IMG_1753

Let me know if I can provide any further details……

Peter

Attachments

Images (2)
  • IMG_1750
  • IMG_1753

Continuing on from my previous post where I cut 7 feet off the layout to move to a different room. Here is the current mess with a little progress. I have the tables in the new space and started to strip off old scenery. I have a vague idea what I'm going to do but time will tell. My wife has suggested I make it a little bigger with a U shape. As long as I have walk around room and reach, I'll consider this option. More next week.

L1L2L3L4L5

Attachments

Images (5)
  • L1
  • L2
  • L3
  • L4
  • L5
@Dave Ripp. posted:

Continuing on from my previous post where I cut 7 feet off the layout to move to a different room. Here is the current mess with a little progress. I have the tables in the new space and started to strip off old scenery. I have a vague idea what I'm going to do but time will tell. My wife has suggested I make it a little bigger with a U shape. As long as I have walk around room and reach, I'll consider this option. More next week.

L1L2L3L4L5

Dave,

If your wife says make it bigger then I would suggest that you had better comply. Those words may never before have been uttered in this hobby.

Jay

@Mikki posted:

I thought the same thing and I AM the wife (girlfriend, actually). He just shakes his head as I try to add more space. ALTHOUGH he really surprised me one day when he verbalized something that I was already thinking about, putting a yard extension in front of the windows.

Mikki

@Mikki I'm currently in negotiations with the CFO to add an extension for a diesel yard. So my layout would be L shaped. Diesel yard on one end and Steam on the other end.

Negotiations have been tough so far, I even threw in one of those mini ducks that run around the house in a diaper. ("We have a micro-farm with a bunch of rescued animals") so that's not out of the ordinary to have some kind of animal running around... Lol

@Dave Ripp. I agree with the others! Too funny!!

@Mikki posted:

I thought the same thing and I AM the wife (girlfriend, actually). He just shakes his head as I try to add more space. ALTHOUGH he really surprised me one day when he verbalized something that I was already thinking about, putting a yard extension in front of the windows.

Mikki

Mikki, sounds like a great idea!  My first of two extensions, off the right side of the main table, was a yard where the main building was the Korber kit 3 bay engine house. With O scale, we all realize the space gets eaten up quickly.  I luckily had the space for an 8' x 8' addition, and didn't have to cut the plywood for the table top...lol...!

Dave, thanks for the comment...my wife got lucky on the fabric by buying a "bolt" as she mentioned, for a bargain.  I was hoping she might have enough fabric left to make me a shirt...but not luck on that one...lol...

Last edited by Capetrainman

@T-Bone1214  In this house I am the CFO! My20240922_11255120240922_112659 boyfriend bought a place in Florida where we spend the coldest months. I in no way wanted to spend all year there nor give up my own furnishings, trains (no room there) or my own investment. My realtor's job was to find us a place with an area for my layout, workroom and storage preferably on a lower level with walkout so that I can do the nastier work in the fresh air. It took two years and lots of turned down offers to find something in my limited budget but 2 years ago exactly we closed. My realtor even mentioned making a hole in the wall to have my trains run into the workroom/studio. BF thought THAT was going too far but I thought about it. My layout is L-shaped and a yard extension would make it a U. The extension would have to be very narrow so that I could get to the windows. Maybe remote-control shades would come in handy! I really need to get more finished on the main layout before I think of adding on and it probably wouldn't even be a yard it would most likely be a small steel mill as that would totally fit in with the prototype that I am modeling. Never enough real estate for our ideas.

I decided to add 2 pics, excuse the mess as I am in the middle of something. The one is looking over part of the layout towards the windows which obviously make photography a challenge. The other shows the space where I could add something. The space is 5 1/2' wide and I need room for an aisle. I do not HAVE to open the windows as you can see there is a slider to the right but I DO like having daylight when I am working or just hanging out.

Good luck with the CFO!

Mikki

Attachments

Images (2)
  • 20240922_112551
  • 20240922_112659

Mikki, sounds like a great idea!  My first of two extensions, off the right side of the main table, was a yard where the main building was the Korber kit 3 bay engine house. With O scale, we all realize the space gets eaten up quickly.  I luckily had the space for an 8' x 8' addition, and didn't have to cut the plywood for the table top...lol...!

Dave, thanks for the comment...my wife got lucky on the fabric by buying a "bolt" as she mentioned, for a bargain.  I was hoping she might have enough fabric left to make me a shirt...but not luck on that one...lol...

Paul, 8x8 is a great size for an extension! the widest that I could go would be 2 1/2' by about 6' maybe 7'. Instead of a yard a small steel mill would really fit my prototype, maybe just the tracks and a backdrop of a mill. An engine house like yours would be awesome but.......

Mikki

Morning Ladies and Gentlemen, I hope your all doing well and I see that you all have been very busy! Well, I might as well start my list as I feel bad if I don't recognize wonderful people doing wonderful work!

@Putnam Division Peter good start and I hope you find it a pleasant soul searching time ballasting! LOL

@T-Bone1214 Tom you have quite the collection of tracks going on there! I am in awe of your yard! One would guess that it is one heck of a layout! Semper Fi!

@Mike Wyatt Mike Great idea on the coal loader! Even the big kids would find it fun! Nice coal scene!

@Darrell Darrel good luck with the future layout! I will tell you the truth it really sucks without a layout! But on the other hand, it gives you something to work towards!

@Dave Ripp. Dave I feel the pain of taking down scenery and how depressing it can get! But don't let it cloud your mind, when the wife says take more room take it and dont look back! Good luck and please let us know how that one turns out! LOL

@Genemed Gene The yard is looking great! I think you did a wonderful job on the lighting!

@Lionelski John nice work on the new sign! It really pops!

@Capetrainman Paul you and the wife did a great job on the skirting! I am glad I kept reading as I was going to say maybe she could make you a Kilt!

@Mikki Hi Mikki I am Mike G. welcome and Nice to see you posting about your layout! Look like you have all the makings for a wonderful and Amazing layout! Just don't forget its mostly about having fun!

I wish I had something to share with you all, more then these words. But for now it is what I have to stay in the game!

I hope you all have a great weekend and find time to have fun with your layouts and trains!

Mikki

I am writing to suggest that you reconsider punching a hole in the wall to run the trains into another room.  I am doing just that and one can find many other examples of people on this forum who have done that.  If you ever move or tear down the layout, it is a trivial job for even a semi-skilled drywall person to patch.  Basic patch about 45 minutes followed up later with 15 min of sanding and a finish coat.  It not that radical of a move.  I searched "layout in multiple rooms" and found other examples.

Bill

@ogaugenut, Bill, thank you for your comment. As I look in the room on the other side of my 12 foot wall, I try to imagine what I could do and whether it would be worth it. I use that room for my desk, drafting table which serves as my kit building/weathering area right now and I also have a spin bike plus it has windows. On top of that, it doubles as a guestroom for the teenage granddaughter if she and her mom both visit at the same time (air mattress on floor). The most that I think I could get out of it would be above my desk to the back and not even a way for a reverse loop which I need. It would basically just allow a train to sit out of view for a while. I will check out what others have done and continue to think about it but.....

Mikki

Paul and Mark, now you really have me wanting to share my progress because these poor photos show so little. I have been behind due to illness which we think was Covid but maybe flu as we didn't test. Finally starting to feel a bit better and I hope to get some work done this week. I need to put the town back where it belongs in the back corner and do some cleaning up but that doesn't mean that I can't show you the dismantling of the old one and birth of the new one. I am having a hard time transferring all of my photos from android phone to laptop and can only seem to do one at a time which is tedious. It is easier for me to post from laptop. Thank You so much for your encouragement!!!

Mikki

@Mikki Good to hear you're the CFO. It sounds like it was a long journey for you to finally settle in to a place that was good for your layout! The layout looks great!

@mike g. There's a lot more to come with the track, two more levels to add. I sometimes curse at myself when I think of all the work I made for myself. Then I come here and appreciate the nice comments along with reading all the cool updates that everyone post. This is my happy place. Semper Fidelis!

Tried to add a rock wall using pink foam. I have almost decided that carving rock walls is not one of my artistic talents. So I will make use of my WS rubber rock wall molds. It will take a while, but there is no way I can get the rock facets I am looking for.  Looks OK, but not to my liking.

The other thing I did was goof up this pine tree. I needed to seal the 2 mm static grass and fine turf to the branches. I thought a light mist of Matte Sealer would do the job as it dries clear with little added gloss. The drops caused the fine fibers to bunch up and clump. I may just give it a light mist of 3M spray adhesive add a little more grass and call it a day.

Next to cover the base with cotton batting and paint and ground cover. And then paint a new backdrop.

resort

Attachments

Images (1)
  • resort
Last edited by ScoutingDad
@ScoutingDad posted:

Tried to add a rock wall using pink foam. I have almost decided that carving rock walls is not one of my artistic talents. So I will make use of my WS rubber rock wall molds. It will take a while, but there is no way I can get the rock facets I am looking for.  Looks OK, but not to my liking.

The other thing I did was goof up this pine tree. I needed to seal the 2 mm static grass and fine turf to the branches. I thought a light mist of Matte Sealer would do the job as it dries clear with little added gloss. The drops caused the fine fibers to bunch up and clump. I may just give it a light mist of 3M spray adhesive add a little more grass and call it a day.

Next to cover the base with cotton batting and paint and ground cover. And then paint a new backdrop.

resort

Have you tried hairspray? The cheap high hold stuff has been said to work well.

I use a Dremel multi-max with a straight blade to carve rigid foam. Creats more angular details.

Bob

@Mikki posted:

@T-Bone1214  In this house I am the CFO! My boyfriend bought a place in Florida where we spend the coldest months. I in no way wanted to spend all year there nor give up my own furnishings, trains (no room there) or my own investment. My realtor's job was to find us a place with an area for my layout, workroom and storage preferably on a lower level with walkout so that I can do the nastier work in the fresh air. It took two years and lots of turned down offers to find something in my limited budget but 2 years ago exactly we closed. My realtor even mentioned making a hole in the wall to have my trains run into the workroom/studio. BF thought THAT was going too far but I thought about it. My layout is L-shaped and a yard extension would make it a U. The extension would have to be very narrow so that I could get to the windows. Maybe remote-control shades would come in handy! I really need to get more finished on the main layout before I think of adding on and it probably wouldn't even be a yard it would most likely be a small steel mill as that would totally fit in with the prototype that I am modeling. Never enough real estate for our ideas.

I decided to add 2 pics, excuse the mess as I am in the middle of something. The one is looking over part of the layout towards the windows which obviously make photography a challenge. The other shows the space where I could add something. The space is 5 1/2' wide and I need room for an aisle. I do not HAVE to open the windows as you can see there is a slider to the right but I DO like having daylight when I am working or just hanging out.

Good luck with the CFO!

Mikki

Mikki,

I'm really diggin' the industrial complex in the middle of your layout and like how you have  used  HO scale structures for a forced perspective view. Keep the progress coming.

Dave

We all know that a layout is never really finished (something that I am grateful for - I love working on the layout). Warrenville has been evolving for 43 years now and remnants of my original 4x8 layout from 1983 still remain as part of it.

This weekend, in addition to the upgraded bridge signage I posted about the other day, I upgraded a couple other bridges in the plateau area. I replaced two short tin MARX bridges with a much larger, and double wide, lighted postwar American Flyer bridge that I recently refurbished and slightly modified. While doing so, I took advantage of the situation and realigned some trackage too.

Before and after pics:

BEFORE:

bridge replace 3

AFTER:

bridge replace 2

bridge replace 5

Attachments

Images (3)
  • bridge replace 2
  • bridge replace 3
  • bridge replace 5

Add Reply

Post

OGR Publishing, Inc., 1310 Eastside Centre Ct, Ste 6, Mountain Home, AR 72653
800-980-OGRR (6477)
www.ogaugerr.com

×
×
×
×
Link copied to your clipboard.
×
×