Following this with interest! Have you considered putting your work in a thread about working with foam? That would be a great reference for us beginners at foaming.
No pictures today.
I went and got some cash for the trip tomorrow. Then worked some on the layout. Starting to zero in on what I want to do. I am leaning on wrought iron black for the bents. Concrete color on the pillars and flat black on the platform wood. It should work well with the black FRP girder rails that will be on the sides of the platform. I also made some changes to add bents where the two tables connect and removed the supports that were tied into the sides of the tables. Helped to quiet it all down.
But for now, I am thinking a few beers and an early night so I can be ready for the trip to the North Woods of Wisconsin tomorrow.
![]()
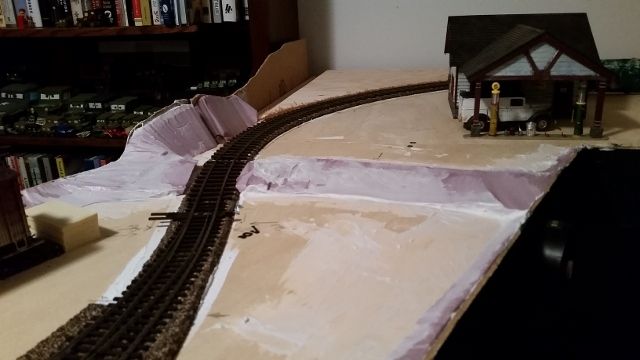
Today with nothing else going on to interrupt me working on the layout I got the other side foamed in. I thought I was going to have to buy some more foam but I lucked out and had enough to finish. This side had a bigger foot print so I thought I would run foam along the plywood edge and make a wandering stream go through under the girder bridge. Tomorrow I'll take the hot knife and cut a stream edge in the foam and on the outside cut the foam to match the contour of the plywood. Also I Still have to carve some spots on the cliff. Pics of the progress today..........Paul
Attachments
Moving right along Paul, cant wait to see the stream, I take it your going to plaster the whole area?![]()
P.S. Did you get that crane Bob showed?
Your right MIKE G, once I finish cutting the foam to blend the pieces together better I will be covering the whole thing with plaster wrap. I better check to see if I have enough before I start. I did not go for the crane. It was a bit too modern for me. I am trying to stay with a 1960/1970 cut off date but I have gone past that a bit with the Morton Salt and generating station. I am still hoping for older vehicles to be released some day. Right now sort of counting down the days to York. Bucket list is already to go. Don't even have to check it twice. ................Paul
Attachments
Attachments
Thanks it's a millhouse river studio 34" with the added indexing , also have to put lighted cab , railings, and arch together, very nice quality, has all aluminum frame, and I got the idea from their website to put a hinge on it underneath and now I can swing it down and use it as an access to the layout,
That's perfect! Use it as access hatch as well! What will they think of next?? ;-)
A good morning and early part of the afternoon. I finished any odd gluing of pieces and then started using the foam knife to fine tune the areas. The hot knife really worked well cutting the foam on the plywood edge. Going to celebrate with a cup of coffee then head back down to start applying the plaster wrap. I'll go as far as I can. I only have a partial roll of plaster wrap. Thought I had another roll. So I placed an order for more at Scenic Express and hopefully I will get it in a few days. Pics of the cliffs ready for wrap................Paul
Attachments
The cliffs are looking great, Paul!! You deserve 2 cups of coffee!! :-)
Hey there Paul, things are looking great. with everything you got done I would have to have a beer break then maybe a nap! LOL
Just wondering if you have a pictures of the hot knife you are using and any information on it.![]()
MIKE G, when I got back down I will take a pic of the hot knife gun. I do not know what make it is. A friend of mine in the local club here lets me use it when I need to cut foam.............I will stick with coffee if I have a bear I will sleep to tomorrow morning LOL................Paul
Did a major clean up of the renovation area for the CEO. Took a break from the job after two days of re-piping the heat in the room and dealing with a defective copper elbow. Had the system filled and saw a small drip from a vent fitting, tried to snug the vent down a little more and the darn thing stripped. Had to drain the entire system and replace the elbow. ![]()
Went downstairs last night and started wiring up the relay and flasher board for some grade crossing signals. Best therapy in the world....the glass of Johnny Black didn't hurt either. Pix to follow.
Paul 2- great work on the bridge and cliffs. Love the old floor tile too- I think we had the same exact tile in our basement growing up.
Mitch- just think how may Gi-raffes you could fit on that layout ![]() Norma Bates Kitteh wouldn't know what to do with herself.
Norma Bates Kitteh wouldn't know what to do with herself.
Sheetrock awaits......bye for now ![]()
mike g. posted:Hey there Paul, things are looking great. with everything you got done I would have to have a beer break then maybe a nap! LOL
Just wondering if you have a pictures of the hot knife you are using and any information on it.

![]()
Mitch
Began laying the roof on my Mesa Models rural church, which I started building in earnest around 2010 but never completed. They supplied mat board and gave instructions for a tarpaper roof, but the cast detail is so nice that I wanted something better looking. As you can see in the image, I'm using Wild West Shake Shingles. I chose their #716 because I wanted a weathered look. I have to admit that when I opened the packages I had an "OK, convince me" attitude, but all I can say is WOW now that the roof is partially completed. The shingle strips are very easy to apply. I used Aileene's Tacky Glue per MM's recommendations. In case you're wondering, the roof deck is .040 plastic sheet with printer paper spray-glued on top to give the Tacky Glue something to grab onto. I did this so my roof would be warp-free and dimensionally stable down the road.
Joel
Attachments
M. Mitchell Marmel posted:Just wondering if you have a pictures of the hot knife you are using and any information on it.

But THIS would work best for foam:

come on guys its just foam, I don't think I need a light saber!![]()
paul 2 posted:A good morning and early part of the afternoon. I finished any odd gluing of pieces and then started using the foam knife to fine tune the areas. The hot knife really worked well cutting the foam on the plywood edge. Going to celebrate with a cup of coffee then head back down to start applying the plaster wrap. I'll go as far as I can. I only have a partial roll of plaster wrap. Thought I had another roll. So I placed an order for more at Scenic Express and hopefully I will get it in a few days. Pics of the cliffs ready for wrap................Paul
I am having a Scotch on the rocks in your honor to celebrate your accomplishment and fine workmanship! Looking great Paul!
Dave
Hey MIKE G, this knife is for you. Sorry I must of been thinking about beer and a nice brewery. I used up what plaster wrap I had but could not quite finish the one side. Now I have to put things on hold until I get the order from Scenic Express. I can't work on track because I have no more switches until I get to York. I guess I will just have to lower myself and run trains on the other layout LOL. Anyways here are picks of the hot knife and how far I got this afternoon. The hot knife has two blades. A 5 inch and a 7 inch I believe..................Paul
Attachments
mike g. posted:come on guys its just foam, I don't think I need a light saber!
Try cutting the stuff with a knife and you'll see why all the light saber jokes. If it wasn't for the hot wire cutter I bought, I'd still be trying to carve the foam on my layout!
Thanks for the information Paul, guess its break time now. Enjoy the trains!!![]()
Lee, I know how hard it is to cut it, and what kind of mess it makes. I guess I am used to messes when I build, I even cut it with my table saw down to a size I can work with! Just remember your dust mask!![]()
mike g. posted:Lee, I know how hard it is to cut it, and what kind of mess it makes. I guess I am used to messes when I build, I even cut it with my table saw down to a size I can work with! Just remember your dust mask!
Mike, I carved the scenery for layout in the room it was already in place, with carpet in place long before from when the house was originally built. I also have a substantial book collection in the book cases right next to it. Getting large amounts of dust in there was not an available option.
The woodland scenics hot wire cutter was worth its weight in gold to me when I was carving the sections of pink insulation foam. I just wonder if breathing those fumes in won’t cause me problems later in life (though I didn’t expose myself to very much, not like a contractor might and I read online the fumes apparently aren’t harmful).
People see the layout now and assume I built the entire thing on a thick sheet of foam which was carved in a giant block. Not so. I made small shapes in the center of the tabletop, and along the edges, to match the fascia I had already cut to meet the profile I had wanted. Once all the ground cover was in place, it’s really tough to tell how I did it:


Once again, you show how your work looks great! I have a cheap hot wire, sometimes it work and sometimes not. So I thought I would check into a hot knife. I will let you know when that time comes!![]()
Paul,
Thank you for the photos of the hot knife. Your scenery looks good with the plaster cloth on the foam!
Lee,
Thank you for the during and after photos! Excellent results!
Attachments
Great shots, Patrick!
Came home from work late last night and spent only a few minutes with the layout. I did some more adjustments to the track I had lowered to fit under the bridge. I also purchased some more O42 Gargraves track on eBay, so I can redo one section to make room for more scenery.
p51 posted:mike g. posted:come on guys its just foam, I don't think I need a light saber!
Try cutting the stuff with a knife and you'll see why all the light saber jokes. If it wasn't for the hot wire cutter I bought, I'd still be trying to carve the foam on my layout!
The first foam carving I did recently I used a Dremell Multi-max with a fine wood blade. Still messy but not to bad. I kept the shopvac nozzle next to the blade and controlled the dust pretty well.
A light saber would be way cool though ![]()
![]()
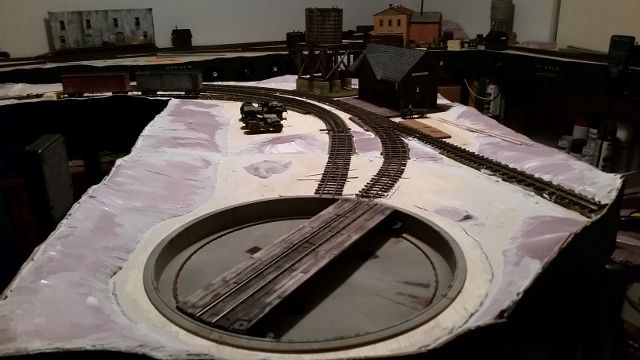
I was pretty well done till supplies get here but I had a little scrap foam left over so I decided to add to the top off where I plastered to sort of round off the top. If I had just a few more pieces of plaster wrap I could of been plastering now. On the other side I took small pieces and placed them in some open spots I had that I thought were a bit too open. In that general area I sort of carved out a pathway zig sagging down the side. Not much I can do now except wait or run trains. Couple of pics that show where I added foam.........Paul
Attachments
Solved a problem with a Lionel 022 switch. t was driving me crazy. Turned out to be a 3rd rail section with no insulation. Easy fix.
I attended a train show March 25 and bought an American Flyer caboose and a section of S gauge track. I decided that I needed a reference display of common train gauges to highlight the diversity of toy/model train scales; 0, S, HO & N. I have a caboose and track example for each. I know that I am excluding G, Standard and On30 (sorry Lee) at this point, but this will do for now. When I have guests, it’s nice to point out the options.
I painted the trailer for my scrap metal transfer yard and have FINALLY gotten around to working on finishing the mountain that I have managed to ignore for the past two years. With the help of some fine weather for working outside, plaster rock castings and Sculptamold, I am beginning to see some progress. I am slowing working my way up to the summit.
My highlight tomorrow afternoon will be a visit to Elliot Feinberg’s (AKA big_boy_4005) layout for a layout update. He even invited me to help him unpack and track some of his rolling stock. I may have trouble getting to sleep tonight from excitement!
Dave
Attachments
paul 2 posted:I was pretty well done till supplies get here but I had a little scrap foam left over so I decided to add to the top off where I plastered to sort of round off the top. If I had just a few more pieces of plaster wrap I could of been plastering now. On the other side I took small pieces and placed them in some open spots I had that I thought were a bit too open. In that general area I sort of carved out a pathway zig sagging down the side. Not much I can do now except wait or run trains. Couple of pics that show where I added foam.........Paul
Paul, that sure looks like a neat idea. Remember when you get tired of running trains you can go on line and shop at Menards, or just go to Bob's house!![]()
Trumptrain - very nice !! I enjoy your photos.
Thought I would be running trains this weekend but not so. Guess it pays to live not too far away from Scenic Express. Put in my order on Thursday and today, Saturday morning, it was there on my front steps. I have a train get together this afternoon but once I get home from that I can now finish of all the foam with plaster wrap. Then once it dries I can apply the plaster, add coloring and then scenery and those two sections will be done and out of the way..................Paul


