Thanks Mike.  I used your link to the color chart and went right passed the NYC grays.  I'm glad you pointed it out.  I didn't think of scalecoat because like Dave C said I remembered they went out of business.  I guess an internet search for 066 NYC Dark gray wouldn't hurt.

Dave C thanks for the alternative.  No hobby shop even remotely close to Myrtle Beach so internet shopping it shall be.

Last edited by coach joe

Thanks Mike.  I didn't check eBay but a Google search came up with a lot of Out-of-Stocks so I searched for Trucolor NYC Dark Gray.  I found plenty of 1oz ready to spray jar at lots of hobby shops including our very own Mr. Muffin's.  It's good to know I can get Trucolor but its also good to know the Scalecoat is also available via eBay.

@coach joe posted:

So this Williams Century Limited observation car arrived Friday.

IMG_3759

It wasn't the Weaver observation car I was looking for but for $10.50 from eBay it was close enough.

IMG_3760

Comparing it to a Weaver car the bodies appear to be from the same molds.  So close enough wouldn't be good enough and a future trip to the workbench would be inevitable.  I figured with a little black pant on the roof and some pin stripe tape to match the Weaver striping this car would complete my Advance Section of the 20th Century Limited.  I had my portable paint booth out yesterday doing some work for my wife so that future trip to the work bench turned into now.  I hadn't taken one of these aluminum cars apart in a long time, if ever, so what I thought would be quick roof removal turned into a total tear down and low and behold the roof isn't a separate piece, so no quick Saturday afternoon Step 1 in the transformation painted roof.  Instead it's a full blown work bench project on top of the 20-30 or so I've already got.IMG_3763

To paint the roof I'll have to mask off the sides and hit it with some rattle can satin black.  For the striping I hoped some auto pinstriping would work.  What I have on hand is a bit too wide.  I think 1/16" is what I need.  I notice the NEW YORK CENTRAL and CENTURY are not, painted, pad printed or decals but stickers, white lettering on gray background, that run the entire length of the car.  It appears that the panels under these stickers are painted like the rest of the car.  I do have some NEW YORK CENTRAL decals that are close to the Weaver cars, so I'm thinking of peeling the stickers off and using those decals.  Has anyone here ever peeled these stickers off a Williams car?  Any recommendations would be appreciated.  So I believe my game plan for the body work is:

1.Remove silhouettes

2. Remove NYC stickers, clean any residue.  Hopefully the Century stickers are not damaged while cleaning any residue.

3. Mask off roof.  Clean roof with alcohol wipes. Paint roof

4. Add NYC decals

5. Clear coat

6. Add pinstripe tape

7. Reinstall silhouettes

Before re-assembly I plan to do some mechanical work.  The trucks and the coupler are looser than the Weaver so the observation car rocks more and the coupler hangs a bit lower.  I will try using some C clips to fill the spaces and tighten this up some.  I don't really want to start drilling out rivets and replacing them.  I'll replace the two incandescent bulbs with some LED bulbs I purchased from Town and Country Hobbies years ago.  and put some of that shiny aluminum duct tape on the roof interior to help spread the light.

I even have a 20TH Century LTD "drumhead" on the way.  Hopefully it fits.

So while the roof re-paint has stalled I did some of the mechanical work.  First I had to re-solder the hot wire from both trucks to the lamp base.  I replaced the incandescents with the Town & Country LED bulbs, added E-clips to take up some of the excess play in the trucks.  Some tape on the top of the dummy coupler keeps it level with the Weaver couplers and the drum head is in.  I had to alter Williams tail end so you could see the 20TH Century.  The Limited is still partially obscured so I'm debating whether to do some more alterations.  I'll post a pic when I decide how I'm going to leave it.

I haven’t had much time for trains lately but have enjoyed following everyone’s projects here. Lots of talent and inspiration!

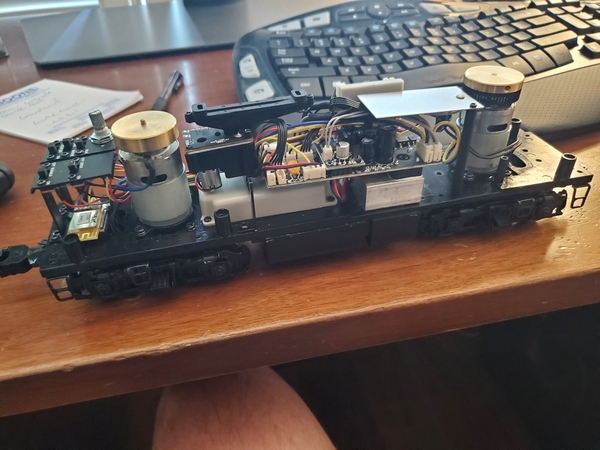
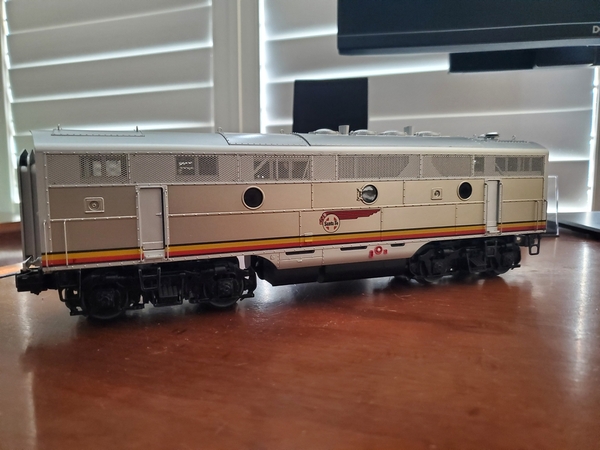
I had some fun this week working on a Weaver B60 that needed some TLC. I couldn’t say no to the price but it had a few things to work through. Several steps were missing and the previous owner had removed the marker lights. Seemed like the perfect project for a few evenings after work.

image1.jpeg
Thankfully the lighting circuit board / directional switch was intact. I found some matching molex plugs which made it easy to re-add markers. To restore the red marker lights themselves I used Evans Designs LEDs. Two sets leftover from car headlight installs worked perfectly.

image2.jpeg

image3.jpeg
To wrap things up I purchased replacement steps via Lionel’s parts sale. Now this beautiful Weaver car is back to its full glory!

image4.jpeg

Attachments

Images (4)
  • blobid3
  • blobid1
  • blobid0
  • blobid2
Last edited by Alex W

Getting back to my BEEP upgrade after a near disaster. My water heater sprung a leak the other day. Fortunately I caught it befor the water made it out of my shop.

So after a false start and fail...I'm back on the lighting install. One end is done, working on the other now. Headlights will control based on direction, and markers will be fed from track power.

20241012_170545

The headlights are off in this shot. They have a reflective background and the camera gives the appearance that they are on.

20241012_170620

The FC board has a cab light output that will go in next.

Bob

Attachments

Images (2)
  • 20241012_170545
  • 20241012_170620
Last edited by RSJB18

Projects have stalled here, both scenery and workbench.  Things have not been turning out quite like I had envisioned or are just much more complicated then I thought.  That combined with the passing of my cat Linus, my constant train room companion although he had little interest in the trains, has put a damper on activities in the train room.  Here's a picture of the 20TH Century Limited "drumhead" I mentioned in my last post.  Still not sure if I want to remove another horizontal bar from the bottom so the "Limited" can be clearly seen.

IMG_3856IMG_3857

Attachments

Images (2)
  • IMG_3856
  • IMG_3857
@coach joe posted:

Projects have stalled here, both scenery and workbench.  Things have not been turning out quite like I had envisioned or are just much more complicated then I thought.  That combined with the passing of my cat Linus, my constant train room companion although he had little interest in the trains, has put a damper on activities in the train room.  Here's a picture of the 20TH Century Limited "drumhead" I mentioned in my last post.  Still not sure if I want to remove another horizontal bar from the bottom so the "Limited" can be clearly seen.

IMG_3856IMG_3857

Looking good Joe! Keep up the wonderful work!

@coach joe posted:

Projects have stalled here, both scenery and workbench.  Things have not been turning out quite like I had envisioned or are just much more complicated then I thought.  That combined with the passing of my cat Linus, my constant train room companion although he had little interest in the trains, has put a damper on activities in the train room.  Here's a picture of the 20TH Century Limited "drumhead" I mentioned in my last post.  Still not sure if I want to remove another horizontal bar from the bottom so the "Limited" can be clearly seen.

IMG_3856IMG_3857

Sorry to hear of the passing of your train room buddy. They do attached themselves to our hearts; even though cats demonstrate that your interest are beneath their dignity. I would suggest that something on your layout have the designation of Linus. Perhaps “The Linus Luncheonette” or “Linus Lane”.

Jay

@coach joe posted:

Projects have stalled here, both scenery and workbench.  Things have not been turning out quite like I had envisioned or are just much more complicated then I thought.  That combined with the passing of my cat Linus, my constant train room companion although he had little interest in the trains, has put a damper on activities in the train room.  Here's a picture of the 20TH Century Limited "drumhead" I mentioned in my last post.  Still not sure if I want to remove another horizontal bar from the bottom so the "Limited" can be clearly seen.

IMG_3856

Sorry to hear about Linus Joe.

Bob

682CD87A-AF64-470C-8580-916BC7AA4900My darned Legacy controls aren’t workingso got to find the board lol don’t worry we’ll get you back on the track!!

Love it - old 2RO calls to me. I have a "similar" (do not know the brand) 1930's NYC H10 Mikado that I installed an  ERR Cruise Commander in, and it ran "like butter", but the small driver flanges/narrow tires could not handle the switches (your driver flanges look promising). The flanges looked like a maybe, so I went ahead. OK off the switches.

I noted and liked the Pre-War Lionel 700T trucks from the 700E's tender on your loco.

Okay, don't  laugh at me guys but THIS is the very first time i have even taken the shell off of a train never mind replace 4 tires!  She had been stored for years and when I went to it, her tires flew off. I was so nervous but knew that I had to do it. I didn't particularly enjoy it though and was afraid that I would screw something up but......IT RUNS!

MIKKI

20241020_120402

Attachments

Images (1)
  • 20241020_120402
Videos (1)
20241020_131245
Last edited by Mikki

Finally got around to converting the old AC incandescent lights in my Buco 4 axle passenger carriages over to LEDs.

With the help of gunrunnerjohn supplying me with his tiny AC to DC voltage regulators, and picking up the rolls of LED strip lights on AliExpress, I was ready to give it a crack!

The original Buco lighting system was one 18V bulb per carriage, suspended from the top of the carriage via a stiff piece of cardboard. The wiring is "daisy-chained" between each carriage, and power is supplied from an outlet at the rear of the larger 304 and 314 Buco loco's. There are no pick-up rollers on these Buco carriages.

DSC03615 DSC03620

Above is the "restaurant" car (they were painted red as per the protype) showing the "daisy-chain" wiring system to power each cars light, and the single light globe suspended on cardboard providing illumination???

DSC03616

Above is a photo (very poorly taken, I admit) of the incandescent light emitted by the single light globe.

So installing the new LED's, I needed to maintain the "daisy-chain" wiring to get track power all the way down the consist to the last carriage, so the small (Buco HO) plugs were retained at the ends of each carriage.

I took a "tap" off the positive (+) and negative (-) leads inside each carriage to power a lighting board (supplied by gunrunnerjohn), and then leads from the board to power the LED strip, which was cut to suit the length of the carriage. See photo below.

DSC03623

I glued the strip of LED's to a timber skewer that fits perfectly at each end, in grooves in the tinplate where the original "daisy chain" wires were located.

DSC03624

I finally completed the conversion to all six (6) of my Buco passenger carriages yesterday, and the difference is night and day (pardon the pun)!!!  See photo below.

DSC03625

I use one of my Williams GG1 loco's to pull this train, as it has got some "grunt", so I needed a transition car with a knuckle coupler to hook-up to the GG1, and a drop-link coupler at the other end to couple to the Buco carriages, hence the MTH "Milwaukee RPO" carriage that also has the roller pick-up to provide track power for the lighting system.

DSC03626DSC03628

Just love the conversion, with no "flickering" of the carriage lights as the train transverses the switches, and the illumination inside the carriages can now be seen!!! I didn't have to worry about seats or passengers visible through the windows inside the carriages, as this was well beyond this Swiss manufacture, back in the early 1950's.

Full credit must go to gunrunnerjohn for helping me with this conversion, for supplying the circuit boards, and pointing me in the right direction about which rolls of LED's to get. Thank you John!!

Peter.....Buco Australia.

Attachments

Images (8)
  • DSC03615
  • DSC03620
  • DSC03616
  • DSC03623
  • DSC03624
  • DSC03625
  • DSC03626
  • DSC03628

Thanks guys, and Mark, for your responses.

I'm about to build another Buco "special" passenger car........I take two single axle passenger carriages, cut them in half (length-wise), join the halves carefully, and then place them on a long freight chassis to create a different type of passenger carriage never built by the original Buco company.

I will add the new LED lighting kit, and let you guys see the results.

Stay tuned.

Peter.......Buco Australia.

I haven't posted anything in a long time. I haven't been involved much with trains or the hobby outside of running a coal drag a few times around the outdoor shelf layout. Last year, I restored a lamp post that was in desperate need of repair. I converted it to a railroad theme using an old RR kerosene lamp that someone electrified. I installed a solar flame bulb and lightly frosted the glass to soften the flame. I had a steam locomotive silhouette that I used as one half of a weathervane on the top. A friend gave me a diesel silhouette and I asked if he could get another one. While waiting, I decided to use the one I had as a stencil to make my own back-to-back silhouette using a 1/4" thick piece of composite decking, eliminating the company logo. This is my current progress.DSCN8752DSCN8753DSCN8754DSCN8755DSCN8756DSCN8759DSCN8761DSCN8762

Attachments

Images (8)
  • DSCN8752
  • DSCN8753
  • DSCN8754
  • DSCN8755
  • DSCN8756
  • DSCN8759
  • DSCN8761
  • DSCN8762

Thanks Coach Joe and Phil.

Phil, the post is mostly from a wood porch post. The base and top are composite decking to help deter water damage. All are painted with exterior water base paint, except for metal parts. They are coated with black satin enamel. The etched lettering, done with a router, is also painted with the same satin enamel. I did some touch up this morning, and when dry, I'll run the belt sander over the surface for a final finish. Since the sign boards are composite, I don't think a protective coating is necessary.

Add Reply

Post

OGR Publishing, Inc., 1310 Eastside Centre Ct, Ste 6, Mountain Home, AR 72653
800-980-OGRR (6477)
www.ogaugerr.com

×
×
×
×
Link copied to your clipboard.
×
×