Paul…….the black IPad is the new big one that just came out…….the other one is an older IPad from about 8 years ago…….I intend to use the IPads and not my phone……

The engine pics were the ones I took…..they are device-specific and only one IPad has them.

Peter

Thanks, Peter. Having eyes of a certain age, doing ANYTHING on my phone (other than making a call) is an exercise in futility My brother just got one of the new iPads and he said he’ll give me his old one which I’ll use as a dedicated controller (in addition to me Cab2’s). And since I plan to take @gunrunnerjohn advice and add all my engines to the Base3 one at a time as I use them rather than waiting for the utility to move over my whole roster, I’ll have to be sure and take pictures. I wonder if the pics exist in a file that can be copied to another device

@Apples55 posted:

Thanks, Peter. Having eyes of a certain age, doing ANYTHING on my phone (other than making a call) is an exercise in futility My brother just got one of the new iPads and he said he’ll give me his old one which I’ll use as a dedicated controller (in addition to me Cab2’s). And since I plan to take @gunrunnerjohn advice and add all my engines to the Base3 one at a time as I use them rather than waiting for the utility to move over my whole roster, I’ll have to be sure and take pictures. I wonder if the pics exist in a file that can be copied to another device

Don’t fret, the picture capture app is very easy……what I mean is that for a dunce like me, it was very intuitive (especially after watching Sean’s 2nd video ).

Peter

I got way behind on many threads I have been following.  In response to many posts about the Base3 and the Lionel app, I will comment that I purchased a DCS WIU about a month ago and got all my engines loaded.  I run 2 TMCC and 1 legacy engine through the same app via the connection from the TMCC base and the TIU.  I am only using my phone for now, and yes it is kind of small but works.  I hope to add some kind of tablet in the future.

I also started planning and cutting out the lauan core for a scratchbuilt model of the church we were married in 40 years ago for a surprise for my wife.  The building was razed 2 years after we were married to build a bigger more useful building that we still worship in.

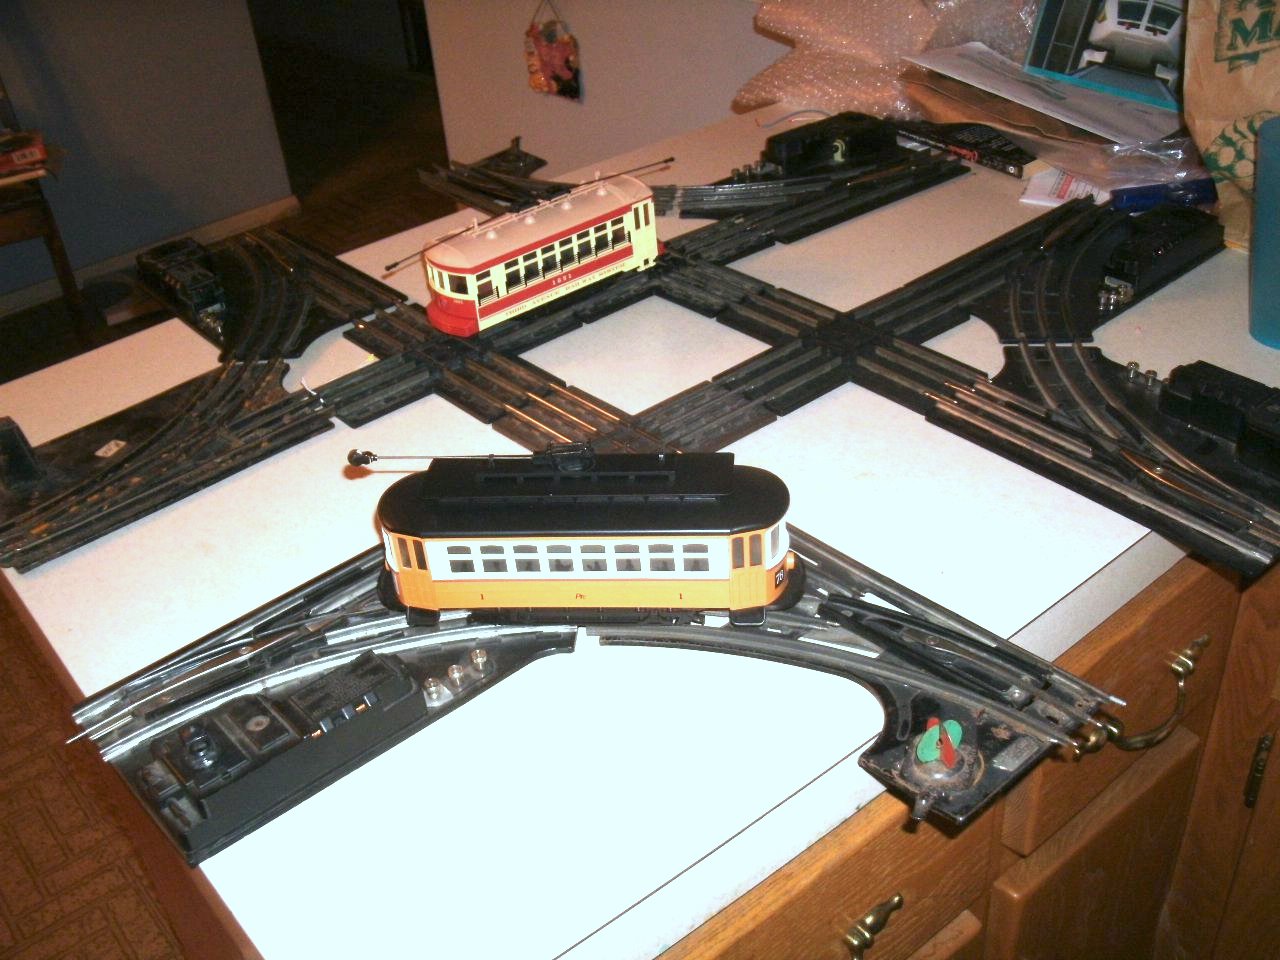
Was playing around with creating brick streets for the trolley line. I bought "grey" clay which was much darker than I thought it would be, I'll buy white next time. Drying is a little odd, but not surprising, sections cup when drying due to shrinkage. I'll work this out over time. Clay is rolled to 3mm thickness to clear the rails. I've asked the supplier to rotate the brick pattern roller 90 degrees so I can roll out a long strip. He replied he can do that. 

Brick trolley street

Attachments

Images (1)
  • Brick trolley street
@ScoutingDad posted:

Was playing around with creating brick streets for the trolley line. I bought "grey" clay which was much darker than I thought it would be, I'll buy white next time. Drying is a little odd, but not surprising, sections cup when drying due to shrinkage. I'll work this out over time. Clay is rolled to 3mm thickness to clear the rails. I've asked the supplier to rotate the brick pattern roller 90 degrees so I can roll out a long strip. He replied he can do that.

Brick trolley street

I agree with Mark, love the trolley!

Mitch - I thought about doing that here and about buying premade sheets. The time spent with spackle would be very high.  I suppose one could cast a strip of plaster and wait just until it set to see if the roller would make a reasonable brick impression. I will likely lay plaster down at the ties and provide a bit of a taper to the edge of the street.  I will cut 3/4 plywood for the track base about 7 inches wide and just make sections up as modular pieces. I have splices for trolley wire connections. A lot of work to do.

@ScoutingDad posted:

Was playing around with creating brick streets for the trolley line. I bought "grey" clay which was much darker than I thought it would be, I'll buy white next time. Drying is a little odd, but not surprising, sections cup when drying due to shrinkage. I'll work this out over time. Clay is rolled to 3mm thickness to clear the rails. I've asked the supplier to rotate the brick pattern roller 90 degrees so I can roll out a long strip. He replied he can do that.

Brick trolley street

Jeff, in Philadelphia Belgium blocks were used in between the gauge. There were two blocks on the outside of both rails. The purpose of these was for clearance. If the obstruction was outside the blocks the operator knew the trolley would clear. I recall seeing sheets of this design on the bay.

Jay

Jay, that sounds like a great idea. I have not seen that application in the trolley rail streets i have found in photos. I will have to dig a little deeper in searches.

Vendor printed a new roller and works fine on playdoh. I may go with oven cure modeling clay. The air dry is moving a lot - ie wavy. Kind of resembles a real street where the bricks have shifted.

Wednesday my daughter’s father n law and I brought his deceased father’s, George Fields, layout from the past alive again.  The last time the layout was operated was 1989 during Larry’s 40th birthday celebration.
We used a 3M sanding block and wire brush on the Lionel high rail track, dusted, and wiped down the rails. Cleaned and tested the two transformers, tested the three Lionel switches.

Larry Fields then set his Lionel 2026 on the track for the first time in 35 years. Larry then slowly added power to the track as we watched the engine to immediately begin moving around the layout track.  Amazing and breathtaking the engine after stuttering began running smoothly and to our amazement smoke began pouring out the stack at each chuff.  
Larry humbly says,  “thank you Dad”.

After three hours of enjoyment I left the operating layout back into Larry's humble hands.

Attachments

Videos (2)
IMG_7533
IMG_7533

Was visiting my local hobby shop to pick up modeling supplies (O gauge inventory is almost none) when one of the "old timers" suggested using drywall to model retaining walls. I bought several sheets of plastruct intending to model a concrete wall. Thickness is an issue so 1/4 is the max thickness. So got to work on modeling a low retaining wall using 1/4 drywall with the paper removed from one side then scribed.

I think it turned out OK. I'll fill the seams with plaster then color wash. More details are posted on TPRR.

brick wall drywall1

Attachments

Images (1)
  • brick wall drywall1
@ScoutingDad posted:

Was visiting my local hobby shop to pick up modeling supplies (O gauge inventory is almost none) when one of the "old timers" suggested using drywall to model retaining walls. I bought several sheets of plastruct intending to model a concrete wall. Thickness is an issue so 1/4 is the max thickness. So got to work on modeling a low retaining wall using 1/4 drywall with the paper removed from one side then scribed.

I think it turned out OK. I'll fill the seams with plaster then color wash. More details are posted on TPRR.

brick wall drywall1

@ScoutingDad: It is a real good look. How will the exposed center of the drywall take paint? Did you have the remove the paper from one side of the drywall or can it be purchased with the paper removed from one side? Also, where did you find 1/4" drywall? the standard is 1/2" as I remember.

Thank you.

Randy, the big box home improvement stores have it. Since Menards is a sponsor, I bought mine there for about $10 a 4x8 sheet. I had my handy utility knife with me to trim it down to manageable sizes. I have more than I can imagine using for a long long time.  I could see using this for building bases (stone) instead of foam. You can also get 3/8 or 1/2 thicknesses which could be other options. I am trying to keep weight and thickness down.

I just posted details on the technique on TPRR. Peeling the paper off is the messy operation.

I use drywall compound all the time which takes washes great. I cannot imagine this will be any different.  Jeff

@ScoutingDad posted:

Jay, that sounds like a great idea. I have not seen that application in the trolley rail streets i have found in photos. I will have to dig a little deeper in searches.

Vendor printed a new roller and works fine on playdoh. I may go with oven cure modeling clay. The air dry is moving a lot - ie wavy. Kind of resembles a real street where the bricks have shifted.

Jeff, see if you can find some trolley photos from Philadelphia; particularly route 23 on Germantown Avenue. If not, let me know and I can reach out to a guy who has a good collection.

Wow guys look at this I am off of here just for a couple of day and I have to go back a page to find where I left off!

@Seth Thomas Great videos and it wonderful that you guys were able to bring the layout back to life!

@ScoutingDad Jeff the trolly section is looking great! Good luck with the clay and I like the idea of the sheetrock! Its funny when I do sheetrock I never seem to have a problem with the paper coming off, but then again it is when I want it to stay in place! LOL

@ChiTown Steve Steve congratulations on your 1000 post! You must have been on the forum from the first day it started! I don't even know how many I have done, but I am sure it is nowhere near that!

Well guys it looks like rain starting next week for a week. The CEO thinks I should work in the shop getting things squared away and maybe some train room time.

I have been talking to a contractor about the room and how to go about making it more realistic to keep it cool/warm. The plan we came up with is pretty much building a room inside the shop area, insulating all the walls and ceiling, then sheetrock and paint. Then I can start on a layout, so as it looks it might be next summer before I get started on a layout, but it will be worth keeping everything cool in the summer and warm in the winter. Plus keeping all the dust from the shop out of the train room!


I hope you all have a great weekend and find time to have fun with your layouts and trains!

Yesterday I was able to take the large prerequisite step to finishing my industrial siding, installing additional power drops to my two lower mainlines, relocating my existing control panel, and completing my elevated trolley line so that it will extend across the entire length of my layout.  

This  large prerequisite step was to make substantial progress in clearing & organizing the underside of my train table, and the viewing isle.  This task included organizing my open coal hopper shelf ( 31 hoppers total ) and my boxcar shelf ( 60 plus total ) relocating and/or tossing some boxes, clearing off my work bench, and control stand.    My apology for not having before/after photos ( Actually I didn't even think to take photos, which means I was totally in fun/work mode. ).  

Over the last many months, I've stacked some bags/boxes of goodies  ( from York, other train shows & hobby shops ) in the viewing isle as well as some containers of scenery items removed from the layout necessary to complete the projects.    Today I hope to tie up the loose ends of the clearing & organizing task.  

Of course the whole time I was doing this work/fun yesterday, I had three trains running.  I took a video of two of those three trains the day before yesterday.   These are William locomotives.  

Attachments

Videos (1)
IMG_4712
Last edited by trumpettrain

Yesterday I was able to take the large prerequisite step to finishing my industrial siding, installing additional power drops to my two lower mainlines, relocating my existing control panel, and completing my elevated trolley line so that it will extend across the entire length of my layout.  

This  large prerequisite step was to make substantial progress in clearing & organizing the underside of my train table, and the viewing isle.  This task included organizing my open coal hopper shelf ( 31 hoppers total ) and my boxcar shelf ( 60 plus total ) relocating and/or tossing some boxes, clearing off my work bench, and control stand.    My apology for not having before/after photos ( Actually I didn't even think to take photos, which means I was totally in fun/work mode. ).  

Over the last many months, I've stacked some bags/boxes of goodies  ( from York, other train shows & hobby shops ) in the viewing isle as well as some containers of scenery items removed from the layout necessary to complete the trolley line, complete the industrial siding, and additional power drops.  Today I hope to tie up the loose ends of the clearing & organizing task.  

Of course the whole time I was doing this work/fun yesterday, I had three trains running.  I took a video of two of those three trains the day before yesterday.  

If you ask me it sounds like a fun day! I can't wait to have that problem! LOL

@mike g. posted:

If you ask me it sounds like a fun day! I can't wait to have that problem! LOL

Mikeg - Oh it was definitely  a fun day!  I didn't mean to imply that it was not. Just being in my train room is fun no matter what I'm doing.  Yesterday was ALL fun work I assure you!  

I look forward to your day (s) of having fun in your train room too!!  

Yesterday I was able to take the large prerequisite step to finishing my industrial siding, installing additional power drops to my two lower mainlines, relocating my existing control panel, and completing my elevated trolley line so that it will extend across the entire length of my layout.  

This  large prerequisite step was to make substantial progress in clearing & organizing the underside of my train table, and the viewing isle.  This task included organizing my open coal hopper shelf ( 31 hoppers total ) and my boxcar shelf ( 60 plus total ) relocating and/or tossing some boxes, clearing off my work bench, and control stand.    My apology for not having before/after photos ( Actually I didn't even think to take photos, which means I was totally in fun/work mode. ).  

Over the last many months, I've stacked some bags/boxes of goodies  ( from York, other train shows & hobby shops ) in the viewing isle as well as some containers of scenery items removed from the layout necessary to complete the projects.    Today I hope to tie up the loose ends of the clearing & organizing task.  

Of course the whole time I was doing this work/fun yesterday, I had three trains running.  I took a video of two of those three trains the day before yesterday.   These are William locomotives.  

Sounds like some big things going on in Patsburg.....

Can't wait to see the new changes Patrick.

Bob

Yesterday I was able to take the large prerequisite step to finishing my industrial siding, installing additional power drops to my two lower mainlines, relocating my existing control panel, and completing my elevated trolley line so that it will extend across the entire length of my layout.  

This  large prerequisite step was to make substantial progress in clearing & organizing the underside of my train table, and the viewing isle.  This task included organizing my open coal hopper shelf ( 31 hoppers total ) and my boxcar shelf ( 60 plus total ) relocating and/or tossing some boxes, clearing off my work bench, and control stand.    My apology for not having before/after photos ( Actually I didn't even think to take photos, which means I was totally in fun/work mode. ).  

Over the last many months, I've stacked some bags/boxes of goodies  ( from York, other train shows & hobby shops ) in the viewing isle as well as some containers of scenery items removed from the layout necessary to complete the projects.    Today I hope to tie up the loose ends of the clearing & organizing task.  

Of course the whole time I was doing this work/fun yesterday, I had three trains running.  I took a video of two of those three trains the day before yesterday.   These are William locomotives.  j

It’s always a fun time working in the train room especially when trains are running.

Gene

@Randy Harrison  Randy, as I thought the dry wall takes washes pretty well. There are almost always sections where the pigment does not like to stick at first, but touch ups will address those issues.

Retaining wall 1

This section has not dried as yet so I expect the color to fade a little. Base was a wash of light grey (on the brown side) with a dilute wash of black. You can see how the black wash colors in the deeper grooves. This is where adding chips and defects to the stone adds visual depth and interest. I will add other colors here and there to give an aged look.  Washes must be pretty thin to work, the mix should just flow down the face of the brick and run into the groves. Too thick will simply "paint" the surface.

The acrylic paint mix is white, raw sienna and black. A couple of pea sized drops of white and maybe a half of a drop of raw sienna mixed together and diluted with water is enough for an 8 foot by 2 1/2 inch section.  Just pull in a bit of black and mix until you get the shade of grey you want. Black is a really strong color so go easy. I put a drop of black on the edge of my mixing tray and used my brush to pull in small amount of black to mix in. Amazing how little is needed. Once I had the wall washed with the first coat, I added more water and mixed the black in with the remaining grey to get the black wash. The tray was only wet with the grey so there was not a lot to mix with. I find it nearly impossible to duplicate the color, so wait to wash until the whole section is done. Of course I did not do that in this case.   

EDITED for Randy - for the acrylics I use the 4 ounce tubes from Liquitex or Master's touch whichever is on sale at my local craft store (who happens to be closed on Sundays). Solvent is water. I end up using 10 to 20 parts of water - far more for thin washes into mixed color. The acrylic is thick and needs to be thinned. If you use the little craft bottles less thinning is required since they are already pretty thin. You will have to try on samples and record your results. You will be surprised on how much water can be added.  I rarely use the bottles anymore because you want a little color variation. As you move along you can pull in more and or different colors. Lately I like to add metallic bronze to areas of rock to give a metallic ore shine. Not a lot just a little. @Randy Harrison 

Attachments

Images (1)
  • Retaining wall 1
Last edited by ScoutingDad

I spent a few hours today designing a freight yard area in place of the Atlas turntable. Strictly IMO, I found the turntable took too much room on my smaller layout for its function, where a yard would be a Gene's 2.75 loop with 8 wiskersGene's 2.75 loop with yardmore desirable and efficient use of space. The only advantage to me with the turntable was being able to change direction of the locomotives. After having it for a year, it’s not something I’d miss.

Gene

Attachments

Images (2)
  • Gene's 2.75 loop with 8 wiskers
  • Gene's 2.75 loop with yard
Last edited by Genemed
@Genemed posted:

I spent a few hours today designing a freight yard area in place of the Atlas turntable. Strictly IMO, I found the turntable took too much room on my smaller layout for its function, where a yard would be aGene's 2.75 loop with yardmore desirable and efficient use of space. The only advantage to me with the turntable was being able to change direction of the locomotives. After having it for a year, it’s not something I’d miss. My sidings are direction mixed also. Here is a before and after AnyRail design plan.

Gene

I love turntables but they are space hogs.

The new sidings look good Gene. Just be aware that coupling and uncoupling cars on curves is problematic at best.

Maybe one day the TT could return on an extension from the main layout.

Bob

Last edited by RSJB18
@RSJB18 posted:

I love turntables but they are space hogs.

The new sidings look good Gene. Just be aware that coupling and uncoupling cars on curves is problematic at best.

Maybe one day the TT could return on an extension from the main layout.

Bob

Absolutely Bob, I gave that some consideration also. I enjoy running trains to have fun. There isn’t much realism on switching plans and logistics on my layout. I grab an engine, pair it with some prototypical rolling stock and have fun. Maybe a boxcar or two and a caboose if room prevails on each siding.

Gene

@Genemed  Turntables are cool but require a lot of compromise.

I am not sure you are gaining a whole lot with the change. It looks like you can get 2 maybe 3 cars on each spur. I count 7 spurs on each design. You could fit in an extra spur on top of the red spur for 8 on the TT version.  If you proceed with this version make sure you put in a run around so an engine can back into the spur and depart. You have spurs going opposite directions meaning one engine would not be able to get out of the spur. The run around enables the engine at the head to pull in, uncouple and exit the track, then come in from behind to finish the job. There are a couple of places to do this, maybe just connect to the same red spur.

In my build I ended up using Ross curved switches in order to get a decent amount of yard space in my 7 track yard. They save a huge amount of linear space.

Add Reply

Post
×
×
×
×
Link copied to your clipboard.
×
×