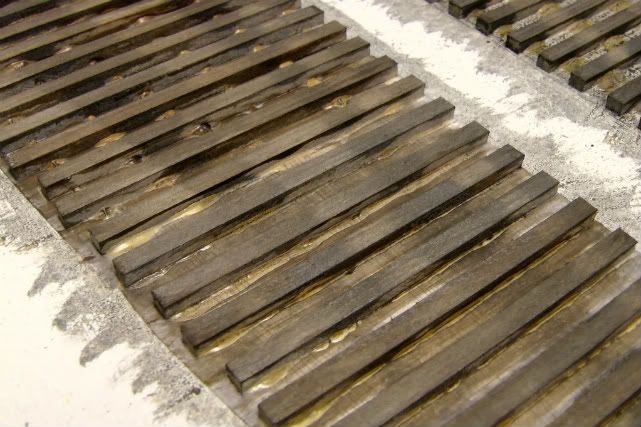
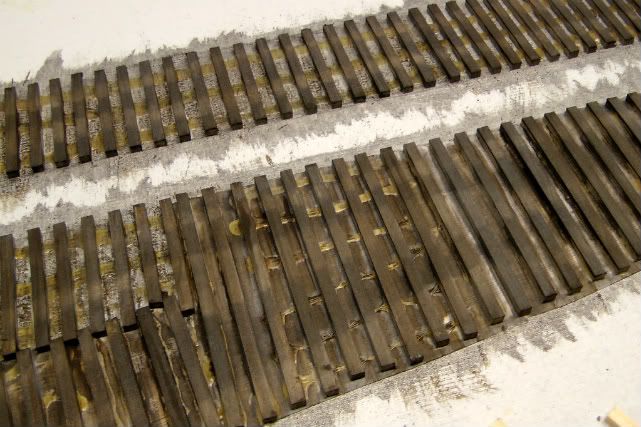
So I am experimenting with different coloring option's for the tie's and tie plates, rail's ect.....frustrating to say the least.

I am leaning towards this on the ties. I want a darker grayish/brownish dirty look. The tie plates and this section of rail I sprayed with a dark brown, to me it will work as a base color and I think will blend with the ties when I add additional coloring and chalks ect. The ties look darker in the photos, they are abit lighter in person. What are your thoughts?
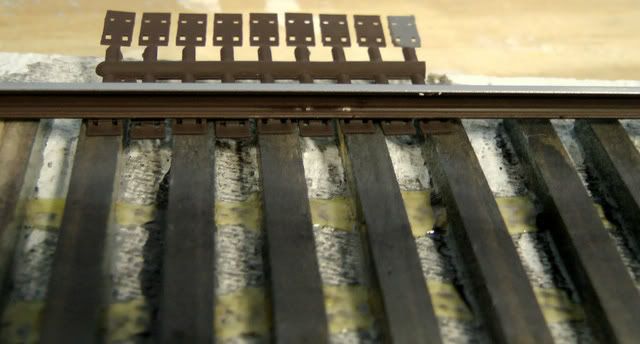


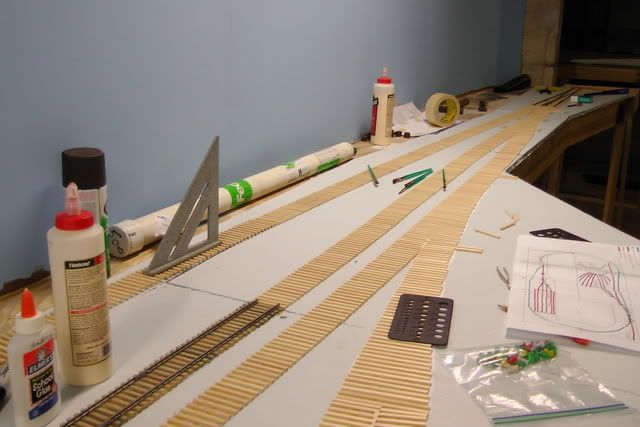
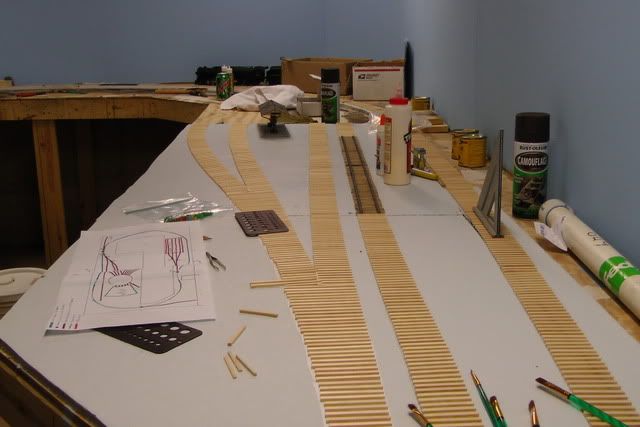
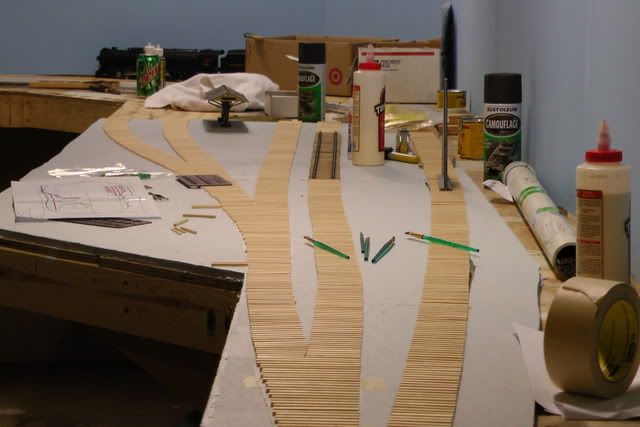
And just a few pics of some progress....lots of ties down...now just need to texture them and.....arggg get some color to the rest.
Original Post

Replies sorted oldest to newest

Chris,

I know you have seen this before, but you might want to take another look:

http://ogaugerr.infopop.cc/eve...1048701/m/4232911617

You might want to try some of the materials/techniques mentioned there and maybe dig up a copy of the reference Matt mentions: 2008 Modelers' Annual from Westlake Publishing.

As for the images you have posted, there's certainly nothing wrong with what you have done. How old do you want the ties to look and is it a main or branch line? I would think that would decide the effect you would be shooting for.

I don't think it's an exact science, and I wouldn't get too excited until it is ballasted and you have the total look. You might want to "tier" down the look of your track with the main line/lines looking the best maintained and the low usage trackage having the least maintained look.

Ultimately you only have to satisfy one person!

Cheers,
Simon
Chris...you can go gray haired over this matter, but once you ballast and develope scenery around it, the precise coloring of the ties will become a minor issue. You can always selectively weather individual ties to add an element of age and detail...that would be appropriate later on in the process.

Your making nice progress Chris whatever you decide to do about the coloring.

Bob
Thanks for the responses guys. Simon it is the main line and I am going for what you see in these photos which is a darker oily greased up look. The ties not being terribly old, but heavily used. There about 10 ties I am experimenting on and in my photo I have used some ebony and gray stains as well as some thinned burnt umber pigment.

http://www.flyerguide.net/view...hp?id=283770&nseq=14
http://www.flyerguide.net/view...hp?id=283771&nseq=13
http://www.flyerguide.net/view...php?id=294609&nseq=9

Chris thank you, I am going to be adding some more coloring to the plates and rails. I want to also have them bleed a little into the ties.
Chris,
I see a can of Rustoleum Camoflage paint in the background.
This is what I do: After gluing the ties and sanding them, I stain with Minwax Dark Walnut, then lay my rail and wire, and finally, I spray the track with the Rustoleum Camoflage Dark Brown. The use of the stain helps to minimize the amount of paint that is needed. Without staining, I used a lot of paint to cover the unstained ties. The paint is dead flat and gives a nice uniform appearance to the ties and rail. Speaking of "uniform" appearance, I read or saw on a video a UP track inspector say that lack of uniformity was a clue that something was wrong or could go wrong in the near future. After hearing his remarks, I don't consider uniformity of color a bad thing. The ties in your pictures of the N&W mainlines show a uniform color.
Hope this helps.
Regards,
Ed
In looking at color shots then and now I find a great difference between the appearance of track in the late steam era and today. Track in the pre-roller bearing era often had gray/black crud on the rail, while today's rail seems to just look "rusty" if not near flange lubricaton device. I suspect this was due to slow lubrication run out from solid bearing journal boxes, mixed in with cinders from passing steam locomotives. As a side note I've observed a huge difference in the color of wheel faces between roller bearing and non-rollller bearing trucks.

If you haven't already done so, before settling on a weathered look for your track, study available color photos of the railroad you wish to model taken in the relevant era. I model PRR in 1952 and have had to totally rethink the weathering I did on earlier railroads. My favorite site for late steam era color photos is John Dziobko. John's photos have been published in PRRT&HS and Morning Sun books - but I really look forward to visiting his website as new shots are added every few weeks.

Ed Rappe
Thanks for the responses everyone.

Ed K. I did use the camo brown on the tie plates and rails for a "base" color, and I am going to go back with other rust colors and chalks to blend them and to vary the color along the rails. Thank you for the help I appreciate it.

Thanks John I will look into that....sounds good.

Ed R. I am modeling the steam era...primarely the N&W. I have looked at gobbs of photos as well and have come to the same conclusion, the track was much darker in the steam days. As you said between the journal boxes leaking and grease flying off the rods not to mention all that brake dust since there wasn't any dynamic breaking to be had yet. Thank you for the link I am going to go and take look see.

Thank you very much for all the help guys I do appreciate it.
Bob - I haven't started to weather the track yet as I'm holding off until after the branch is fully operational. Last month I laid quite a bit of track to connect the branch with the main. The only trackwork remaining to build is the Oceola Mills yard - about 12 turnouts.

At this point all I know is I won't be using straight Floquil rail brown as on my old railroad. I think Chris's base color looks quite good. I'll probably try playing with a mix of grimy black and rail brown/rust on the sides of the rails. In addition to 2400' of track to weather - I have more wheel sets to re-weather than I'd care to count! Perhaps if internet photos were around in the 1980's I'd have done better the first time around.

Chris - please continue to share - we'll all benifit.

Ed Rappe
quote:
Originally posted by anzani racer:
why is it all the hand laid track i see is raw wood. then painted after the rail is laid? you could get the color stain that you like and soak the ties before they get placed.
. ...rob


Ive done both methods, and hands down I like to stain on the already glued down ties for a few reasons:
I can adjust the tie color for the service it will placed in, Soaking ties is messy, and then you have to strain them and let them dry..also messing and time consuming. Plus I dont stain a bunch of ties that I wont end up using. My ties are mostly homemade and I probably throw away one outta 15. But I can make them for .0032 cents a piece so they are cheap. Cool
Good evening all, I really love all the input and advise you guys are the best.

Anzani racer thanks for the link, very informative. I actually am using a ebony stain in areas on the ties for shading and such.

Big Jim thank you very much, you hit the nail on the head. As silly as it is I have been looking at the rail and plates all day and wondering what color will do what I am seeing in my mind and in photo's and the gray's will do it perfectly.

Ed R. All I can say is that regarding that link you posted....wow. He has some great photo's there....color also. Which really was helpful. Thank you again.

Ok here is my latest efforts, the tie's now appear lighter in these photo's and are in fact much darker in person...gotta tone down the lights a bit. Smile


another simple way to get the Tannic acid referred to in the link is to take leaves after they've turned completely brown, oak leaves are very good for this. pulverize and soak a pile of it in water for a week or so. use just enough water to cover the leaves. warming the water will speed up the process.
(a covered black container left in the sun works)

the tea-like liquid left is a tannic acid-H2O solution. the less water the better the final mix with vinegar will be.
Best way to stain ties.

Have 5 mason jars of wood stain each jar contains 25% less stain (weaker mixture) than the previous mason Jar.
Separate ties in 5 equal piles and place pile 1 in jar 1, pile 2 in iar 2 ... you get the idea.

When you are done you will have 5 piles of ties with varying degrees of stain.

Next at the starting point take a tie from pile 1 glue it down, pile 2 glue it down ... you get the idea.

In the end you have a prototypical representation of aged ties in various stages of "tie" life. And it looks good too.
Cris, I do what LLKJR but I have some 1 gallon clear plastic pails with tight lids from Lowes and got a brown and a grey Minwax water based stain made up. Thinned and combined in different proportions I have different colors. When I need ties I dump a bunch in and scoop half out quickly the rest after 10 minutes (you end up with lighter and darker ones of the same shade) and dump them on shop towels. They are ready to use in about an hour. I use the acrylic stain as I couldn't stand the stink of the regular Minwax stain and it took the ties forever to dry. I even tried to hurry up their drying by putting them in an old toaster oven on low-bad idea!!!

Peter
quote:
Originally posted by CWEX:
Simon it is the main line and I am going for what you see in these photos which is a darker oily greased up look. The ties not being terribly old, but heavily used. There about 10 ties I am experimenting on and in my photo I have used some ebony and gray stains as well as some thinned burnt umber pigment.


Chris,

Given that you are modeling main line trackage, I think your ties look to be pretty representative. Once you have the ties colored in a fashion that pleases, you might want to loosely apply ballast in a small area. I think that will tell the tale. If you are not happy with the overall appearance, you can brush off the loose ballast and change coloring if you think you need to. Keep up the good work! Smile

Simon
Post
×
×
×
×
Link copied to your clipboard.
×
×