@coach joe posted:

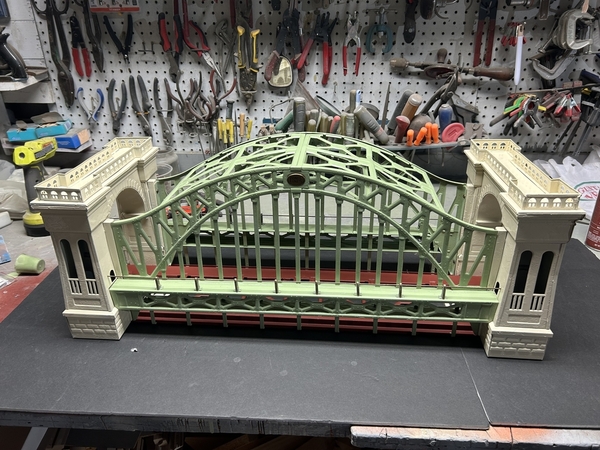
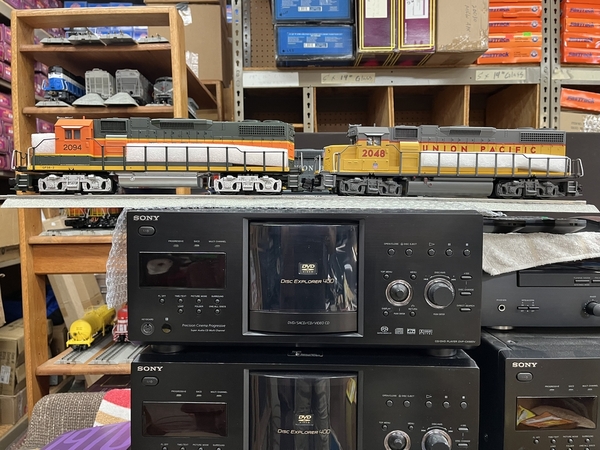
That's some nice work John.  You say commissioned by the RRMLI, I see 6 of each, if that's the entire production run would you know the intended use for these cars, displays, extremely limited edition sale, fund raising raffle, special gifts?

Thanks coach

6 of each is the current run. They may order another run of 6 in the future, I don't think more than that

Their plan is to sell them to help fund the museum. The grey Crew cars are on their website, the blue tool cars should me up there this week.

With a number of incomplete projects on the "workbench" why would I start another one?  I wish I could answer that question but I just couldn't help myself.  A while back I picked up this Lionel Alaska bunk car to add to my Alaska work train.  Thinking of a work camp out in the bush I added another bunk car and started thinking of making one a mess hall/canteen/ chuck wagon, whatever you'd like to call the kitchen and dining facilities for the camp.  I wanted to add a Lionel tool car to vary the look of the cars.

IMG_3518

I came across this 1989 LRRC Tool Car and figured I could lose the LRRC graphics and re-letter for the ARR.
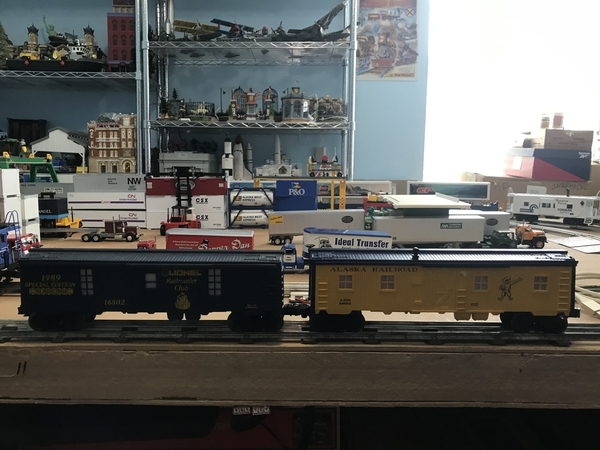
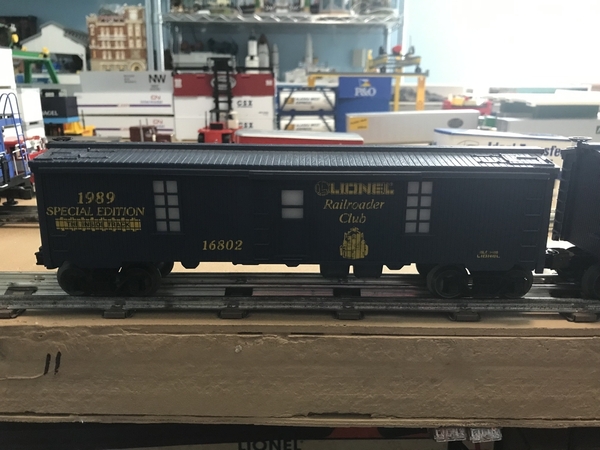
IMG_3483IMG_3485

To make getting rid of  the LIONEL easier I removed the roof.  I expected the "windows to be part of the roof like the "Madison" passenger cars.  Once I saw that the windows were I separate piece I started thinking of replacing the opaque plastic insert with individual clear windows and detailing the interior.
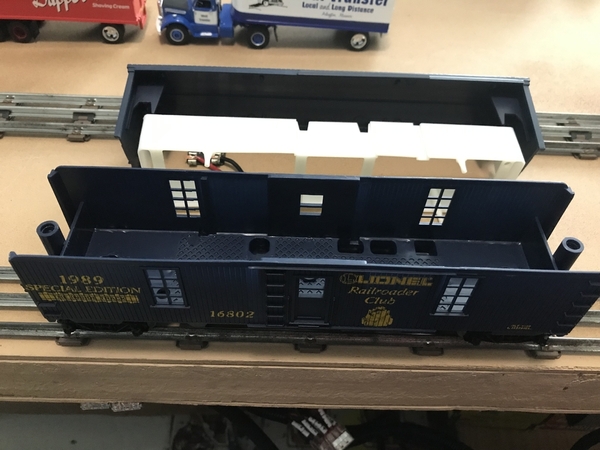
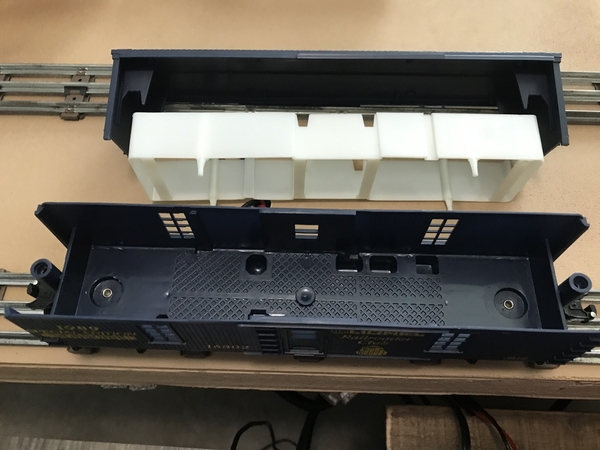
IMG_3486IMG_3487

Here's the clean canvas waiting for Alaska Railroad decals.  I have a set of Walthers HO Alaska boxcar decals that will provide the lettering and even have a set of repro 614 "decals" with the Eskimo that I bought a long time ago so I thought I was set.  The quotation marks are because that set of decals is actually clear stickers, which would work fine on the flat surface of a diesel switcher but wouldn't really work so good on the wood sides of a tool car.  I've got enough Alaska RR decals that while I don't have any other Eskimos I'll be able to find an appropriate logo to take the Eskimo's place.
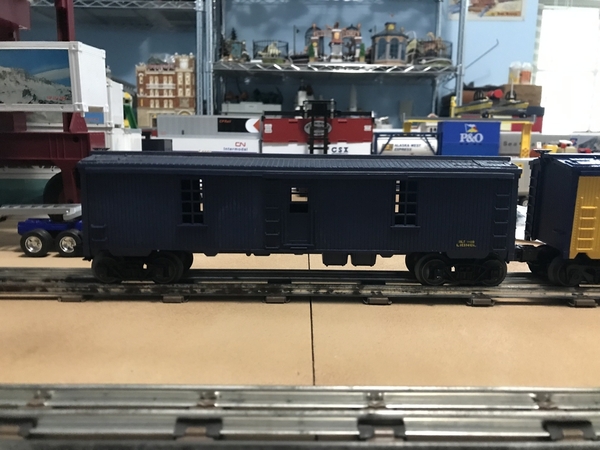
IMG_3519

My conundrum is now the rabbit hole that detailing the interior has become.  I have the window material and some 3D benches and tables and even some kitchen appliances but it doesn't end there.  It needs a floor, foam core is too thick, I've already tried it so now to find the right material to fit around that knob in the middle of the car to level the floor and add floor boards.  Oh, did I mention the car is not lighted so all the wonderful detailing would go unseen.  Okay lets add lights, buy some pick-ups, wire them up, my soldering skills aren't the best and I've botched replacing a caboose light socket in the past because of them but what the hey maybe I can get past that.  I have a roll of LEDs that I could use for lights, but I'm not sure what I need to run them off of track power.  I could always ask over on the electrical forum and I'm sure I'll get that answer but then I need to get those components and add them.  Then there's the access hole to bring the wire from the pick-up into the car.  Notice I said hole not holes so if I use double pick-ups for better connectivity and les flickering I'm running wires under the car and that hole is located very near one of the windows so now hiding the wires and not disrupting the interior details is another issue.  Then there's always the battery operated option for the LEDs, a 9 volt, a bracket and a micro switch.  I believe I've both a bracket and a switch around here somewhere.

None of this is truly that difficult and with patience and assistance from the wonderful people here on the forum I'm sure I can get the answers I need and probably even suggestions on how to do it better and where to get the parts and supplies I need to get this done.  I'm just not sure if I want to go through all that right now.  Then what about the two bunk cars?

Attachments

Images (6)
  • IMG_3518
  • IMG_3483
  • IMG_3485
  • IMG_3486
  • IMG_3487
  • IMG_3519

B9B5A105-BC85-4881-8800-E9F2251461B0Took a break from track laying to work on , yet another, incomplete project, the ubiquitous Lionel feed mill.  This one received gray paint like the ones I saw in SD and just got some glued-in window glass. Some appropriate lighting is in transit as well.  Other details will be added to hopefully make it not just another plastic feed mill. 🤔

Rich in WV

Attachments

Images (1)
  • B9B5A105-BC85-4881-8800-E9F2251461B0
@Norton posted:

Installing Lionchief in some RMT Beefs. B unit and Trailing A are powered. Considering Kadees to close the gaps but just not now. Still fine tuning. The B unit has a bit of a hitch in its gitalong I am trying to sort out.


Pete

Well, now. Who wouldn't love those? I've never done any Lionchief upgrades - in fact, I've seldom even been around Lionchief.
The close-coupling Kadees would be a nice touch.

@D500 posted:

Well, now. Who wouldn't love those? I've never done any Lionchief upgrades - in fact, I've seldom even been around Lionchief.

The close-coupling Kadees would be a nice touch.

D, Lionchief is currently the least expensive upgrade path to Command Control. A Universal Remote will operate all generations of Lionchief. Currently only basic Lionchief is suitable for upgrading as Lionchief Plus and Lionchief Plus 2 require motors with tach sensors. Basic Lionchief does not. Current base Lionchief will control couplers and smoke. Chuff requires a tach sensor so problematic for steam upgrades.

Pete

Last edited by Norton
@Norton posted:

D, Lionchief is currently the least expensive upgrade path to Command Control. A Universal Remote will operate all generations of Lionchief. Currently only basic Lionchief is suitable for upgrading as Lionchief Plus and Lionchief Plus 2 require motors with tach sensors. Basic Lionchief does not. Current base Lionchief will control couplers and smoke. Chuff requires a tach sensor so problematic for steam upgrades.

Pete

I didn't know you could buy Lionchief upgrade kits. Where do you purchase them? I have some Williams diesel engines I'd love to upgrade.

@pault posted:

I didn't know you could buy Lionchief upgrade kits. Where do you purchase them? I have some Williams diesel engines I'd love to upgrade.

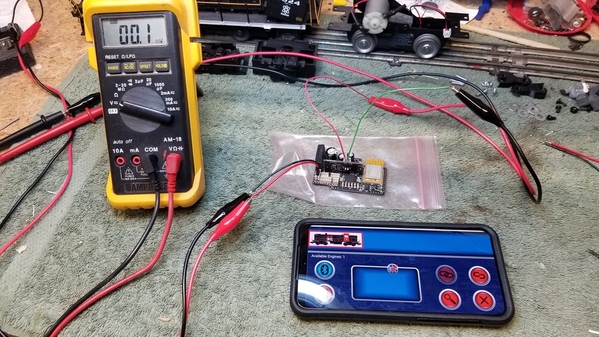
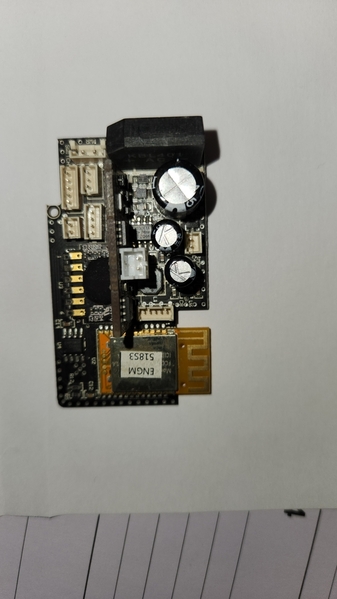
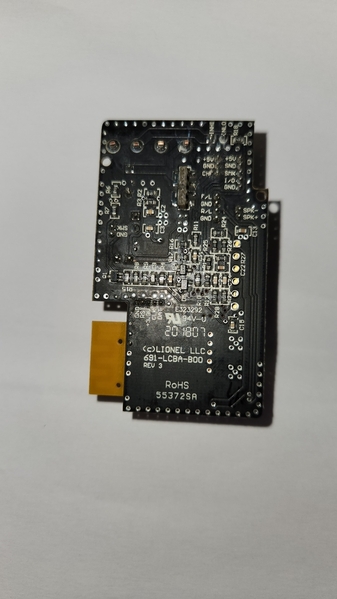
No kits but you can get the boards from Lionel. You have to supply the speaker and make the wire harnesses but easy if you have the required JST connectors. 2.54mm EH, 2mm PH and 1.5mm ZH.

Most can be had at Amazon.


Both A units are powered. If you want to run any two engines together they must have the same board part number in them. A dedicated or Universal remote will run both together. Neither the LC nor Cab3 app will run two identical engines.

Pete

Attachments

Videos (1)
IMG_3672
Last edited by Norton
@pault posted:

I didn't know you could buy Lionchief upgrade kits. Where do you purchase them? I have some Williams diesel engines I'd love to upgrade.

Paul- I put a Lionchief/bluetooth board in a Weaver RS-3. The added benefit is either universal remote or LC app control with a smartphone. I'm planing to do more. As Pete said, it's the most cost effective option to upgrade conventional engines.

I started by searching Lionel's site for an appropriate matching engine for the upgrade (if available) from their Lionchief line. I just added the necessary speaker. No electro-couplers with these boards but not a big deal to me.

2024-03-18 20.57.31

2024-03-18 20.58.482024-03-18 11.23.392024-03-18 12.00.44

Attachments

Images (4)
  • 2024-03-18 20.57.31
  • 2024-03-18 11.23.39
  • 2024-03-18 12.00.44
  • 2024-03-18 20.58.48
Last edited by RSJB18
@RSJB18 posted:

Paul- I put a Lionchief/bluetooth board in a Weaver RS-3. The added benefit is either universal remote or LC app control with a smartphone. I'm planing to do more. As Pete said, it's the most cost effective option to upgrade conventional engines.

I started by searching Lionel's site for an appropriate matching engine for the upgrade (if available) from their Lionchief line. I just added the necessary speaker. No electro-couplers with these boards but not a big deal to me.

2024-03-18 20.57.31

2024-03-18 20.58.482024-03-18 11.23.392024-03-18 12.00.44

Does that board include sound?  (You mentioned adding a speaker.)

I found it on https://trainsandtoysoldiers.c...-gauge-model-trains/ , and the description doesn't say much.  Can't find it on Lionel's site.

Last edited by Mallard4468
@Mallard4468 posted:

Does that board include sound?  (You mentioned adding a speaker.)

I found it on https://trainsandtoysoldiers.c...-gauge-model-trains/ , and the description doesn't say much.  Can't find it on Lionel's site.

Yes the LC boards all have sound.
That looks like a bare board, not a LC board. It takes some hunting on Lionel's parts site but what I did was search Lionchief pcb (PC Board) and went through the results till I found a New Haven model. A comparable road name may not be available but if you are doing for example a GP-9 then any GP board would do. The only major issue is that the announcements won't match.

https://www.lionelsupport.com/...ords=Lionchief%20pcb

@necrails posted:

Can someone show how to make the connectors for these boards.  I didn't realize you could buy them but my knowledge of wiring us limited to soldering and wire nuts.

The install is pretty straight forward. The plugs on the boards are labeled so you can figure out sound, lights, motor(s), etc.

The plugs are JST-ZH, motor output is a JST-EH, I bought pre-made harnesses from Ali-express.

https://www.aliexpress.us/item...gatewayAdapt=glo2usa

If you scroll back a few pages you will find my RS-3 build as I progressed through it.

Bob

Connectors vary depending on which board you end up with. Early LC had JST EH and PH connectors. Newer ones have those plus ZH connectors. Look for kits with pre crimped wires or invest in a decent crimp tool made for those connectors.

Note both XH and EH are listed as 2.54mm but are not interchangeable. Housings are different.

Good thing LC has only a few harnesses to be made and most are just two wire.

power, motor, speaker, coupler, maybe smoke depending on which board you use.

Pete

Here’s what I’ve been working on.  I have two MTH GP38-2s from 1998 that came with the high water fuel tanks that I didn’t really care for because of the tanks.  I ordered two fuel tanks from MTH for the PS2 GP38-2 but when they arrived they were identical to the ones I already had.  I discovered that the GP38-2 is essentially the same size as the GP40.  I searched MTH for GP40 parts and found they had GP40 tanks in stock.  The picture they showed depicted a fuel tank that appeared to the same as a later version of the GP38-2 that I have.  I ordered a pair, which are painted the UP gray.  They arrived the other day and today I installed one of them.  I had to drill new holes in the frame file a little off the left front support because of the bell and the back center area due to a screw head.  The BNSF unit has the old fuel tank and the UP unit has the new one.  


Larry

IMG_0871IMG_0872

Attachments

Images (2)
  • IMG_0871
  • IMG_0872

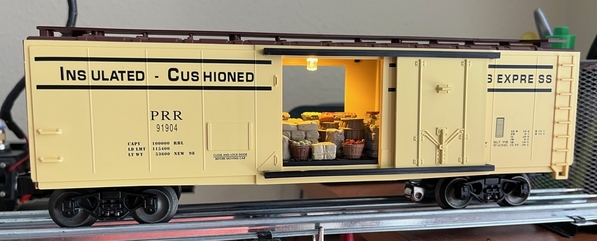
I recently bought a NIB Lionel 17317.  I like it a lot.  I determined that I could easily add a collector and ground strap to it, so I thought about adding an ETD.  I posted a query about that, and the general response was that it wouldn't fit the era.  I'm okay with that.  Since I like lights, I added a warm white LED as a bare ceiling light, and bought 2 types of fruit boxes/containers.  I think it came out alright.

IMG_5458

Attachments

Images (1)
  • IMG_5458

I just checked the MTH parts website and the GP40 fuel tanks are no longer in stock.  I must have bought the last two, lucked out there.  The early GP60Ms used the same high water fuel.  I have three of the later MTH GP60s and the fuel tank on one I checked has the correct distance above the rails but it is shorter that any that are on any of the Atlas GP60s I have.


Larry

Last edited by PSAP2010

It's not quite on the workbench yet, but...

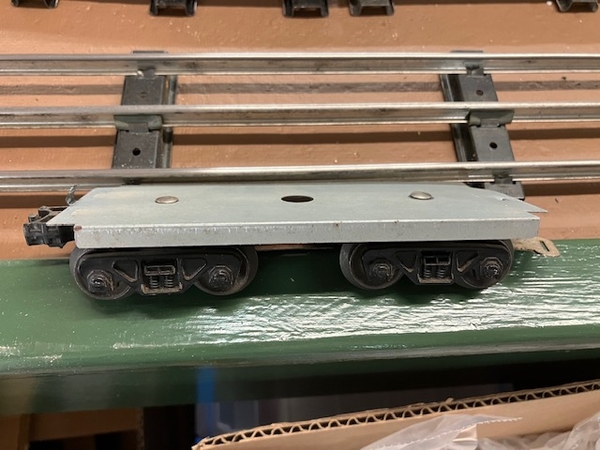
Awhile ago, I built a Frankenstein steeple cab loco from a MPC switcher and a couple of slope back tenders.  As a result, I have two short tender frames.  Here's a pic of one of them:

tender frame

Trying to decide what to do with them.  Leaning towards something whimsical - some kind of short caboose, or maybe put a beer can on it.  Suggestions are appreciated.

Attachments

Images (1)
  • tender frame

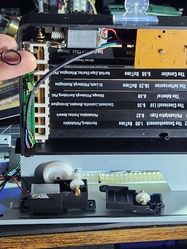
20240802_005038Been looking for a cheap mth #334 dispatch tower, aware of the main belt dry rot issues. I acquired a nonrunning MTH #334 PRR dispatch tower from Trainz (sold as tested, and not working condition).

The main drive belt was in great shape surprisingly, but the rubber band in the top of the dispatch board motor assembly was dry rotted. A size 014 70 durometer oring fits and works perfectly! I've seen the belt listed here, but not the dispatch board o-ring size. New favorite operating accessory!

Attachments

Images (2)
  • 20240802_005040
  • 20240802_005038
Videos (1)
20240802_010748
Last edited by p8ntballer789

20240802_005038Been looking for a cheap mth #334 dispatch tower, aware of the main belt dry rot issues. I acquired a nonrunning MTH #334 PRR dispatch tower from Trainz (sold as tested, and not working condition).

The main drive belt was in great shape surprisingly, but the rubber band in the top of the dispatch board motor assembly was dry rotted. A size 014 70 durometer oring fits and works perfectly! I've seen the belt listed here, but not the dispatch board o-ring size. New favorite operating accessory!

Very cool.  I had never seen operate before.

@Mallard4468, I have some similar shorty flat car bodies I picked up at a train show years ago.  I've had different ideas for hem over the years which either didn't work out or proved to be totally off base.  I think I have come up with one that will work for one of them. 

IMG_0888IMG_0889IMG_0890IMG_0891

Put one of those Lionel generators on it to provide power for the work camp cars.

IMG_3483

Attachments

Images (5)
  • IMG_0888
  • IMG_0889
  • IMG_0890
  • IMG_0891
  • IMG_3483

In the third post down from the top of this page I began the tale of making a set of camp cars to accompany my K-Line ARR work train.  Due to the remoteness of much of the right of way accommodations for the work crews is often necessary.

So as previously posted I'm turning this LRRC Tool car into a commissary car to go along with the bunk car.  All logos and lettering have been stripped using Testor's ELO except for the Lionel Built Date. 

IMG_3579IMG_3580

The opaque shell that served as windows has been replaced by clear glazing and a wooden floor has been installed over the plastic base of the shell.

IMG_3577

These cars served their time in revenue service as ice cooled reefers and were converted into crew cars in Alaska Railroad's own shops.  The shop Forman figured the ice bunker hatches could be used to provide any ventilation necessary but non of the track crew members were fond of getting rained on or snowed on while cooking or eating meals so the commissary car returned to the shops and gained some much needed roof vents.

IMG_3583IMG_3582

I'm standing on the precipice of that rabbit hole I spoke of earlier and this blonde haired girl named Alice keeps shoving me closer and closer.  I've got some K-line pick-up assemblies that snap right into the Lionel trucks.  If I find that roll of LEDs that's hiding around here somewhere and make my way over to the electrical forum I fear I'm a goner.  But first I need to get it all decaled up and clear coated.  Humidity has been sky high here and we've been getting those pop up thunder showers for the last few days so paining is on hold and after seeing decals peeling off another unfinished project because it's been waiting to get finished and clear coated for way to long I'd rather wait on the decals until I think I can get them clear coated in a reasonable amount of time.

Attachments

Images (5)
  • IMG_3579
  • IMG_3580
  • IMG_3577
  • IMG_3582
  • IMG_3583
@coach joe posted:

In the third post down from the top of this page I began the tale of making a set of camp cars to accompany my K-Line ARR work train.  Due to the remoteness of much of the right of way accommodations for the work crews is often necessary.


I'm standing on the precipice of that rabbit hole I spoke of earlier and this blonde haired girl named Alice keeps shoving me closer and closer.  I've got some K-line pick-up assemblies that snap right into the Lionel trucks.  If I find that roll of LEDs that's hiding around here somewhere and make my way over to the electrical forum I fear I'm a goner.  But first I need to get it all decaled up and clear coated.  Humidity has been sky high here and we've been getting those pop up thunder showers for the last few days so paining is on hold and after seeing decals peeling off another unfinished project because it's been waiting to get finished and clear coated for way to long I'd rather wait on the decals until I think I can get them clear coated in a reasonable amount of time.

And don't forget the lighting regulator for flicker-free lighting.....

Be careful...don't trip on a tree root.......

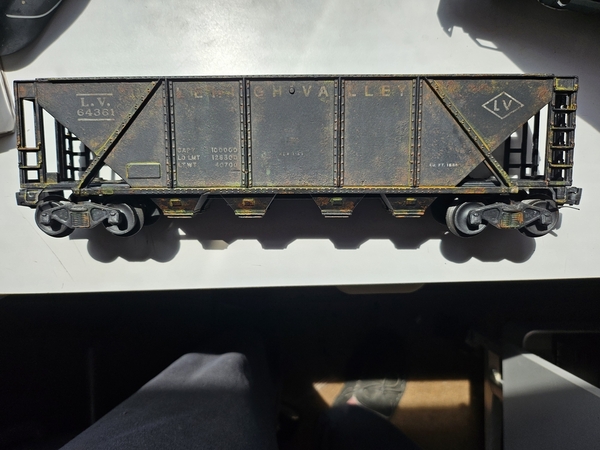
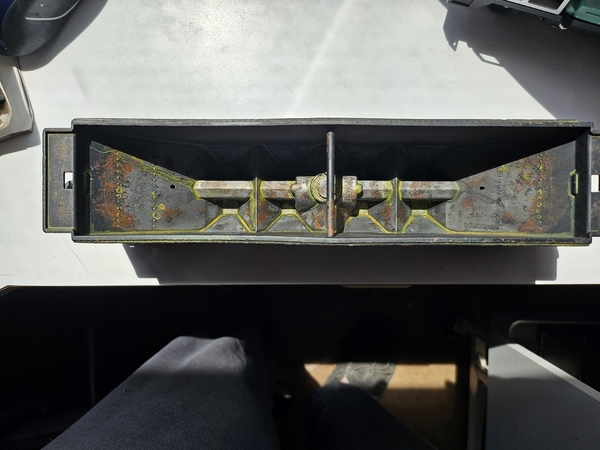
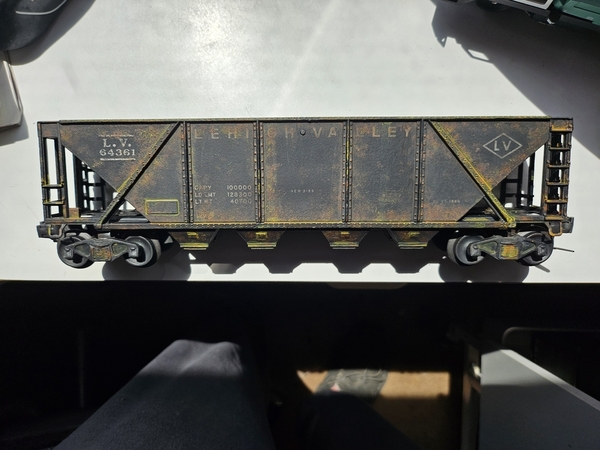
Figured I try my hand at weathering on a C&O boxcar and a open LV hopper. The LV I also tried the inside showing bare metal and added light yellow/brown rust runs as if it recently rained. I'm also changing out the trucks on the LV so I didn't really work on them.

I'm going to redo some areas on the boxcar as I noticed things that I'm not pleased with. These were my first two
so please be gentle...LOL!

20240731_09421720240803_12211020240803_12210020240803_12205120240803_122308

Attachments

Images (5)
  • 20240731_094217
  • 20240803_122110
  • 20240803_122100
  • 20240803_122051
  • 20240803_122308
Last edited by T-Bone1214

Add Reply

Post

OGR Publishing, Inc., 1310 Eastside Centre Ct, Ste 6, Mountain Home, AR 72653
800-980-OGRR (6477)
www.ogaugerr.com

×
×
×
×
Link copied to your clipboard.
×
×