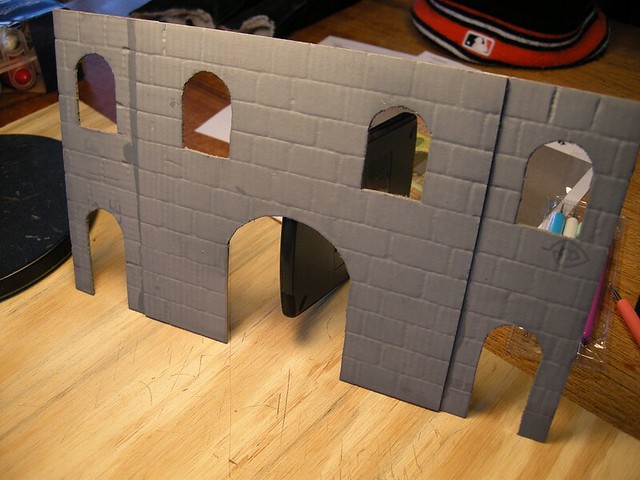
Unfortunately, I didn't take too many pictures along the way, but here are a few. I started off with USPS corrugated, cut to shape, built up in layers with window/door openings drawn in:

After cutting out the four sides and the openings, I used some embossers I bought at Michael's in the scrapbooking section. I carefully embossed stonework onto the corrugated, than gave each section a primer coat:
This was done with each side, than a two-tone paint scheme was provided using gloss spray-paint:
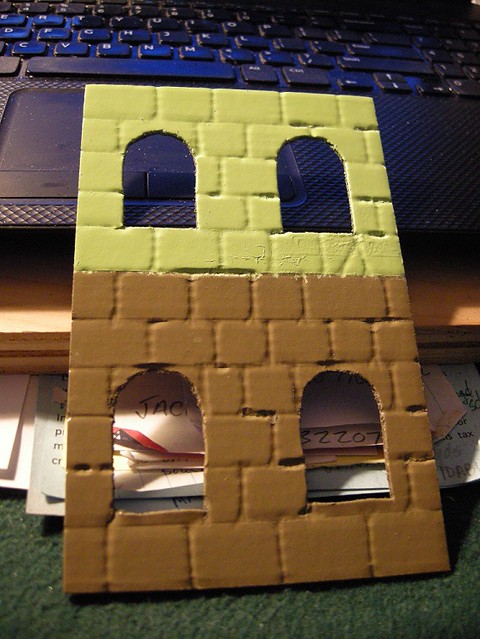
In a few spots you can see I pressed a bit too hard and poked through the top layer of paper on the corrugated. It added to the texture a bit, and in some places was covered by striping (automobile detailing tape) and/or signage. Window/door frames were cut from cardstock, painted, then cemented in. Signage was printed using Excel and the Inkjet printer:

The original Marklin station had no sidewalls in the "tunnel" bit, but I made a pair (seen at the top), including doors for a book-stall and a parcel office. For the book-stall, I scanned some lithography on an old Hornby station, printed it, than used it in the window. It's hard to see looking into the tunnel, but I'm hoping that it will be more visible when the internal lights are turned on.
I used a couple sheets of acetate to make window glazing, shot on one side with flat matte to give it a frosted appearance. This I cemented in using some Loctite GO2 cement, a personal favorite for many projects.
I went on to cut a couple of gable-ends to form the end bits for a lift-off roof using basswood for stringers. I then assembled the whole structure bit with basswood and Titebond at the corners and more corrugated at the center to keep everything square (and forming the ceiling of the tunnel bit in which I cut two holes for the internal light to shine through and illuminate it):
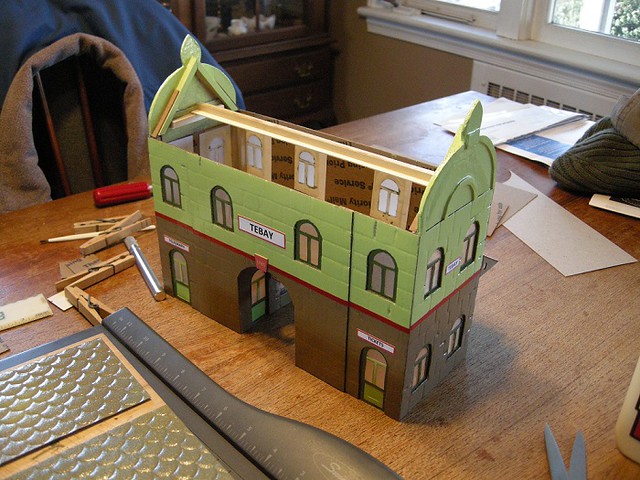
I made a couple of roof panels using some cereal box card-board and a piece of embossed paper purchased at Michael's that looked a bit like scalloped shingles (seen in the picture above lying on the paper cutter). The embossed paper had some sort of glitter applied to it...I lightly sanded this to remove as much as possible, than gave it a mottled paint job using gray paint, along with a dusting of the green and brown from the sides, all topped with an overspray of clear gloss.
For the platform roof, I made a rudimentary structure which I covered with one-sided corrugated I got from my good friend Howard Lamey. This stuff is brilliant, replicating the look of corrugated roofing perfectly. I gave that a shot of "steel" paint, washed it with some diluted black acrylic paint, a shot of clear gloss lacquer, than cemented the whole thing to the back of the station using more Titebond and a couple of straight pins for temporary fasteners.
The chimneys were fashioned from some matt-board cut to shape, covered with some hand-drawn brick paper, and tops made from a piece of matt board and a couple pieces of dowel (painted terracotta using some decent craft paint). They were each give a blast of clear-gloss spray lacquer (although it didn't dry with much luster).
That done, I moved on to the base/platform. This was cobbled together using scraps from the shop. I made it a bit too big, I think, but it worked:
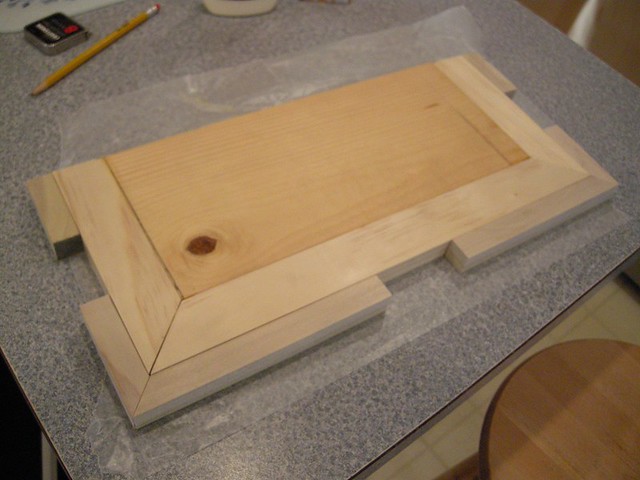
I used 1/4-inch basswood to build up some steps, than gave the whole thing a coat of acrylic paint (Howard Hues "concrete", no. 1106). For the edges, I printed some gray stone paper on cardstock, gave it a dusting overspray of some light brown, than cut it to length and height and cemented it on. Once dry, I gave the whole thing an overspray of clear satin lacquer:

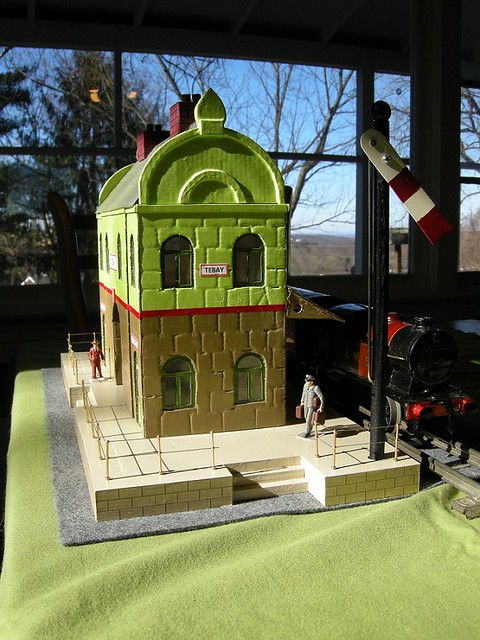
Stanchions were from my model ship bit box. I had some brass rod I was going to use for railing, but it seemed too malleable (little hands were going to have it all bent up), so I opted for an old favorite, carbon-steel guitar "string". No one's going to bend that, at least not easily. I glued the stanchions in with more GO2, than strung the wire railing. Base done, I moved on to making a little manual semaphore signal for the end of the platform.
The signal is made from a short length of dowel, a sliver of aluminum cut from an old foot-plate for a door, a bicycle spoke cut to length (with a 90-degree bend at the bottom), and a small bolt, nut, and washer to hold the whole thing together. Three holes were drilled in the dowel so that the semaphore could be positioned for stop, slow down for train orders, or proceed without stopping. The inspiration for this came from an old JEP signal I have seen. Here are some of the bits I used to make a mock-up:

I glued a wood bead on the top for a bit of ornamentation, painted the pole black and the semaphore a combination of gloss dark red and off-white. I then glued the signal in a pre-drilled hole at the end of the platform.
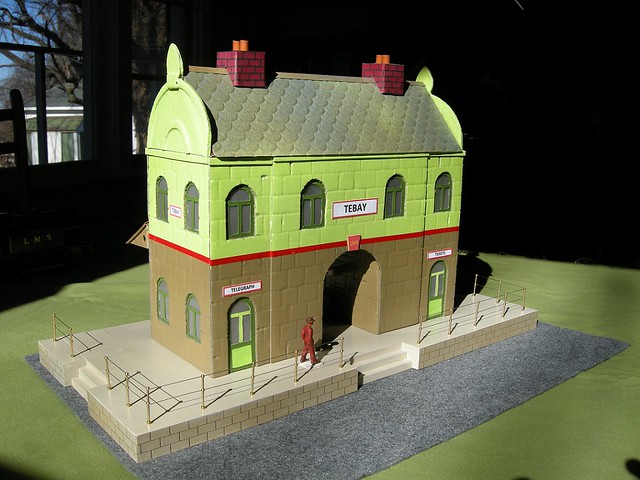
That's about it. Took freakin' forever, but it was a fun project for what I hope/pray is the tail-end of Covid:

This whole thing started off as an experiment to see if it was possible to replicate prewar embossed tin using cardboard. If you don't look too close, it works pretty well. Close examination, however, will reveal many flaws.
That said, it should be a nice addition to the clockwork layout planned for a Christmas display.
PD


