paul 2 posted:

First had to get the grocery shopping out of the way. Working with something new or you never used it before can be a small learning curve. I started out following the gluing directions but found out that I had to hold each one in place for far too long. So I had a drill bit that was close to the base of the cattails. When drilling I made sure I did not go through the plywood because when I pour the water I do not want it draining out. Half the cattails are in. The single ones I can go back and bend them after the glue dries. Later this afternoon I hope to get the rest in. But I have to run my truck into the dealer because there was something wrong this morning in the steering and I don't want to take any chances. But here is a pic so far I still have more to put in...................Paul

DSCN1270

That’s looking good Paul!  I’ with you on drilling holes for things like that.  I can’t hold things steady very long, an I get things cockeyed using the fast acting glues.  Drive safely!!

You are right Bob. I can't stand it when my train routine is inter feared with. How am I suppose to get things done with interruptions LOL. Still waiting to hear the news on the truck. I love shuttle service. While waiting for a call I got the rest of the cattails in and the first coat of water. Then I got the dirt devil and vacuumed all the track in the freight yard to get all the sawdust out from drilling holes for the screws. So now till the water dries I am going to start to layout the track for the brewery. Pics.................Paul

DSCN1271DSCN1272DSCN1273DSCN1274

Attachments

Images (4)
  • DSCN1271
  • DSCN1272
  • DSCN1273
  • DSCN1274
Mark Boyce posted:
Moonson posted:

Hi Mark, I too appreciate your posting about the unfinished bridge in Pittsburgh, and Thanks especially for the picture of it.

Back in the mid-60's, on a visit home from college, in Ohio, I deliberately ventured out onto that unfinished span riding my little Honda50 "motorcycle", knowing the bridge was unfinished and would end in midair, not reaching the other side. I eased past the barriers and went, cautiously, right up to the edge, and looked down into the very dark, very deep waters. It was nightfall. Then, I zipped theheck out of there. But I can still see that bridge edge and the dark waters below. It was a remarkable feeling, never repeated again. But at least I got to see it close-up.

FrankM (from Duquesne)

The things we do when young, Frank!  LOL  I wonder how many folks did like you.  Thank you for sharing your experience!!

Well, Mark, that is one  of the especially nice and attractive features about this forum, we all enjoy sharing ideas and experiences.

Thanks again.

FrankM

JD2035RR posted:

Progress is slowly creeping forward. I ended up taking all of the track off the table, painting everything green, then putting all of the track back on. The 022 switches that I had to resolder the strap to the curved control rail mostly worked :/ Two of the resoldered switches didn't work as expected. I think I'm just going to add a insulated rail section next to the curve and tie it to the binding post. 

I built a sloped control panel, but after adding it to the side, it was taking up too much room. (I'm in the garage, still need to park cars, exercise equipment, etc). So I just placed transformers and switch controls on the table top. I'm still going to add some toggle switches to control the passing sidings.  All of the accessories will be controlled from arcade style buttons on the front fascia.IMG_2675

Here is an overall view. Should be able to run 3 separate trains, juggling them between the top loop, bottom loop, and passing siding. 

IMG_2679

Most everything still needs wired, which I try to chip away when I have a spare 10 mins here or there. I really need a couple hours to just knock the whole thing out. 

Having fun - and the kids really like it, and they haven't even seen it go full bore with the buttons and accessories. 

I think what you've done looks delightful, and i bet your kids are very excited about it!

Moonson posted:
Mark Boyce posted:
Moonson posted:

Hi Mark, I too appreciate your posting about the unfinished bridge in Pittsburgh, and Thanks especially for the picture of it.

Back in the mid-60's, on a visit home from college, in Ohio, I deliberately ventured out onto that unfinished span riding my little Honda50 "motorcycle", knowing the bridge was unfinished and would end in midair, not reaching the other side. I eased past the barriers and went, cautiously, right up to the edge, and looked down into the very dark, very deep waters. It was nightfall. Then, I zipped theheck out of there. But I can still see that bridge edge and the dark waters below. It was a remarkable feeling, never repeated again. But at least I got to see it close-up.

FrankM (from Duquesne)

The things we do when young, Frank!  LOL  I wonder how many folks did like you.  Thank you for sharing your experience!!

Well, Mark, that is one  of the especially nice and attractive features about this forum, we all enjoy sharing ideas and experiences.

Thanks again.

FrankM

Very interesting dialogue about the awe inspiring Bridge to Nowhere before its completion.

By the way, Frank, I enjoyed reading about your diverse interests in your profile page.

Arnold D. Cribari posted:
 
JD2035RR posted:

IMG_2675

IMG_2679

I think what you've done looks delightful, and i bet your kids are very excited about it!

Thanks Arnold! I really like your layout- I always wanted to create a baseball field. 

My kids are the reason I got back into the hobby.  It started with my oldest son when he was 3, "we gotta have a train around the tree for him" and it has snowballed from there. It sparked an interest in me, re-igniting the excitement I had as a kid.  The more you learn about this stuff, the better it gets!


Last edited by JD2035RR
JD2035RR posted:
Arnold D. Cribari posted:
 
JD2035RR posted:

IMG_2675

IMG_2679

I think what you've done looks delightful, and i bet your kids are very excited about it!

Thanks Arnold! I really like your layout- I always wanted to create a baseball field. 

My kids are the reason I got back into the hobby.  It started with my oldest son when he was 3, "we gotta have a train around the tree for him" and it has snowballed from there. It sparked an interest in me, re-igniting the excitement I had as a kid.  The more you learn about this stuff, the better it gets!


So many of us have had the same experience with our parents, and then our children and grandchildren.

Looks like a bunch of us have been very busy today!!!!    Well when I got home from work today there were to big boxes waiting for me!  Got my BLI water tower and 5401 Southern engine today for Trainworld!!!   YAY!!  Very good looking engine and water tower!  Also got my fastrack order in from Mario!!!!!  Excellent service and pricing from both! So I got right to it on bench work and got one 2x4 section done and then got the bigger 4x8 section done!   All I lack now is a 28x24 section to connect one end, an angled area not sure of size.   Then some kind of lift gate/bridge???   Moving forward! 

Jim 

In my last progress report Tuesday, I said plaster Wednesday because I forgot what day it was. I meant Thursday. So, here we are, and we have plaster! I finished the cardboard support strips for the entire hump. I really like the plaster cloth for putting down a base. Quick and easy!

The rolls are 4" wide by 15' long, so I cut them into manageable pieces, about 18" and covered the cardboard, forming a shell. Some of the steeper sections may need retaining walls.

IMG_7973

Now that I have a shell, I'm going to get some regular plaster and smooth the whole thing out. Remember this area is going to be winter, so get used to the white.

IMG_7974IMG_7975

Still trying to figure out how to disguise the tops of those two openings in the backdrop. Maybe something as simple as thin styrene strips painted blue, and set to the absolute max car height with no excess clearance.

IMG_7976IMG_7977

After that was done, I moved to the lower deck and filled in between the tracks on the big curve. In this case I just used solid cardboard.

IMG_7978

I'll be plastering this area Saturday !  I also plan to deal with the part between the inner track and the backdrop. I'm going to cut some strips of Luan plywood, and fasten them to the backdrop to give me a stapling surface.

IMG_7979

This area will be the winter - spring transition.

IMG_7980

This makes the layout so different. I'm very excited! (and I don't usually get excited anymore)

Attachments

Images (8)
  • IMG_7973
  • IMG_7974
  • IMG_7975
  • IMG_7976
  • IMG_7977
  • IMG_7978
  • IMG_7979
  • IMG_7980

Evening worked out well. Wife had a Cavs game so I got to have some more time to work on the layout. I got a second coat of water down and I think that will do it. Tomorrow I can add some ground foam around the water if it is dry. I also got the cork started in the brewery area. So all and all it was a great evening. Pics............Paul

DSCN1275DSCN1277DSCN1278DSCN1279DSCN1280

Attachments

Images (5)
  • DSCN1275
  • DSCN1277
  • DSCN1278
  • DSCN1279
  • DSCN1280

Finished taking down the Christmas layout. .  I do not have a permanent layout, since we are renting. Then I brought in to the house (from my trunk) my latest purchase, a used New York Central set. I just had to check it out so I put up a short run line just to make sure every thing worked. which it did. I ran down to my Local train store and picked up the two missing canisters for the gondola and completed the set, Packed everything up and get all my stuff ready for Storage.  Actively looking for a house and hope to get one soon. Trying to find one that will work for us is hard, There aren't many homes with a "Train" room for sale around here. Most of the homes were built as winter homes for Northerners and are two bedrooms either have no garage or had the garage converted to a third bedroom.  

Last edited by Noah
Noah posted:

Finished taking down the Christmas layout. .  I do not have a permanent layout, since we are renting. Then I brought in to the house (from my trunk) my latest purchase, a used New York Central set. I just had to check it out so I put up a short run line just to make sure every thing worked. which it did. I ran down to my Local train store and picked up the two missing canisters for the gondola and completed the set, Packed everything up and get all my stuff ready for Storage.  Actively looking for a house and hope to get one soon. Trying to find one that will work for us is hard, There aren't many homes with a "Train" room for sale around here. Most of the homes were built as winter homes for Northerners and are two bedrooms either have no garage or had the garage converted to a third bedroom.  

Third bedrooms work!! Thats what I'm using : ) 

Jim

Here's couple pictures of the revised track layout: one from the south end and one from the north end. The exposed spaghetti wiring is for easy access to testing switches and some accessories. My younger son and future daughter-in-law gave my grandson a battery powered train set for Christmas, which weirdly enough, the engine and cars fit pretty nicely on our O-Scale track. The black engine with red drivers and the tender are from that set, the other engine next to them is also a battery operated toy that he has had for a while. He really enjoys running his trains around the Fasttrack loop while I run the other train on the inner layout. He plays in this room quite a bit when I'm at work, and is always very careful about things. This first picture is the north end, which has two sidings and part of the loop that allows direction change.

The south end will have the 97 coaling tower, which now fits with the offset siding on the one side. I'm hoping to work on it this weekend, and get it cleaned up, lubricated and operational. I've also got a few of the operating coal cars that need to be worked on. I'm going to be busy with going through stuff tonight and tomorrow to figure out what parts I need, make a list, and pick them up this Sunday at the monthly train show at DuPage County Fairgrounds.


Attachments

Images (2)
  • North end
  • South end
Big_Boy_4005 posted:

In my last progress report Tuesday, I said plaster Wednesday because I forgot what day it was. I meant Thursday. So, here we are, and we have plaster! I finished the cardboard support strips for the entire hump. I really like the plaster cloth for putting down a base. Quick and easy!

The rolls are 4" wide by 15' long, so I cut them into manageable pieces, about 18" and covered the cardboard, forming a shell. Some of the steeper sections may need retaining walls.

IMG_7973

Now that I have a shell, I'm going to get some regular plaster and smooth the whole thing out. Remember this area is going to be winter, so get used to the white.

Still trying to figure out how to disguise the tops of those two openings in the backdrop. Maybe something as simple as thin styrene strips painted blue, and set to the absolute max car height with no excess clearance.

This makes the layout so different. I'm very excited! (and I don't usually get excited anymore)

Elliot- what if you painted the wall behind the openings blue? Might help blend them in a little.

After all the nuts and bolts of fascia, wiring, track work, etc, on your layout, nice to see some color on the tables, even just white. Looking good

Bob

carsntrains posted:
Noah posted:

Finished taking down the Christmas layout. .  I do not have a permanent layout, since we are renting. Then I brought in to the house (from my trunk) my latest purchase, a used New York Central set. I just had to check it out so I put up a short run line just to make sure every thing worked. which it did. I ran down to my Local train store and picked up the two missing canisters for the gondola and completed the set, Packed everything up and get all my stuff ready for Storage.  Actively looking for a house and hope to get one soon. Trying to find one that will work for us is hard, There aren't many homes with a "Train" room for sale around here. Most of the homes were built as winter homes for Northerners and are two bedrooms either have no garage or had the garage converted to a third bedroom.  

Third bedrooms work!! Thats what I'm using : ) 

Jim

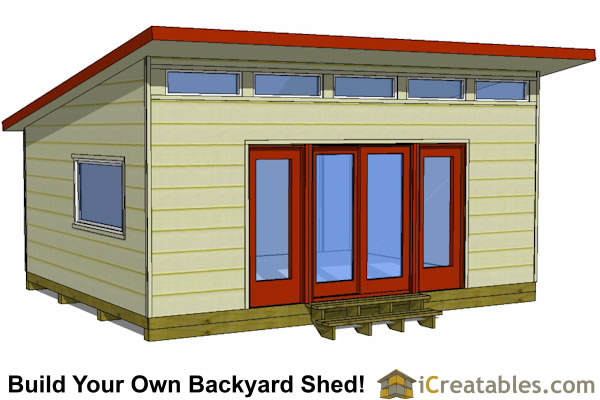
Noah- I see a huge shed in your future

Image result for 20X 15 shed

Noah posted:

Finished taking down the Christmas layout. .  I do not have a permanent layout, since we are renting. Then I brought in to the house (from my trunk) my latest purchase, a used New York Central set. I just had to check it out so I put up a short run line just to make sure every thing worked. which it did. I ran down to my Local train store and picked up the two missing canisters for the gondola and completed the set, Packed everything up and get all my stuff ready for Storage.  Actively looking for a house and hope to get one soon. Trying to find one that will work for us is hard, There aren't many homes with a "Train" room for sale around here. Most of the homes were built as winter homes for Northerners and are two bedrooms either have no garage or had the garage converted to a third bedroom.  

Noah, I have heard that about Florida houses, and no basements either.  I have never been to Florida though.  I hope you can find a suitable house with a nice train room!  It is hard to buy a train, run it a bit, then pack it up.  I feel for you!

ELLIOT - Great progress once again!  Thee plaster roll over cardboard looks like our winter landscape around here in NH.  If you run into small areas, that need to be filled in, Woodland Scenics Shaper Sheets works well.  I used it for my 3'X4' mountain and several small rock areas.  It would be costly for your application.  It does not required the cardboard support. Thanks for the progress reports.

Big_Boy_4005 posted:


Still trying to figure out how to disguise the tops of those two openings in the backdrop. Maybe something as simple as thin styrene strips painted blue, and set to the absolute max car height with no excess clearance.

IMG_7976


Do you have room between the track and backdrop for a small embankment to cover the two openings?   Form it with cardboard strips as you did for the front slope.  You can stretch it out beyond the openings and it would blend with the topography of the hump.  Dave

Last edited by darlander

Well guys Mark covered it all! LOL But Elliot, I like how things are looking. it will make a great winter area! Maybe if there is room just set something up on the upper level so when you look that direction you cant see the holes. That way you don't have to worry about clearance.

Paul, the water is looking wonderful and its nice to see more cork going down, which means more track soon! 

Brian I am glad your having fun, things must be warming up back there, they say we should get close to 60 tomorrow!

mike g. posted:

Well guys Mark covered it all! LOL But Elliot, I like how things are looking. it will make a great winter area! Maybe if there is room just set something up on the upper level so when you look that direction you cant see the holes. That way you don't have to worry about clearance.

Paul, the water is looking wonderful and its nice to see more cork going down, which means more track soon! 

Brian I am glad your having fun, things must be warming up back there, they say we should get close to 60 tomorrow!

Mike- 55 this morning, 13 tomorrow night on LI. gotta love wacky weather

Slowhands posted:

Here's couple pictures of the revised track layout: one from the south end and one from the north end. The exposed spaghetti wiring is for easy access to testing switches and some accessories. My younger son and future daughter-in-law gave my grandson a battery powered train set for Christmas, which weirdly enough, the engine and cars fit pretty nicely on our O-Scale track. The black engine with red drivers and the tender are from that set, the other engine next to them is also a battery operated toy that he has had for a while. He really enjoys running his trains around the Fasttrack loop while I run the other train on the inner layout. He plays in this room quite a bit when I'm at work, and is always very careful about things. This first picture is the north end, which has two sidings and part of the loop that allows direction change.

The south end will have the 97 coaling tower, which now fits with the offset siding on the one side. I'm hoping to work on it this weekend, and get it cleaned up, lubricated and operational. I've also got a few of the operating coal cars that need to be worked on. I'm going to be busy with going through stuff tonight and tomorrow to figure out what parts I need, make a list, and pick them up this Sunday at the monthly train show at DuPage County Fairgrounds.


That's great it fits on your O gauge track!  Your little engineer can have at it!  Good plan to get things going for him!!!!

RSJB18 posted:
mike g. posted:

Well guys Mark covered it all! LOL But Elliot, I like how things are looking. it will make a great winter area! Maybe if there is room just set something up on the upper level so when you look that direction you cant see the holes. That way you don't have to worry about clearance.

Paul, the water is looking wonderful and its nice to see more cork going down, which means more track soon! 

Brian I am glad your having fun, things must be warming up back there, they say we should get close to 60 tomorrow!

Mike- 55 this morning, 13 tomorrow night on LI. gotta love wacky weather

Yes, and starting tomorrow night lows in single digits, some plus and some minus; not counting wind chill.  A good bit of snow coming our way starting tonight so they say.  Look out Bob, I don't want to hog it all, so I may be sending some your way!  Brian and Paul should be seeing it before me.

I got the rest of the cork glued down this morning. I have one section yet to do but I am waiting on the switches I ordered from Ross. On the section where the drill is sitting I am hoping to add a switch to add another short siding. I think it is a 0-31 switch. If that gives me the right angle I am set if not I'll just add more building in that area. After lunch while I am waiting for the glue to dry I'll start adding ground foam around the water. Pics..........Paul

DSCN1281DSCN1282

Attachments

Images (2)
  • DSCN1281
  • DSCN1282

Add Reply

Post
×
×
×
×
Link copied to your clipboard.
×
×