
Melvin P posted:Cut lumber for leg braces for the second level of my layout. I can see plywood coming soon.
Nothing like the smell of fresh cut lumber!!
Fixed another O ring. This time in my 497 coal elevator. Again I replaced the stretched out O Ring with a MTH traction tire. All is right with the world.
Nice looking cars there Lee! Great job!
briansilvermustang posted:getting ready for "frontendfriday"...
put up a shelf for some of my Williams engines...
![]()
![]()
![]()
You have more of them than Williams has!!!!
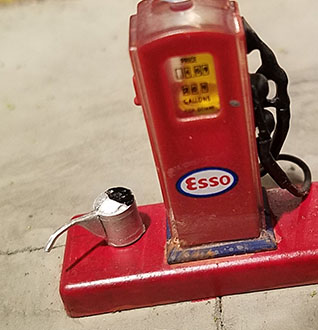
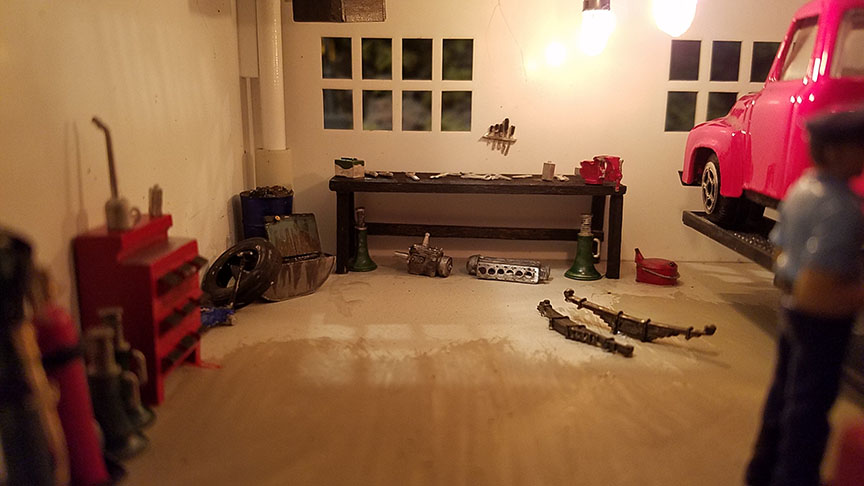
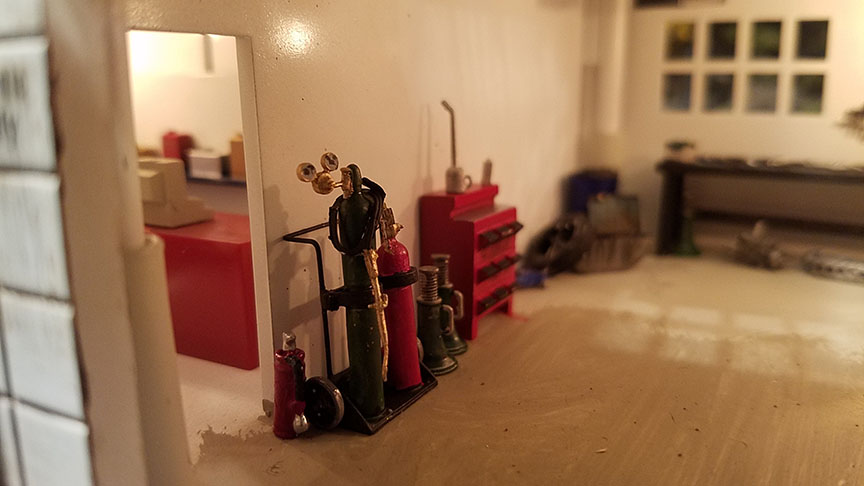
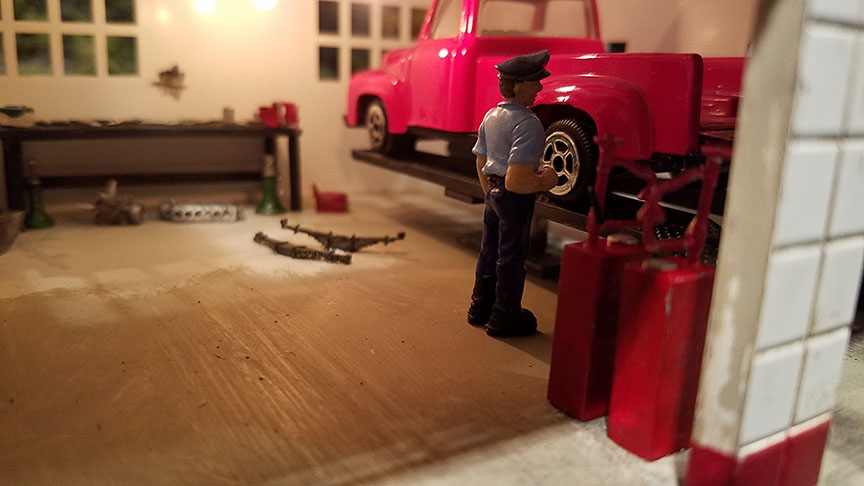
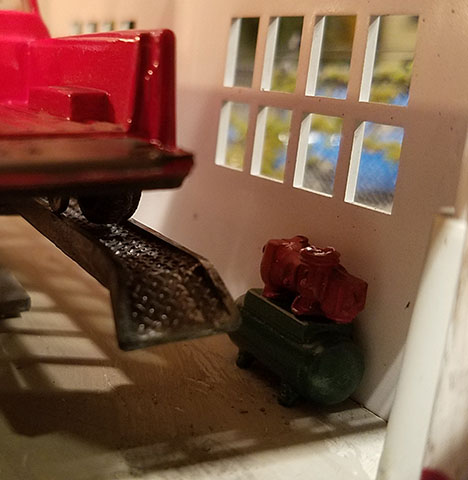
CSX Al posted:I finished assembling,painting and installing all the extra details for my garage tonight. PITA, since I had to do it all through the open bay doors.
Looks awesome Al.
mike g. posted:carsntrains posted:Mike, Mark, I agree 100% on the duck under. The only reason I'm considering it is that I'm short lol Just under 5'8''. So its not that hard for me to get under 49 or so inches. Still all in the maybe stage. Did make a template last night. Bridge will be in an S turn. It would look cool but which would be the bigger PITA. A lift/swing gate that has to be moved all the time, and my silly self could maybe forget to close. Or ducking under...
Jim
Edit. Note that Ive "ducked under" around 38.5 inches about 100 times over the last week! Lots of good exercise lol
LOL its all your choice Jim, but I am 5'9" and 54 and it huts sometime to duck under let alone get back up off the floor! But my fingers are still good enough to throw the switch to raise and lower my bridge! Plus with safety switches in place if the bridge is up the trains stop 5 feet before the bridge!
Well I'm 6' 0'' and during the 7 years since I was 54 I lost 40 pounds, started exercising for cardio 5 times a week, and do stretching/flexibility exercises too. What do I have to show for it? I have a harder time stooping and crawling around! ![]()
Great job indeed, Lee!!!
Fixed the short on the inner loop and ran a maintenance truck through it. It goes but there are spots that need serious cleaning or a new piece of track. Going to figure out my siding situation as well. Outer loop with both sidings are done. I might add some trestle on the back to raise it, slip in two girder bridges, and lower it back down.
Attachments
Looks great, Deuce!!
Deuce,
Coming along, starting to look seriously nice! Take your time and find out why you are having the bad spots, test and complete the job, it should all run smoothly when you are done.
Congrats on a real nice layout!
CSX AL,
Great looking work on the Gas Station, top shelf stuff!
PCRR/Dave
CSX Al posted:I finished assembling,painting and installing all the extra details for my garage tonight. PITA, since I had to do it all through the open bay doors.
Al, do you service MiniCoopers in your beautiful garage?
Maybe with the old fashion Esso pump (which I love) in the scene, I should say Studebaker or Edsel, not MiniCooper.
briansilvermustang posted:getting ready for "frontendfriday"...
put up a shelf for some of my Williams engines...
Fortescue called. He wants his royalties! ![]()
Mitch
Attachments
Eric, PCRR/Dave and Arnold, thank you!
Arnold, I might be a bit tired, but I’m not sure what you are referencing with the Mini Cooper ? The pick truck on the lift is a Chevy.
CSX Al posted:Eric, PCRR/Dave and Arnold, thank you!
Arnold, I might be a bit tired, but I’m not sure what you are referencing with the Mini Cooper ? The pick truck on the lift is a Chevy.
Al, I thought your model of the garage was so good, including appearing very clean and well organized, that I was offering to take my Minicooper (which I drive) in for service at your garage.
Okay,thanks for the clarification. I am a little beat today and not as sharp reading the forum tonight. I had thought I had made the shop somewhat dirty but yet organized . On a side note I will probably put Studebaker at the pumps. ![]()
Always enjoy your terrific modeling
Nice looking cars there Lee! Great job!
Great job indeed, Lee!!!
Thanks very much, guys!![]()
Lee, great photos again. Enjoy your work. All I did today was do a little more on the oil storage kit. Forgot I had some little jars of paint from Home Depot. One color worked on the main building and the other worked on the chimney but the pic came out blurry. I still need some more colors so I'll head out to Hobby Lobby tomorrow morning. Pics ...Paul
Attachments
Deuce- glad you fixed your short. The layout is coming together nicely. The kids are going to have fun with it for sure!
Bob
RSJB18 posted:Deuce- glad you fixed your short. The layout is coming together nicely. The kids are going to have fun with it for sure!
Bob
Thanks Bob. The last pieces for the layout are on their way. By the first week in February the track layout will be complete ... and then I'll have (even more ![]() ) questions on accessories. This whole process has been fun - and addicting. I need help (and the wife to not attempt to balance the checkbook for a month or three).
) questions on accessories. This whole process has been fun - and addicting. I need help (and the wife to not attempt to balance the checkbook for a month or three).
Mark Boyce posted:R.C. posted:Hey ya'all. Since my last post here, I've made several workings to the 12x10 shelf layout as noted below. Also, I introduced RC jr to menards "O" gauge stuff via text. Two days later, He text's me from his local Menards (Toledo) with a pic of the Morton Salt building saying "Look what I just got for half price", because it was the display model & 15% off day! I said, "Oh, my grandson is gonna love this" & He say's, "No, Dad, This is for YOU!" Dang, I think we can fit it in on the wide portion of the lower level & wire it thru the AIU as a center piece based on preliminary measurements. Here's what I have done;
Started a test version of a backdrop using neon blue poster board (I know it sounds kinda chinsey as opposed to facia), but taking into consideration it's a shelf layout & with multiple grades it seemed more logistical. It not only gives a nice color enhancement with the lcd lighting, hides brackets & some wiring & could be hand painted for ground effect.
Also, if I decide to change to facia next year, the poster board could be used as a pattern for cutting the angles & grades. So, I'm headed back to Pat Catans for enough to go all the way around. Another test area, the wall in craneville where I have been playing with scenery & ballast, I tried the poster board in black and love it! So, I'm going to do the entire lower level backdrop the same way, giving it a Dark night effect.
As seen in that photo, I painted the shelf underside in preparation for that. here's the wide area I hope the Morton salt will fit into once it gets here.
Also, the 5 amp re-settable breakers made it from china. I installed them along with some buss & wiring improvements; a breaker on each of the 3 track circuits & 1 on Acc circuit fed with a brick. They so far, they function perfectly, but I did notice that I have to knock the track circuit down with the AIU before re-setting as they cause the units to restart in conventional mode. This is probably for the best anyway so as not to re set under load.
Needed something to keep me out of the mower shop for another month anyway ( getting some warm days in between cold spells) & this should do it without breaking the bank.
It looks good R.C. I need something for a background on my Ceiling Central RR to enhance the look of the trains.
Progress on Homegrown Background;
Overcame a bonehead decision to try the glossy (rather than flat black poster board on lower tier) with an overlay.
Painted the mountains on white poster board (on the bench), then glued onto blue. Gotta add some clouds yet. What a difference not seeing the wire harnesses & the effect on trains. My plan for switch machine connections is to use match box's painted (to look like signal box) , enabling diagnostics or machine change. But, for now, it;s painting landscape background.
Attachments
CSX Al posted:
All I did last night was look at this again and measured how much height I have. Duh! It is only 9 scale feet from the stream bed to the the top of the roadbed. I believe number 3 would be the best choice for this application. Everything else would be more appropriate for a higher fill.
On another note; I am off work and nothing else is pressing, so I am planning to go over to my mother-in-law's and start taking that workbench apart that will provide a lot of wood and even Homasote for my new layout. I'll keep my fingers crossed that nothing else happens and I actually get this done. ![]()
Mark Boyce posted:CSX Al posted:All I did last night was look at this again and measured how much height I have. Duh! It is only 9 scale feet from the stream bed to the the top of the roadbed. I believe number 3 would be the best choice for this application. Everything else would be more appropriate for a higher fill.
On another note; I am off work and nothing else is pressing, so I am planning to go over to my mother-in-law's and start taking that workbench apart that will provide a lot of wood and even Homasote for my new layout. I'll keep my fingers crossed that nothing else happens and I actually get this done.
Mark,
I was going to vote for #1 ONLY if you included the tire. But honestly ... that tire needs to show up somewhere in your layout now. I still think #1 would work if you had the top stonework above the track line, and modeled it like a small bridge.
Deuce, that table and layout are looking really nice! Shorts can be a PIA, but I am glad you got them fixed! Wonderful job!![]()
R.C., I think the back drops are looking good and I like your idea with the match boxes! Keep us posted!![]()
Mark, WOO HOO #3, did I call it or what! I wish you luck on your bench move today to get the lumber as I know you have been trying to get it to your house for sometime!![]()
After lunch going out to get my paint. But this morning I finished off the ballast on the last two track in the brewery area and added some ground foam to some of the areas between the tracks. Added the vent cap to the upright storage tank and when that is dry I'll paint it. The first coat of paint is on the windows and doors of the building. After it dries I add a second coat. Was using a nice small fine brush but I guess I am not as steady as I use to be so I will have to touch up the siding when I am done with the window. Tomorrow I will be going up to Parma Ohio to help set up for the train show on Saturday. I decided to also get a table to sell some stuff too. So I won't get back to the layout till Sunday. Couple of pics.............Paul
Attachments
Paul your work is looking great! Keep on chugging !! Cant wait to see the outcome!
Jim
Looking good Paul! Don't worry about the paint, we have all been there! your just putting on a thicker coat to protect the siding on the building from the weather!![]()
mike g. posted:Deuce, that table and layout are looking really nice! Shorts can be a PIA, but I am glad you got them fixed! Wonderful job!
R.C., I think the back drops are looking good and I like your idea with the match boxes! Keep us posted!
Mark, WOO HOO #3, did I call it or what! I wish you luck on your bench move today to get the lumber as I know you have been trying to get it to your house for sometime!
Deuce, Yes, I agree the tire has to show up in the crick!!
Mike, Yep, you called it Mike!! I didn't think so until I got measuring! ![]()
Ah, the bench move! Yes I was able to complete that today!! This workbench was 8' x 3' 4". It had two 1/2" sheets of Homosote on top that measured 4' x 10' on top. Yes, 10' long. The woman my mother-in-law bought the house from had been a seamstress, and she had these sheets of Homasote on top of the workbench with lines marked off every inch, front and back of both sheets. I cut them in half. Underneath was a nice sheet of Masonite 8' x 3' 4", that I can use for backdrop. I didn't know it was there. Then the top of the bench itself was made of four 1" x 10" planks. You can see it had been used previously as a workbench where painters had dripped paint, and circles from paint cans sitting on it. I can rip those with my Skil saw and fence. There was a shelf a foot from the floor of 1/4" plywood, and the same plywood on the back and sides. There are also two long 2 x 4s. I took all of that apart and moved it over to our house. I left the two end assemblies intact. They have casters on the bottom. My plan is for a C shaped layout, with turn back loops on the ends. The long middle will be a 30" or so shelf mounted to the wall. The end loops will detach, so I can roll them out to get in behind for access. As I said in another topic, I'm not building anything I have to crawl under, duckunder, pop up, etc. If not now, sooner or later I would get stuck or hurt myself.
Here is one of the rolling ends. I can use these for the first loop end, then make something similar for the other side. I may put larger casters on for easier rolling. I'll reinforce them a bit, but they are pretty sturdy considering I ripped them off the rest of the workbench.
Attachments
Looking mighty good, Paul!! I hope you have a lot of success at Parma this weekend!!
Good job Mark, I am glad you were able to get everything moved! It also sounds like you have a good plan on how to use everything on your new layout! congrats!![]()
Mike, Thank you! I had to plan the move for a day when I thought I had enough time to get everything completely out of her house by the end of the day. While my wife's mother is in good health for mid 80s, but she has never driven, and we have to take her everywhere. She cleans what doesn't even need cleaned. If I left something sitting there overnight, she would try to move it to make it look better to her or clean under it, and end up getting hurt. As it was I caught her trying to lug one of the end sections up the basement stairs (trying to be helpful). I don't need her to fall down, break a hip, and listen to the complaining of it being my fault. ![]()
So does this mean that Marks layout construction has officially started?
I vote for the tire too 😁
Yes, Bob! See I have two supports on casters for the first movable section already completed!! ![]()
Move it out Mark!!! WOOO HOOO
Worked on my two track bridge. Got off work. Came home studied the template. Wife and I ran down to Home Depot and got some metal. Started tinkering. My son say lets bend it! So a 4lb hammer. A steel weight rack that hold lifting weights. And a chunk of 2x4. And the "I BEAMS" are ready to weld up and put together. Aint figured out how I'm going to top it yet. Wood or 1/16 steel. Those are 1/8 inch C channel "I BEAMS" 2 inches tall. Studied some bridges today and the beams were about half as tall as a freight car. So I THINK these would be scale 8 foot?

Jim
Attachments
Minor stuff this evening. Grabbed a couple of 1.75" FasTrack pieces to extend the outer loop just a bit to give it a bit more space from the long siding. Then switched a 4.5" piece with two 1.75" pieces to give me another inch space between the outer loop and the long siding as well. Then I cleaned up the table a bit and pulled out the loading dock accessory. Finding a place for this is going to be difficult, but I may have found a home for it. See that I need to do some work on it as well. I may build a base for it that I can slip under the track and also give me enough clearance for all of my trains (sides and top). Also measured out some aluminum flashing for new bottoms for my two girder bridges. I imagine I don't really need something underneath, but it won't hurt and while the flashing is a bit flimsy, I think it'll work just fine for where these are going to be placed. If worse comes to worse, I can fold it up onto itself. I have enough of this stuff from an old project in my last house and I won't be needing it any longer.
So now the items I have are as follows: wiring up the power switches to the two FasTrack sidings and attaching them properly to the table; getting my extra O27 switches in and getting the inner loop completed, cleaned, and tested; and laying out accessories. I have a pair of dwarf switches, the diesel horn shed, the rotary beacon, and the Marx radio tower that need to be powered. I also have a pair of Plasticville buildings I need to find a home for. I have a feeling not everything is going to fit exactly the way I envisioned, but I'm not giving up track real estate for buildings. I'll figure it out.
Attachments
p51 posted:
Something I've grown to appreciate are the photography skills of many of the forum posters. It's hard to get a good shot! Lee, you make it look easy.
Great modeling and photography.
Anybody ever use this for soundproofing their track?
Something I've grown to appreciate are the photography skills of many of the forum posters. It's hard to get a good shot! Lee, you make it look easy.
Great modeling and photography.
Thank you very much, JD. That means a great deal to me!
I bought signboard at a craft store in Portland a while back, so I made a sign to hang in a layout room as you walk through the door. I sort of used an original sign photograph I got off eBay as a basis. I think it turned out okay, not bad for just half hours work with a brush. I just finished it a few minutes ago and will hang it up tomorrow.
Below is the sign itself, and the photograph I used to base it upon loosely. My sign is roughly 10X20"
The plan is to lightly sand down the sign, to weather it a little bit, later.




![IMG_20180120_231506[1] IMG_20180120_231506[1]](https://ogrforum.com/fileSendAction/fcType/0/fcOid/12129987997660671/filePointer/77593417127195742/fodoid/77593417127195724/imageType/MEDIUM/inlineImage/true/IMG_20180120_231506%255B1%255D.jpg)
![IMG_20180122_102757[1] IMG_20180122_102757[1]](https://ogrforum.com/fileSendAction/fcType/0/fcOid/12129987997660671/filePointer/77593417127195743/fodoid/77593417127195727/imageType/MEDIUM/inlineImage/true/IMG_20180122_102757%255B1%255D.jpg)
![IMG_20180122_102810[1] IMG_20180122_102810[1]](https://ogrforum.com/fileSendAction/fcType/0/fcOid/12129987997660671/filePointer/77593417127195746/fodoid/77593417127195728/imageType/MEDIUM/inlineImage/true/IMG_20180122_102810%255B1%255D.jpg)
![IMG_20180122_102831[1] IMG_20180122_102831[1]](https://ogrforum.com/fileSendAction/fcType/0/fcOid/12129987997660671/filePointer/77593417127195747/fodoid/77593417127195730/imageType/MEDIUM/inlineImage/true/IMG_20180122_102831%255B1%255D.jpg)
![IMG_20180122_102849[1] IMG_20180122_102849[1]](https://ogrforum.com/fileSendAction/fcType/0/fcOid/12129987997660671/filePointer/77593417127195748/fodoid/77593417127195732/imageType/MEDIUM/inlineImage/true/IMG_20180122_102849%255B1%255D.jpg)
![IMG_20180120_230923[1] IMG_20180120_230923[1]](https://ogrforum.com/fileSendAction/fcType/0/fcOid/12129987997660671/filePointer/77593417127195749/fodoid/77593417127195733/imageType/SMALL/inlineImage/true/IMG_20180120_230923%255B1%255D.jpg)
![IMG_20180124_194501[1] IMG_20180124_194501[1]](https://ogrforum.com/fileSendAction/fcType/0/fcOid/12129987997660671/filePointer/77593417172630808/fodoid/77593417172630802/imageType/MEDIUM/inlineImage/true/IMG_20180124_194501%255B1%255D.jpg)
![IMG_20180124_194512[1] IMG_20180124_194512[1]](https://ogrforum.com/fileSendAction/fcType/0/fcOid/12129987997660671/filePointer/77593417172630809/fodoid/77593417172630803/imageType/MEDIUM/inlineImage/true/IMG_20180124_194512%255B1%255D.jpg)
![IMG_20180124_194420[1] IMG_20180124_194420[1]](https://ogrforum.com/fileSendAction/fcType/0/fcOid/12129987997660671/filePointer/77593417172630810/fodoid/77593417172630804/imageType/MEDIUM/inlineImage/true/IMG_20180124_194420%255B1%255D.jpg)
![IMG_20180124_194501[1] IMG_20180124_194501[1]](https://ogrforum.com/fileSendAction/fcType/0/fcOid/12129987997660671/filePointer/77593417172630808/fodoid/77593417172630802/imageType/SQUARE_THUMBNAIL/inlineImage/true/IMG_20180124_194501%5B1%5D.jpg)
![IMG_20180124_194512[1] IMG_20180124_194512[1]](https://ogrforum.com/fileSendAction/fcType/0/fcOid/12129987997660671/filePointer/77593417172630809/fodoid/77593417172630803/imageType/SQUARE_THUMBNAIL/inlineImage/true/IMG_20180124_194512%5B1%5D.jpg)
![IMG_20180124_194420[1] IMG_20180124_194420[1]](https://ogrforum.com/fileSendAction/fcType/0/fcOid/12129987997660671/filePointer/77593417172630810/fodoid/77593417172630804/imageType/SQUARE_THUMBNAIL/inlineImage/true/IMG_20180124_194420%5B1%5D.jpg)


