
Chris,
Thank you for your comment; much appreciated.

Steve,
The room is 33-ft x 38-ft and I use most of it. Here is an updated track plan of what it is now after a couple of spur additions and final configuration of the area around the turntable.


. . . and yes, I am having fun with the scenery. In addition to the pink foam, I am using the more traditional paper towel (blue) dipped in plaster, but instead of plaster I am using Structolite, and what a difference! Wink About three years ago I learned about it from Jim Policastro, but had a limited opportunity to use it on my then (small) layout. Not this time! Big Grin

Thanks!!!

Alex
I have done some more wiring and have started the scenery in the Etieca Valley and Villa de Rocas areas.
Here are a couple of shots of each.

Etieca Valley will have a small refinery, Intermodal Facility, and Diesel Service Shop.


Far, far away beyond the refinery and the double track main there are a couple of hunter cabins. HO scale and smaller trees worked just right for the desired effect.


Villa de Rocas is home to the turntable, engine shed, and some industry.


Of course, all of this is far from finished. . .

Thank you for looking.

Alex
quote:
Originally posted by willbacker45:
Just saw your video of the Big Boy! Very cool! I didnt know that you were the one that had the amazing fastrak layout I was always blown away by that one and was sad when you took it down but your new layout is obviously going to be spectacular!
Yes, it was sad to take that one down because it actually turned out fine. But better things were in the horizon, and I am working on them now. THANK YOU for your comments!

I wasn't sure about this video, but since you thought it was OK, I'll post it.
• It's a new camera - for pictures (Nikon D3100 DSLR) and I don't really know how to to properly use it yet;
• The turntable is not finished (But I'll get it done ASAP, so Al Z. won't get mad at me).
• It is a raw video. . . no editing or anything.
But I just had to try it.


Thanks!

Alex
quote:
Now its run nights and layout night!

Patrick -
It sure was a lot easier to work on the layout a few months ago - it was all building the frame, the top, and laying track. But now, I have to choose: Scenery or run trains, more wiring or run trains, setup buildings or run trains, control panel or run trains. Running trains wins too often Big Grin

Don,
Yes, Al's turntable is a joy to work with. I am assembling the bridge now and should have a few pictures soon. That whistle - - I was going to 'quill' it, but between running the video, the turntable, and the loco, I forgot!

THX!!!!!!!!!!!!!!

Alex
quote:
Is that a Lionel Big Boy or the MTH model?

Alan,
That is the MTH 20-3414-1 from 2010 Vol-2. I really it.

I was lucky to find one when I did as I did not realize that I had the 2010 Vol-2 issue (the spine of the book says Vol-1 !) and had not looked at it. That was shortly after we moved (Aug 2010) and I did not realize that I had the Vol-2 catalog until I unpacked.

I called Jimmy, who was winding down at the time, and he did not have any, but thought that Jason might have one. Sure enough - Jason had one and I bought it. That was around Sep-Oct last year.

I'll have another video soon . . .

Alex
Al,

The wire 'was' tucked in at one time. I'll try to secure it better next time. Wink

Colors (not following any prototypes - just what I thought would look OK. Eventually I'll add some weathering, but for now it will have the fresh look.

Rust-Oleum Camouflage 1919 Deep Forest Green = The arch, stanchions, and motor gears
Rust-Oleum Camouflage 1917 Khaki = Shanty
Rust-Oleum Ultra Cover 249082 Satin Colonial Red = Window frames
Rust-Oleum Metallic Finish 7715 Aluminum = Ladders
Railroad Colors 110145 Boston Maine Blue = Motor and bearing blocks
Testor’s Yellow = Handrail (I used a brush, but it would have been better sprayed – I just forgot and assembled it before painting.)
Testors' Red = Ball on top of rotor (which is free to rotate so I can add the wires to the power pole.)

Thanks for the nice comments!

Alex
A logo for my railroad.

The tracks that join the east and west side of my layout are located behind the stairwell, as shown below. Although these tracks and switch tracks are easily accessible from the service aisle, this ‘pass junction’ is hidden from the main viewing area and from the control center, hence the name of the railroad.


What do you think?

I have been working primarily on the controls and wiring over the past few weeks, but in a couple of days I will post pictures of the other progress I have made.

Thank you for looking!

Alex
Thanks, Marty!

Believe it or not, it is now harder to work on the layout than it was earlier. No, it is not that the tasks are more difficult or anything like that; it's just that now I have some many more things to are ready to be worked on that before!

In the beginning, it was easy: make the bench frame, then the plywood and Quiet Brace top, and the graded track supports. That was followed by the track and basic wiring.

But now, EVERYTHING is ready and waiting: Scenery, turnout wiring and signaling, block wiring, control panel, buildings and structures and weathering, ballast, streets, and the list goes on. Sometimes I start working on one of these only to leave it to work on another.

Oh well, at least I am assured of not running out of things to do! Big Grin


Thanks for looking!

Alex
Patrick -

"Hide the remotes"

Good idea, but unless my wife hides them, it wouldn't work (and I won't let her have them Big Grin)

"Schedule?"

I try to work on at least two different areas everyday, but that's about it. I am trying to work on the layout close to the same number of hours as I did on my regular work before retiring.

"Did the engine(*) show up today?"

Yes! And it works fine! It is great! I'll post some pictures and maybe a video - soon.

Thx!!

Alex

(*) The engine is a Vision Challenger that was a Christmas present and it did not work right out of the box. I shipped it to Lionel on their UPS calltag exactly two weeks ago, and received it back today.
Alex,
Just incredible sir, you have the space and talent to engineer and build what so many of us would love to own. I like your choice of track and switches also, your realistic look is great stuff. I have always built to accomplish the Tin Plate toy train look, however after seeing your layout, I now really like the realistic look also. Great job sir!
PCRR

Some of the men in the old Iron Horse Train club at the realistic office layout,
who would appreciate your fantastic work. From a time gone by.


Last edited by Pine Creek Railroad
PCRR –

Thank you for your nice comments! Those are really nice pictures you posted of a fine layout.

I started reading this forum about the time that I started in O-Gauge after many years of HO, and my HO layouts were pretty good, but I learned the challenge of realistic detailing and how to accomplish it to the forum. Sometimes my engineering mind gets in the way, and I end up spending too much time in the planning or in getting something done a certain way when it really is not necessary.

However, I admit that I enjoy all of it! Realism is something I try to model, but since I like the operating accessories and cars, there will be some areas on my layout that may not be quite prototypical in every detail. But then again, operating accessories was one of the reasons I left HO and came to O-Gauge – it is just plain fun!

Thanks!

Alex
quote:
Originally posted by Ingeniero No1:


Far, far away beyond the refinery and the double track main there are a couple of hunter cabins. HO scale and smaller trees worked just right for the desired effect.

Alex


Wow - incredible. You have talent. I have been following this since you began. It's hard out here to have a house with that much contiguous space to create an empire like you have (no basements). Thanks for documenting your journey - it's fun to watch.

Ted
Ted, Dennis -
Thank you for your nice comments - I really appreciate it!

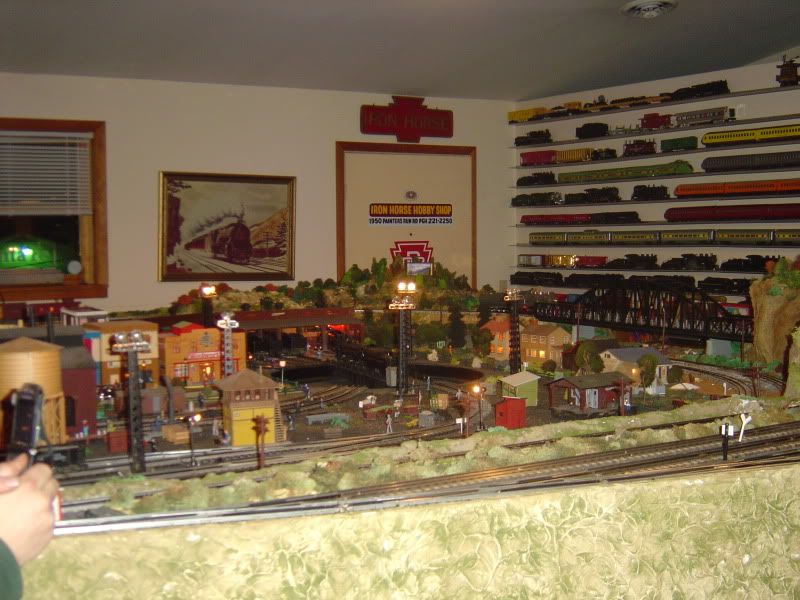
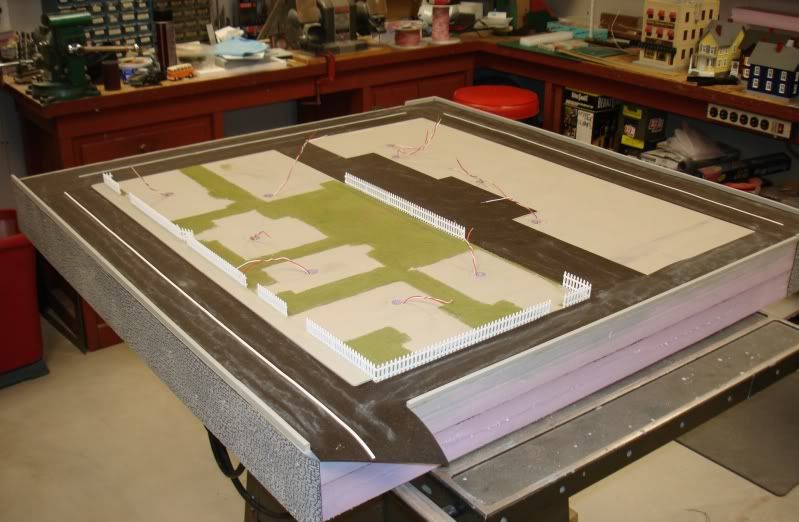
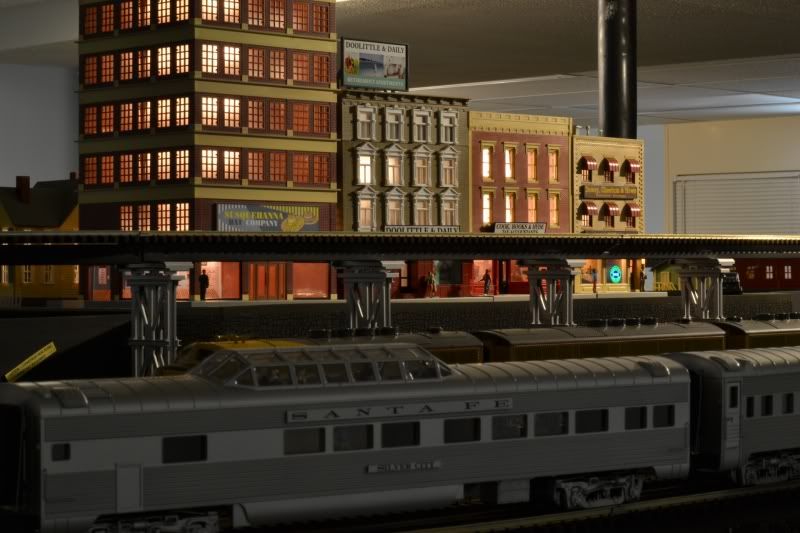
I have been working on buildings and other structures for the layout, and finally finished the raised city block at Madera Heights. I still have to add people, vehicles, and light posts, but the main part is done. Also, the inclined drive down to the main level still needs a little work.

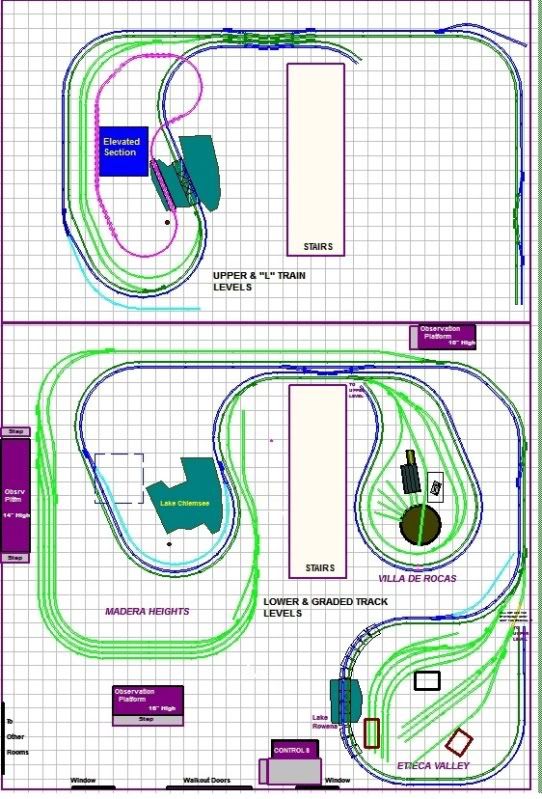
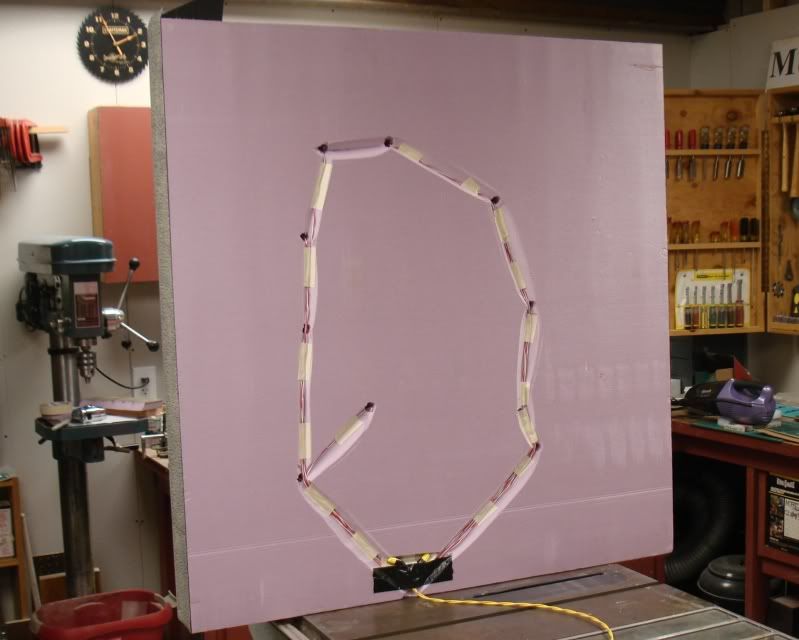
The raised portion base consists of two 2” sheets of pink insulation to make up the 41” x 42” area. Not very big, but it fits nicely where I need it.

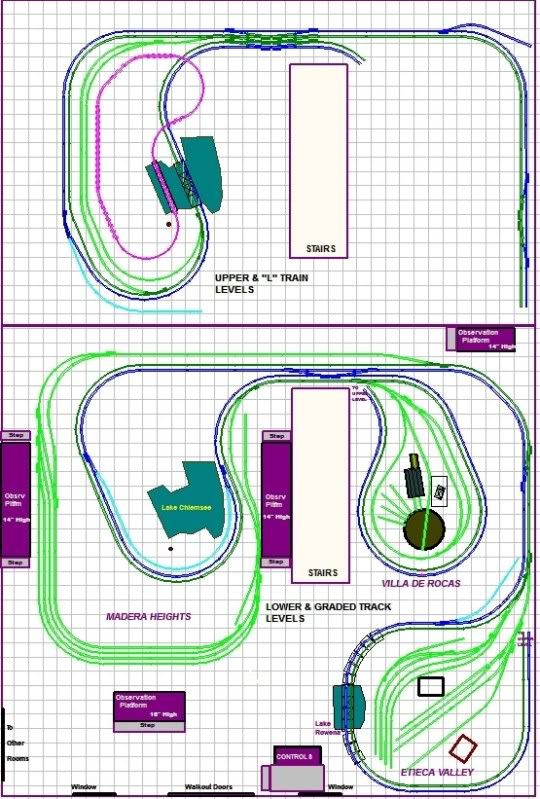
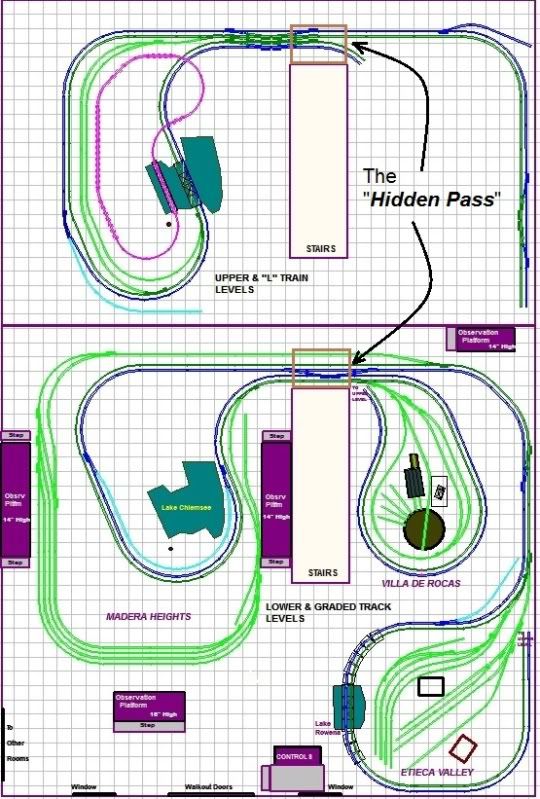
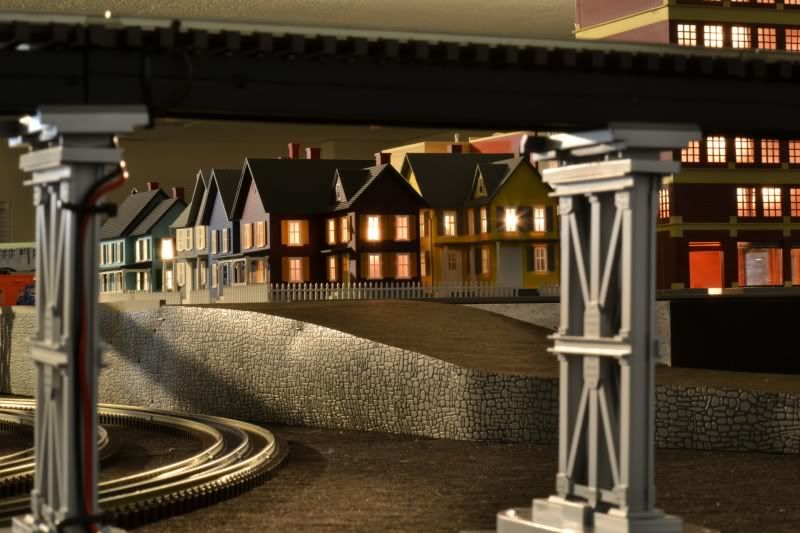
The raised area is represented in my layout, below, by the blue rectangle on the upper view, and dotted rectangle in the lower view.


I laid out the buildings, cut holes for the wires (used a 5/8” diameter brass tube to which I added a serrated edge), and carved the groove for the wires so all can be connected at one point.

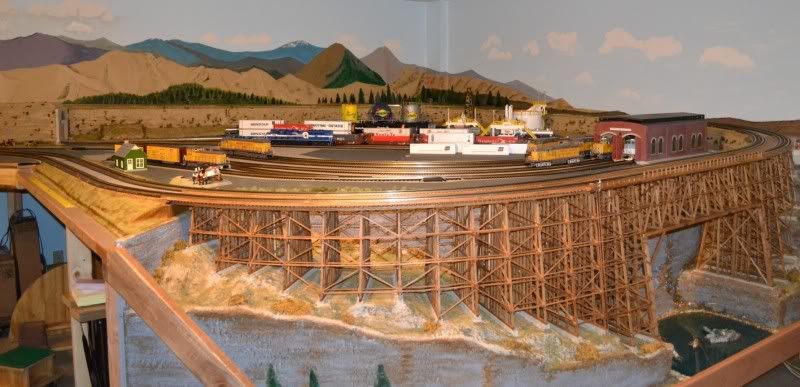
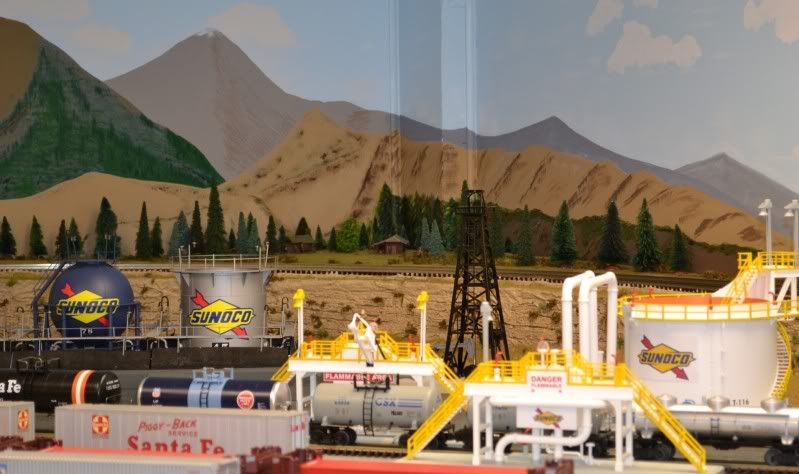
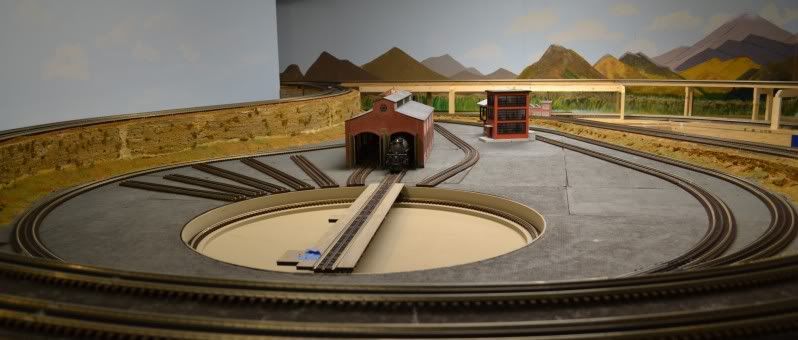
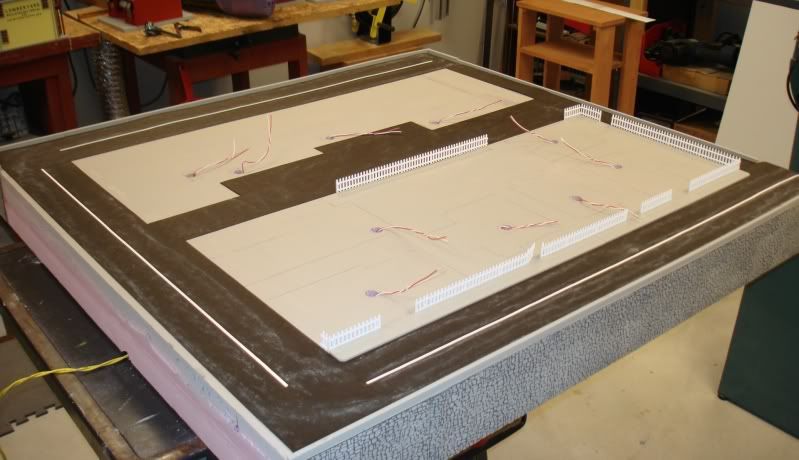
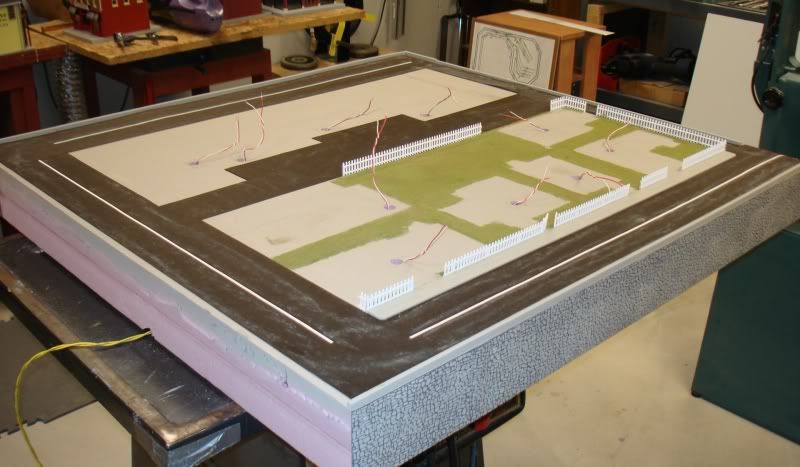
The streets are roofing paper with grey chalk, and they look better than the pictures show. The grass and other details cannot be seen easily, but when I have a train car mounted camera, those details will show up.


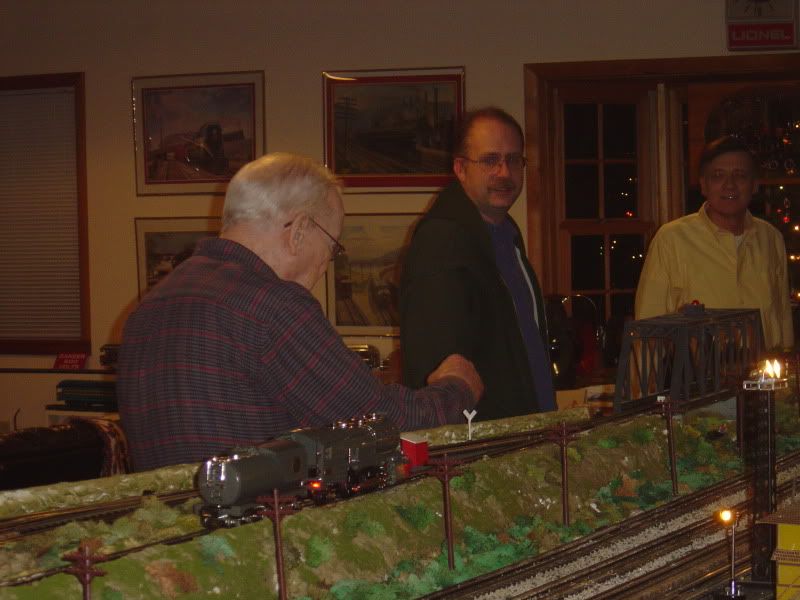
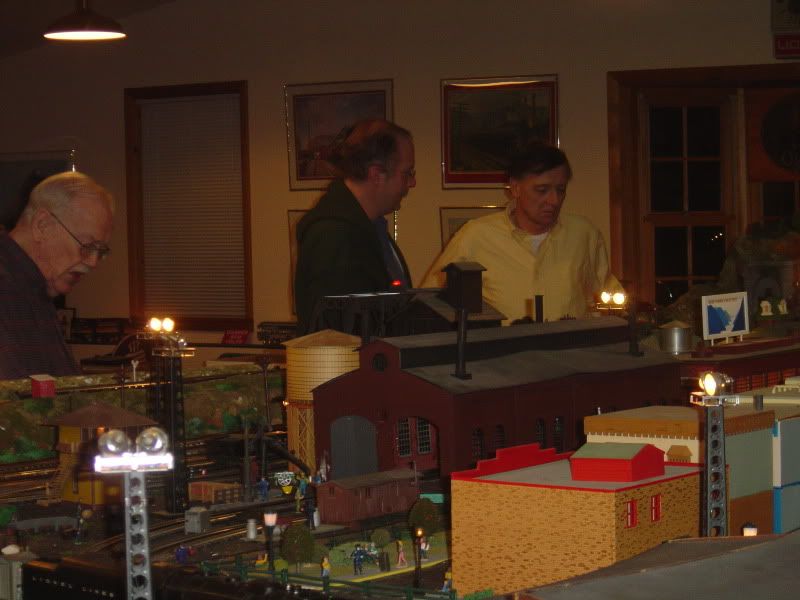
Here are three shots. I posted more images in the 3-Rail O-Gauge Trains forum section here: Madera Heights Uptown.


Thanks for looking!

Alex

Thanks, Patrick!


Now the real fun begins - wiring.


There will be 232 wires going to the panel itself:

• 46 for the toggle switches that turn the track-block relays on/off

• 92 for the toggle switches (center off, spring return on-on) that control the turnouts

• 92 for the bi-color LED's that indicate the turnout points direction

• 2 commons - 12VDC for the LED's and relays, and 18VAC for the turnouts


It will take a while, but the layout is operational using the DCS remote for the turnouts, which will remain so even after the toggle switches are wired, and the track-blocks will remain always on until each of the 6-relay modules are installed.


Thanks for looking.


Alex

Leandro, Don –

Thanks! Glad to share.


Rich,

That is a good question. The LED’s are 12VDC at 20ma, the panel switches for the relays operate 12VDC at about 80ma, and the ones for the turnouts 18VAC at a bit higher current but for just an instant. This allows me to use 22AWG wires (stranded for easy flex) from the panel to the terminal strips in the control cabinet.


From the control cabinet to the layout I do plan to use some sort of multi-position connector, as you mentioned, but will use 18AWG since some of the runs can be quite long. I’ll post with my wiring progress and what I end up using.


Thanks!!


Alex

Alex,


Yes, you are right. The (my) problem now is how to divide my time among all that needs to be done 'next', and defining what is 'next'.


There is the wiring, and finishing development of the turnout-points sensors, and structure weathering, and general scenery, and ballast, and vehicles, and little people, and fascia, and . . . the list goes on.


It was easier early on when I had the background to paint, then the benchwork, and then the track. After those were pretty well done, everything else came up (or became available) all at once!


I guess just take it one day at a time, rotate chores so as to not get burned out (fat chance), and remember to run the trains once in a while for relaxation.


Thx!


Alex

Yes Alex thats what I did not to get bored or burnt out

keep switching from time to time and before you know it

a lot gets done.


ALEX I SAW THAT YOU PURCHASED THAT UP FEF 8444 IN GREY

I WAS THINKING ABOUT IT.THATS A GREAT PURCHASE.MY FRIEND

MIKE R HAS ONE AND HE RAN IT ON MY LAYOUT,ITS AWESOME

I,M GLAD YOU GOT IT.LET ME KNOW HOW YOU LIKE IT.


THANKS,ALEX

Alex,

I'll let you know how that 4-8-4 works out. It will look good next to my grey Challenger .


Here are a couple of pictures of a semi-logging facility I added at the southwest empty corner of the layout. I will load log cars there, pull the cars with the Shay, and unload them at another spur.


03 Logging med crp DSC04726


04 Logging med crp DSC04736


Thank you for looking!


Alex

Attachments

Images (2)
  • 03 Logging med crp DSC04726
  • 04 Logging med crp DSC04736

Wippen,


No problem. Here is the latest image of the layout (pretty much up to date), and the RR-Track file.


One difference is the observation platform construction in the aisles - they are or will be 10" high, and there are no steps; instead, I built ramps up and down from the platforms, and these seem to work fine.


Overall Layout - Combined View 04 RD


Let me know if you can open the RR file.


Enjoy!


Alex

Attachments

Add Reply

Post
The Track Planning and Layout Design Forum is sponsored by

AN OGR FORUM CHARTER SPONSOR

OGR Publishing, Inc., 1310 Eastside Centre Ct, Ste 6, Mountain Home, AR 72653
800-980-OGRR (6477)
www.ogaugerr.com

×
×
×
×
Link copied to your clipboard.
×
×