@harmonyards posted:

I’m going to wait and see if Big Jim comes up with what’s accurate, …..if they’re supposed to be both one color, I’m going to follow what Jim says is correct,…..obviously, if you do yours, you can do whatever color you like,…..I’ll get you the drill bit size and measure the jewels I used this evening after work,…..I’m at break at the moment,…..sadly, there’s a 55 Chevy DelRay calling my name, so back to the grind…….😔

Pat

Well, if they should be one color, I'm all for that.  As you said, I was also just going to follow what Lionel did.  OTOH, we all know that even 3rd Rail had the wrong color class lights on early stuff, and even now I don't think Lionel gets the colors right on the class/marker lights all the time.  If there is better information, I might as well follow that.

@harmonyards posted:

Can you verify this Jim? …..I’m obviously in uncharted waters working on C&O equipment. I just followed what Lionel did with the “dummy jewels” but I’d like to make the locomotive more accurate than the toy, so suggestions welcome, …..if it needs the change, I’ll be happy to oblige ……thought you were an N&W guy, but if C&O is your thing too, please suggest away!!…..

Pat

Why would you believe what Lionel did?
Yes, the class lights should show the same to both front and to the side. This is standard operating rules for every RR! Class lights are either: Unlit - for the numbered train, White - for an Extra train, Green - for a section of the numbered train following. No other colors!

@Big Jim posted:

Why would you believe what Lionel did?
Yes, the class lights should show the same to both front and to the side. This is standard operating rules for every RR! Class lights are either: Unlit - for the numbered train, White - for an Extra train, Green - for a section of the numbered train following. No other colors!

It’d been my crappy luck that the C&O followed their own set of rules…..😉

Thanks Jim!!…..that sets it straight…

Pat

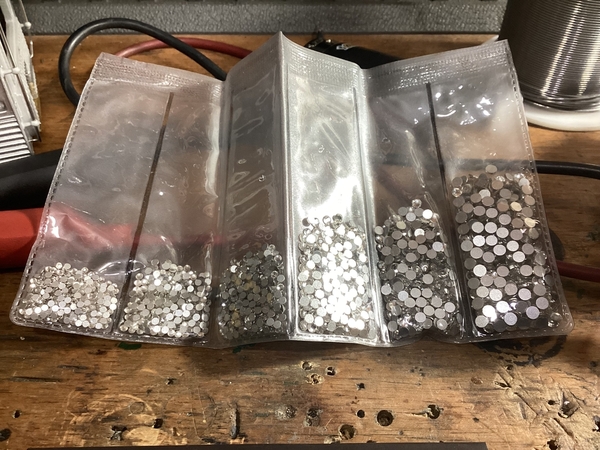
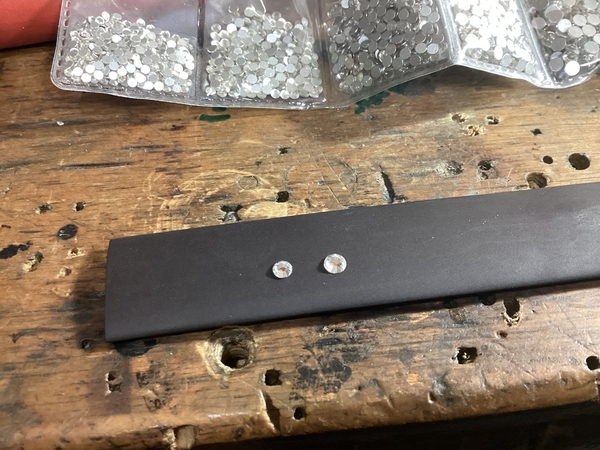
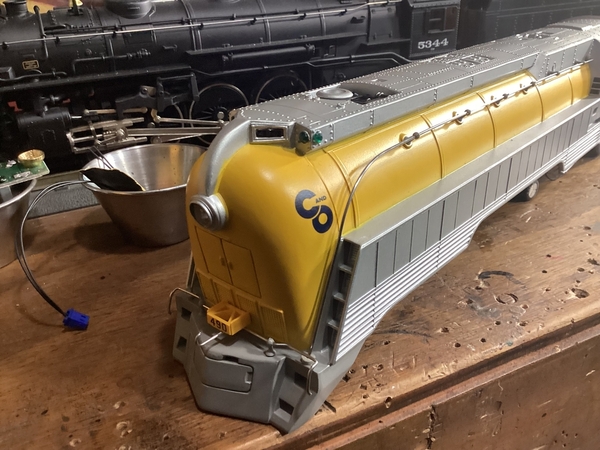
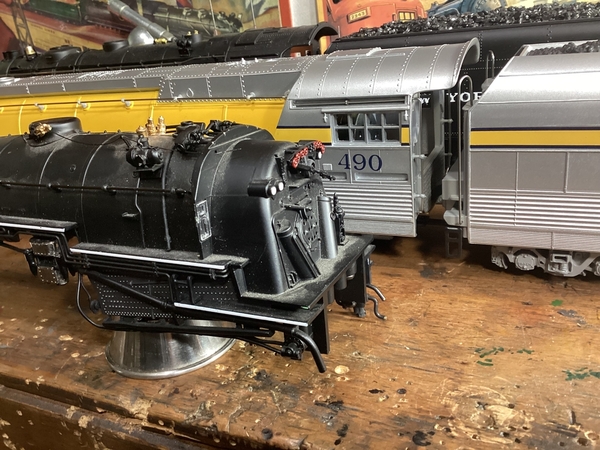
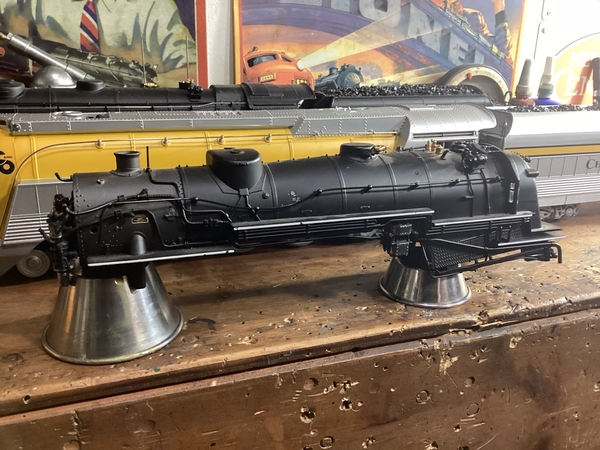
Here’s the info on the jewel sizes, bit size and the basic how to,……you’ll notice on the Lionel  490, the front facing costume jewel is a smaller OD than the one on the side. I used the 2.75mm jewel for the forward facing class light, and the 3.20mm jewel for the one on the side. I used a #40 bit to make the holes. Start with the side class light hole. Be prepared to be there for a while. You’re drilling straight to China. Eventually you’ll come through the skyline casing. …Then drill the front class light hole, and you’ll junction the two holes. Pics show the two sizes I used, and how the jewels are delivered. Obviously they send a boat load for the small money they ask for them. The 3.20 mm is the largest in this pouch pack. Also note, I’ve changed my two side class lights to the appropriate green as Jim corrected us on,…..So thanks again Jim!!….

Pat IMG_8784IMG_8785IMG_8787IMG_8783

Attachments

Images (4)
  • IMG_8784
  • IMG_8785
  • IMG_8787
  • IMG_8783

Excellent, saved that sucker, I think I'll give that a go, I really wanted to light those, that really dresses it up.  I'm a sucker for lights anyway.

Forgot to add, and Pete touched upon this too, make sure you get the flat sided jewels. Lay a piece of fine sand paper on a flat surface, and rub the silver sided flat side back and forth a few times till the silver backing is gone, and the jewel is transparent …..

Pat

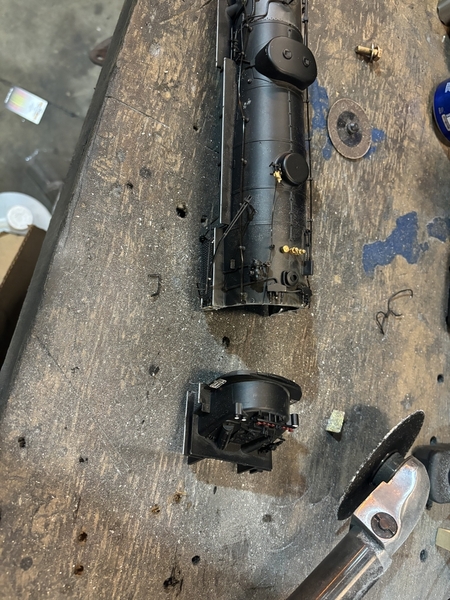
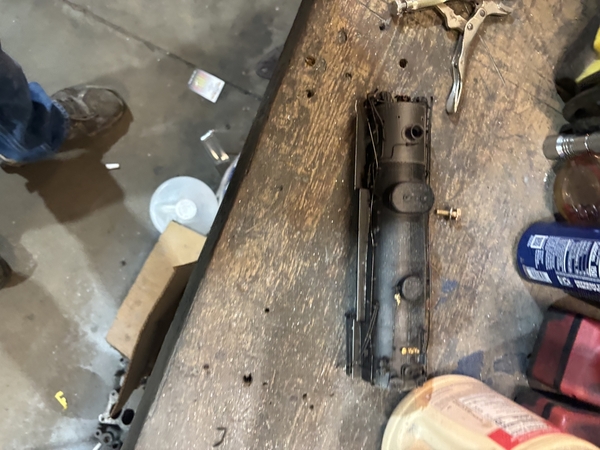
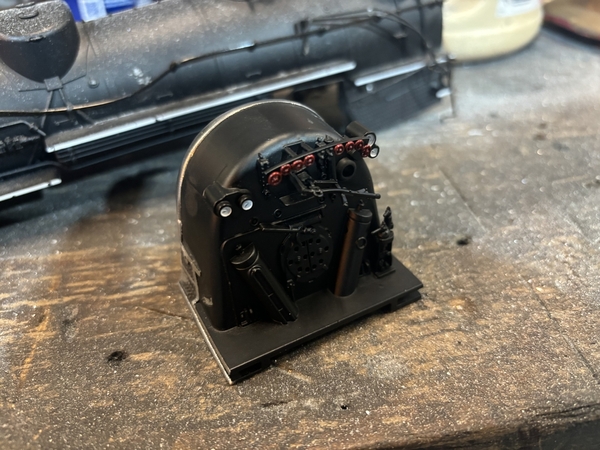
And for our next trick,…….anyone who owns one of these C&O yellow bellies knows there’s no cab interior, ….zilp, zilch, nata, …..it’s a wide open cavern,…….While at York one year, I stumbled across a vendor selling Lionel boiler shells for the princely sum of 3 dollars each, I bought a handful, and so did my buddy Pete, …..One of those shells was a C&O Pacific, ….Beings the 490 was built from a Pacific, let’s follow suit, and we’ll harvest this cab interior section, slice it, dice it, and make a beautiful cab interior using what we’ll call “ genuine C&O parts”…..I could easily use a Vision Line 700E backhead, but that’s been done to death already, ……let’s choose to be different, and set this 490 apart from the crowd,….

Pat IMG_8789IMG_8790

Attachments

Images (2)
  • IMG_8789
  • IMG_8790
@harmonyards posted:

And for our next trick,…….anyone who owns one of these C&O yellow bellies knows there’s no cab interior, ….zilp, zilch, nata, …..it’s a wide open cavern,…….While at York one year, I stumbled across a vendor selling Lionel boiler shells for the princely sum of 3 dollars each, I bought a handful, and so did my buddy Pete, …..One of those shells was a C&O Pacific, ….Beings the 490 was built from a Pacific, let’s follow suit, and we’ll harvest this cab interior section, slice it, dice it, and make a beautiful cab interior using what we’ll call “ genuine C&O parts”…..I could easily use a Vision Line 700E backhead, but that’s been done to death already, ……let’s choose to be different, and set this 490 apart from the crowd,….

Pat IMG_8789IMG_8790

It's a shame to hack up a perfectly good boiler shell Pat. But, It is, what it is. Let the surgery begin. The needs of the one, from the parts of the many.

@Jayhawk500 posted:

It's a shame to hack up a perfectly good boiler shell Pat. But, It is, what it is. Let the surgery begin. The needs of the one, from the parts of the many.

These shells were specifically picked for the great back head detail they have……it would take a gazillion dollars to make a locomotive out of these donor shells. So that’s exactly what they are now, ……parts donors,…..😉

Pat

@coach joe posted:

Boiler shells for $3!  You can't even get a stanchion for a handrail for $3.  You and Pete must have cleaned him out with all the parts The Central shops need to create proper road engines.

Not only the backhead but the stanchions, railing, whistle, safety valves, stack, and builders plates. I think PSC wants about that much for one builders plate and these are as nice or nicer than PSC’s.

Pete

Last edited by Norton

While we are on the subject of the class lights, let me throw something out there. Caboose Markers
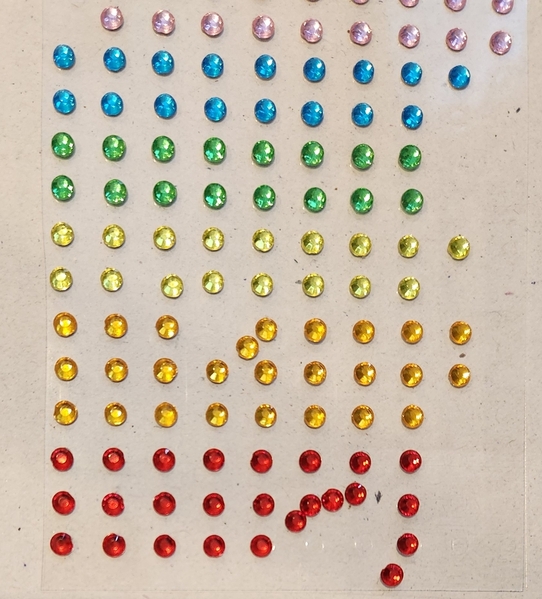
I noticed that you found bags of jewels. The yellow and red ones can be used on caboose marker lights. On the N&W, which I am familiar with, the cab markers (having four lighted sides) showed one red to the rear and three yellow. I have no knowledge of other practices, so, check them out if you care to be prototypical.
One other thing.
For those of you who do not want to dabble in actually lighting your markers, stores such as Joann's, Michaels, Hobby Lobby have stick on jewels as shown below (clear ones are also available). You can find them in varying sizes in the "bejeweling" section of the stores. The green and red ones could also be used as switch indicators in yards.
Let your imagination run wild!

Jewels

Attachments

Images (1)
  • Jewels
Last edited by Big Jim
@Jayhawk500 posted:

It's a shame to hack up a perfectly good boiler shell Pat. But, It is, what it is. Let the surgery begin. The needs of the one, from the parts of the many.

At one time Lionel parts had available backheads that would fit in the cab of the much vilified Lackawanna 4-8-4 et al. Who knows if they have any left over.

Pat,
It looks like there a number of parts on those boilers that could be used to detail other locos.

Last edited by Big Jim
@Big Jim posted:

At one time Lionel parts had available backheads that would fit in the cab of the much vilified Lackawanna 4-8-4 et al. Who knows if they have any left over.

Pat,
It looks like there a number of parts on those boilers that could be used to detail other locos.

Absolutely Jim, ….I won’t discard the shell till there’s nothing left but some powder. 😁

Pat

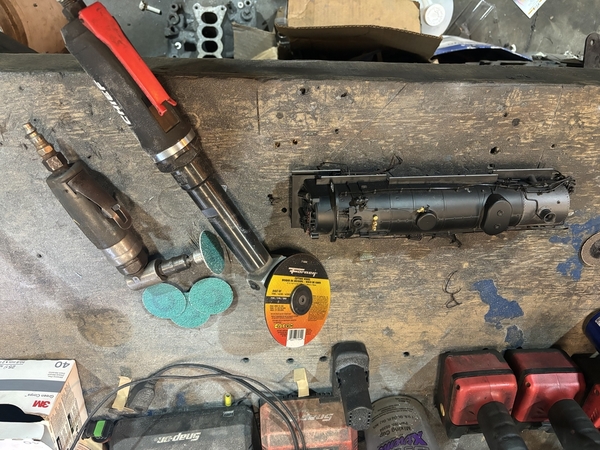
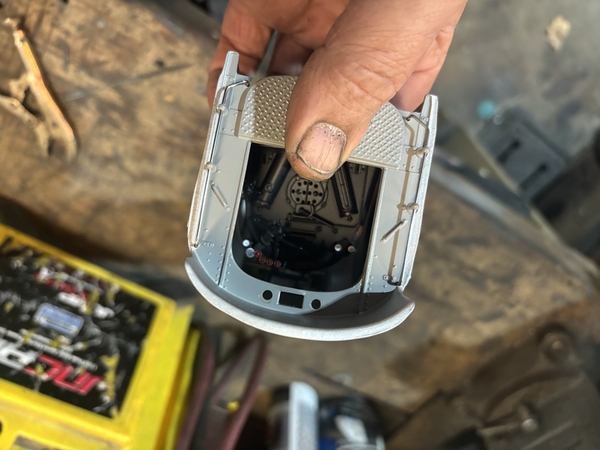
Sorry some of the pics came in upside down, ….I’m not a cinematographer,…..but I thought I’d share the heavy demo work out in the big shops to get our desired part,…..after a quick basic test fit in our star, we can retreat to the RR shop, where it’s warm, and finesse the install for a perfect fit,….it’s cold down here in Carolina today….I did harvest as much of the plumbing details as possible, ….the radiators couldn’t be saved, so in the name of progress, we went through them like butter…..

Pat IMG_0041IMG_0042IMG_0045IMG_0043IMG_0044

Attachments

Images (5)
  • IMG_0041
  • IMG_0042
  • IMG_0045
  • IMG_0043
  • IMG_0044
@harmonyards posted:

Sorry some of the pics came in upside down, ….I’m not a cinematographer,…..but I thought I’d share the heavy demo work out in the big shops to get our desired part,…..after a quick basic test fit in our star, we can retreat to the RR shop, where it’s warm, and finesse the install for a perfect fit,….it’s cold down here in Carolina today….I did harvest as much of the plumbing details as possible, ….the radiators couldn’t be saved, so in the name of progress, we went through them like butter…..

Pat IMG_0043

Takes a strong will and a steady hand to take a cut-off wheel to a loco shell......

For reference- it looks like your are drilling through the casting until you come out behind the number boards? A good 3/8" I suppose? Got a photo of the inside to share?

Looks great Pat. This build definitely is a special one.

Bob

Attachments

Images (1)
  • mceclip0
@RSJB18 posted:

Takes a strong will and a steady hand to take a cut-off wheel to a loco shell......

For reference- it looks like your are drilling through the casting until you come out behind the number boards? A good 3/8" I suppose? Got a photo of the inside to share?

Looks great Pat. This build definitely is a special one.

Bob

It’s closer to a 1/2” Bob by the time you get all the way through the skyline casing,……I’ve already buttoned up that area, ( smoke unit and all the other lighting features ) but if i have to go back inside for more detail, I’ll be sure to a Kodak moment….

Pat

@harmonyards posted:

It’s closer to a 1/2” Bob by the time you get all the way through the skyline casing,……I’ve already buttoned up that area, ( smoke unit and all the other lighting features ) but if i have to go back inside for more detail, I’ll be sure to a Kodak moment….

Pat

No worries Pat. Hard to tell from the pix how deep it was but you are right about holding your breath when drilling. That's a long way to go on a model.

Bob

@harmonyards posted:

Sorry some of the pics came in upside down, ….I’m not a cinematographer,…..but I thought I’d share the heavy demo work out in the big shops to get our desired part,…..after a quick basic test fit in our star, we can retreat to the RR shop, where it’s warm, and finesse the install for a perfect fit,….it’s cold down here in Carolina today….I did harvest as much of the plumbing details as possible, ….the radiators couldn’t be saved, so in the name of progress, we went through them like butter…..

Pat IMG_0041

Pat, is that an intake manifold on the floor? Looks like you’re into more than just model trains!
this is a great project, I’m enjoying following it!

I'm late to the party today. We got snowed in today with a foot of snow. I was supposed to go get my car serviced, but that had to get rescheduled. Amazing work as usual Pat.

@Big Jim, before you replied about the class light info from yesterday, I had found a web page on the C&O's service rules on just about everything including classification markers and signals. I believe that the caboose lights were also mentioned as it should be since it is on just about everything you should know. I only got a bit of glancing on it before forwarding that info to Pat.

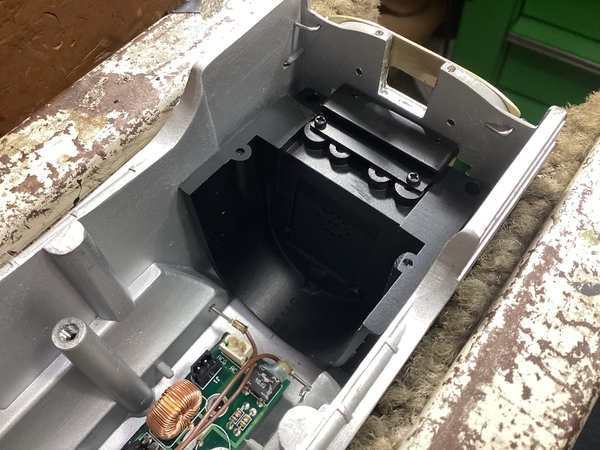
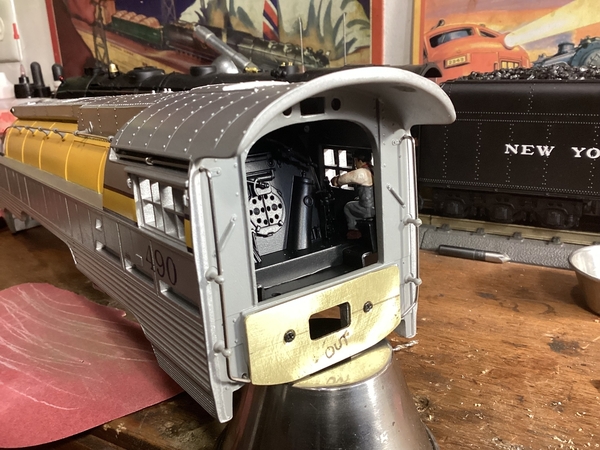
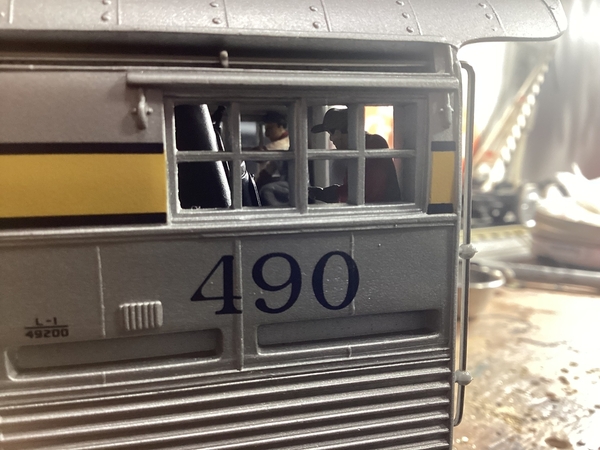
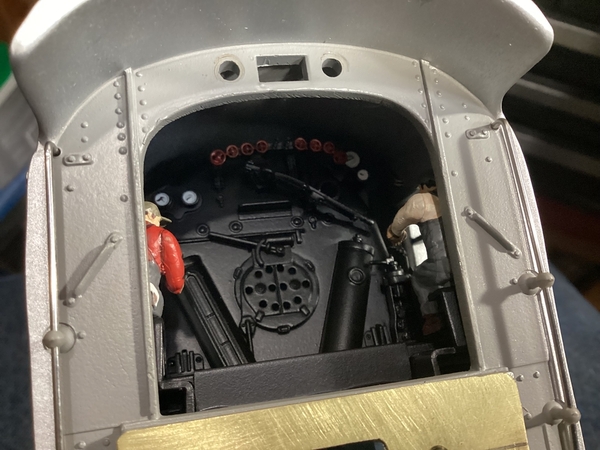
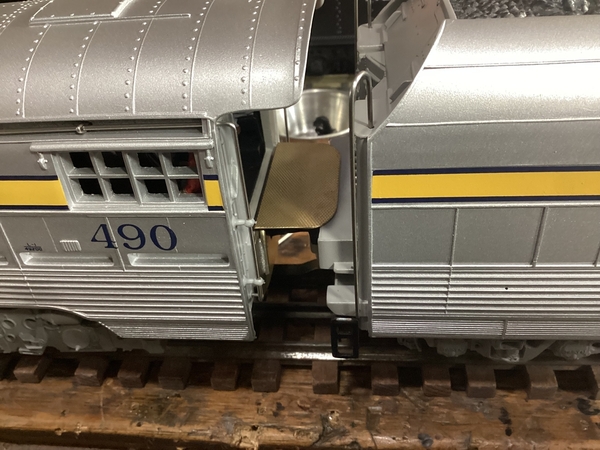
Install looks good, …..it now looks like a factory component. I’m also fabricating a new cab bottom, as I plan to install a deck plate, and the boiler shell has the deck plate as a cast in detail in the down position. That will never do, beings we’ve drawn the engine & tender closer together for a nicer look. After I fab the working deck plate, all of those parts will be painted to match. We need someone who lives near the B&O museum to snap a picture of the cab walls,….does anybody know if the cab walls are institutional green? Or gray? …….

Pat IMG_8797IMG_8798IMG_8799IMG_8800

Attachments

Images (4)
  • IMG_8797
  • IMG_8798
  • IMG_8799
  • IMG_8800
@Norton posted:

Not only the backhead but the stanchions, railing, whistle, safety valves, stack, and builders plates. I think PSC wants about that much for one builders plate and these are as nice or nicer than PSC’s.

Pete

That's exactly what I was thinking.  Besides the backhead all those wonderful little brass do-dads on top the handrails and whatever else could be cut off and reused.

@harmonyards posted:

Install looks good, …..it now looks like a factory component. I’m also fabricating a new cab bottom, as I plan to install a deck plate, and the boiler shell has the deck plate as a cast in detail in the down position. That will never do, beings we’ve drawn the engine & tender closer together for a nicer look. After I fab the working deck plate, all of those parts will be painted to match. We need someone who lives near the B&O museum to snap a picture of the cab walls,….does anybody know if the cab walls are institutional green? Or gray? …….

Pat IMG_8797IMG_8798IMG_8799IMG_8800

With such meticulous demolition craftsmanship I think that fits even better than the Vision Line backhead.  And at @$24.50 a piece even if the have restocked them cutting up that $3 shell was definitely the way to go.

@Dave_C posted:

Pat, I’m looking at the long handled air powered cut off wheel. Used one a a lot at work. When I retired I gave it away seeing I didn’t have a decent air compressor at home.  Never occurred to me I could use it working on trains. Fantastic job on the blackhead install.

Dave, that one pictured is my least favorite,…..I had a Rockwell version circa 1930’s that was my hero, …..I had that tool for almost 40 years, …….I failed to do basic maintenance on it, and it tore the gear box up, …..broke my heart,….The new one is ok, but doesn’t have that anger that the Rockwell had,…..it was like losing a friend …..at my job, there isn’t a day that goes by that I’m not cutting something with that tool,……didn’t matter how hard, or thick the material was, that Rockwell was indiscriminate…..but for the model trains, that Rockwell was like a scalpel in the hands of a surgeon…..

Pat

@harmonyards posted:

Install looks good, …..it now looks like a factory component. I’m also fabricating a new cab bottom, as I plan to install a deck plate, and the boiler shell has the deck plate as a cast in detail in the down position. That will never do, beings we’ve drawn the engine & tender closer together for a nicer look. After I fab the working deck plate, all of those parts will be painted to match. We need someone who lives near the B&O museum to snap a picture of the cab walls,….does anybody know if the cab walls are institutional green? Or gray? …….

Pat IMG_8797IMG_8798IMG_8799IMG_8800

Well Pat, I tried researching online and I can not confirm the interior of 490. There are two photos that jumped out, one is tagged with the Allegheny, the other isn't tagged. I would imagine that when this model was made that the interior was modeled correctly, but you never know.

Can anyone confirm if 490 has green interior?

I found a picture of the interior here:

https://forums.auran.com/threa...yellowbellies.66137/

dark green interior, black backhead.  Upon review of pictures here, https://www.steamlocomotive.com/places/bomuseum/  the photo in the above link is actually the interior of 1604, not 490 as stated in that forum.

Hey look at me contributing to the build! Guess not, wah, wah ,wah!

There's also a picture with a section of skirt lifted up and the gray paint on the running gear only went as high as the skirt.  Top of the cylinders are black, bottoms are gray.

Last edited by coach joe
@coach joe posted:

I found a picture of the interior here:

https://forums.auran.com/threa...yellowbellies.66137/

dark green interior, black backhead.  Upon review of pictures here, https://www.steamlocomotive.com/places/bomuseum/  the photo in the above link is actually the interior of 1604, not 490 as stated in that forum.

Hey look at me contributing to the build! Guess not, wah, wah ,wah!

There's also a picture with a section of skirt lifted up and the gray paint on the running gear only went as high as the skirt.  Top of the cylinders are black, bottoms are gray.

Coach, awesome job. That was the other cab that was unidentified in the searches I had done. There was no photo credits or anything about where it was, so no way I could say for sure especially since it brought up the Allegheny's can in the search as well. Great job Coach.

@harmonyards posted:

Dave, Coach, ….thanks for looking! …we’ll figure it out somehow, ……somebody on this forum has to leave near, or recently been to the museum, …..in the meantime, …the icing on the cake,….I made a new deck plate this evening for our star,….

Pat IMG_8801IMG_8802

Pat, the post Coach has is a long thread on the yellowbellies and it is noted with the cab picture, "not sure how they got permission". The photos I saw were the same and was credited to a photographer of whose name I don't recall. Since there wasn't any notes or descriptions on the interior, it was hard to say which engine since the photos themselves where all over the museum. Coach solved that with his post. Bravo.

Add Reply

Post
×
×
×
×
Link copied to your clipboard.
×
×